Filmer Switch
Prerequisites
The system will be a support for two Filming applications viz IOS Filmer and Flexi Filmer. Only one Filming application will be available for usage at any point of time. System will be configured with the new Enhanced Flexible Filmer( Flexi Filmer), any switch to the IOS filmer needs to be done with utmost discretion and after proper local leadership decision. Ideally we would not like to switch to the IOS filmer.
If you have switched to the IOS filmer, older printer configuration done earlier and restored into the system via save restore operation will continue to work.
Procedure
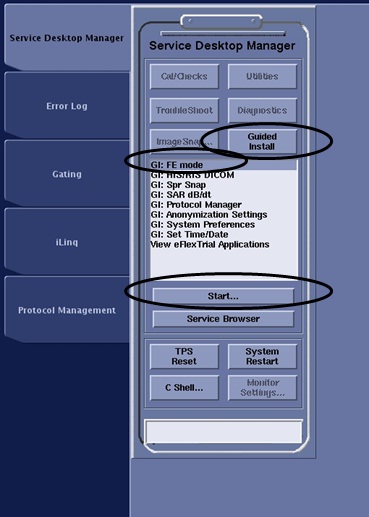
- Go to the Service desktop.
- Click on the Guided Install.
- Select “GI: FE Mode” from the list.
- Select Start Button.
Figure 1. Service Desktop Manager
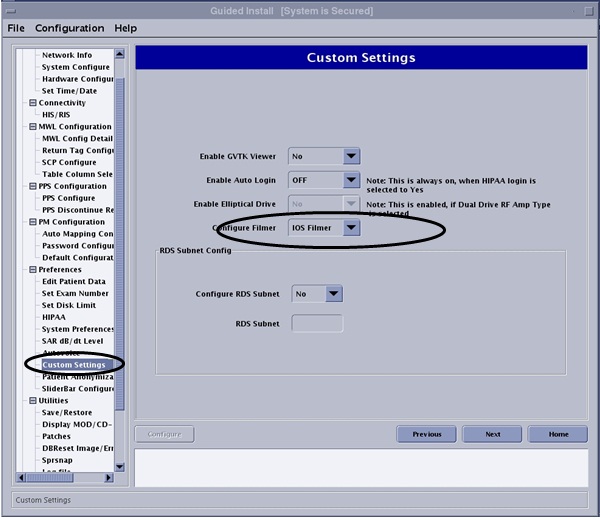
- From Guided Install under Preferences Select Custom Settings
- From Configure Filmer Drop Down List Box Select appropriate
Filmer
Figure 2. Config Filmer
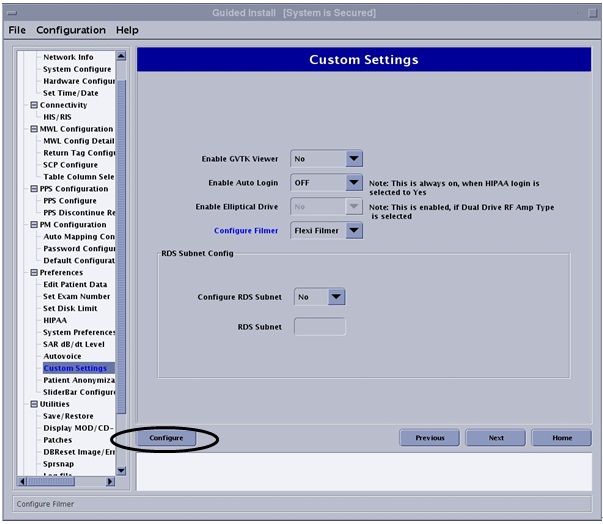
- After Selection of the appropriate Filmer Select Configure
Button.
Figure 3. Config Filmer
- After Filmer Configuration is complete, restart the system, for the configuration changes to take effect.
Finalization
- System need to be restarted for the changes to take effect.
- After Filmer configuration, create a test film.
- Ensure the system is working before turning over to customer.