Echo Planar Test (EPT)
Prerequisites
1 Startup
EPT combines the functionality of the current B0 Dither Calibration, Group Delay Calibration and B0 Image Test into a single tool with a simple user interface. The output is suitable for remote support access, trending, and automatic checking of results against acceptance limits. In addition, EPT automatically updates the EPI calibration files when authorized by the user.
Procedure
- Click on New Pt, and enter the following:
ID: geservice
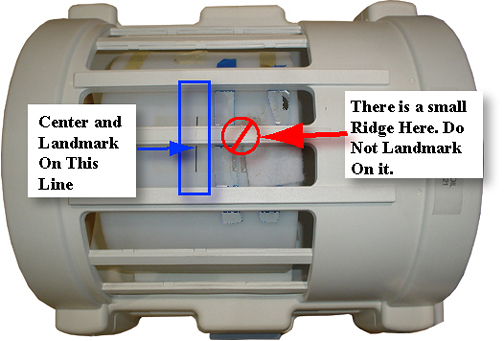
- Landmark on the center of the sphere, but do not advance to
scan yet.
Figure 1. Landmark Marker
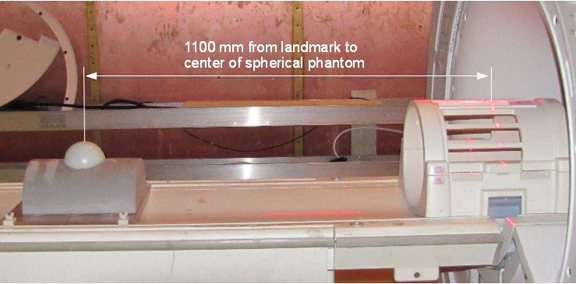
- Place a foam positioner and a 100-mm sphere on the Grafidy base
plate. Move the table into the bore to 1100 mm from landmark. Slide
the Grafidy base plate so the center of the 100-mm sphere is at the
axial alignment light, and then press the MOVE TO SCAN button.
Figure 2. Positioning Phantom on Curved Table
- Click the Start button.
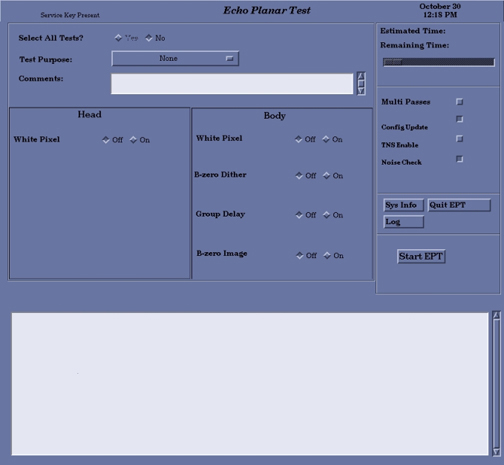
- The Echo Planar Test Window will appear, as shown inFigure 3 .
Figure 3. Echo Planar Test Window
 note:
note:The “Select All Tests” default option is No.
- For calibration, set the Select All Tests option to Yes.note:
For troubleshooting, select individual tests as desired.
- There are four option buttons on the screen that must be chosen
before starting EPT:
- Selecting the Multi Passes button and entering an integer in the text box can perform more than one pass of the tests.
- One or more of the selected tests can automatically update the config files with new calibration data if the new data is within specs. Select Config Update before starting EPT.
- Select a Test Purpose from the pull-down menu.
- Two lines of comments can be entered, if desired. If no comments
are entered, the text “NO COMMENT” will be entered into
the results file.
 caution
- Select Start EPT. Running all the tests
takes about one hour and will thoroughly test the EPI performance
of your system. This is the recommended mode for baseline, PM, and
initial problem-finding. The single test mode is meant to be used
while troubleshooting. If possible, run the full set of tests at the
end of your troubleshooting to verify system performance. While EPT
is running, each test will be displayed in the message window indicating
the amount of time the test requires to run. note:
Actual run time of the test may not coincide with the countdown clock displayed on the interface.
- EPT will create many images. If applicable, a window will pop up to inform you that there is not enough space available.
- When the tests are complete, one of four messages shown below
will appear:
- Your tests completed successfully, or
- A minor system problem has been detected. This problem is NOT expected to affect image quality, or
- A serious system problem has been detected. This problem IS expected to impact image quality, or
- EPT was unable to determine PASS/FAIL status of the tests.
- Select Quit EPT and confirm
 |
2 Test Termination Procedure
Procedure
- If Quit EPT is selected, a confirmation window appears.
- If the EPT process is not shut down in an orderly manner, the
service protocol directions may need to be reset. This can be done
by opening a C-shell and typing the following:
cd /usr/g/service/cclass/ept Enter
resetept Enter
3 Finalization
Procedure
- Reset the TPS to bring the system back into a known mode.
- Do a test scan to ensure the scanner is working properly before customer turn over.