DIMM memory Replacement
Prerequisites
Procedure
- Shutdown the system software and Lockout/Tagout the power to the Simple OC before beginning the replacement.
- Wear the static electricity prevention band to the wrist.
- Spread the static electricity prevention sheet for replacement
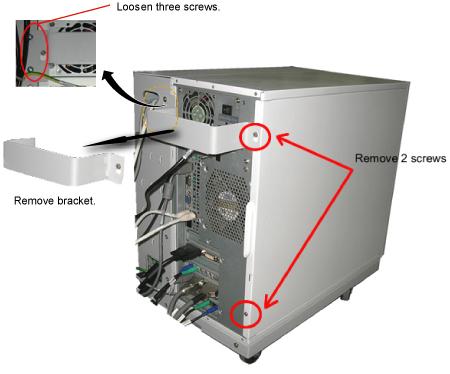
- Loosen the four screws that is fixing the bracket on the PC
rear panel and take the bracket away.note:
A seal might be attached at the PC rear panel which describes "Warranty void if this seal removed". Please do not care about description of the label and remove it for panel removal.
- Remove the left panel of the PC by remove 2 bolts.
Figure 1. Removing the Left Panel of PC
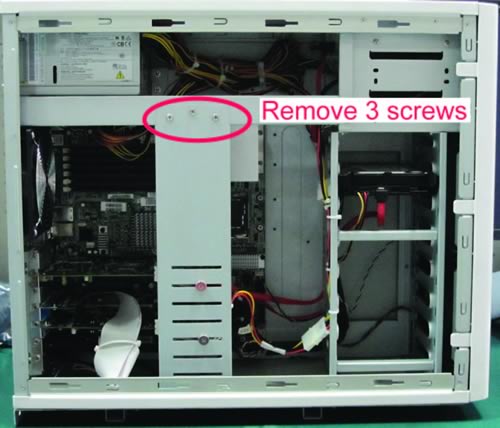
- Remove the 3 screws (Show in Figure 2),
Figure 2. Removing the bracket
 note:
note:Use Anti-static wrist strap to discharge before plug off DIMM memory. One end clipped onto a metal object, in this case a metal cabinet, the other end strapped onto your wrist.
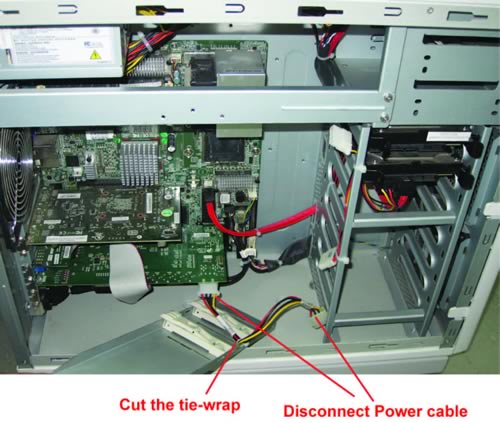
- Disconnect Power Cable and cut the tie-wrap (Show in Figure 3 ) and take
away the bracket.
Figure 3. Disconnect Power Cable
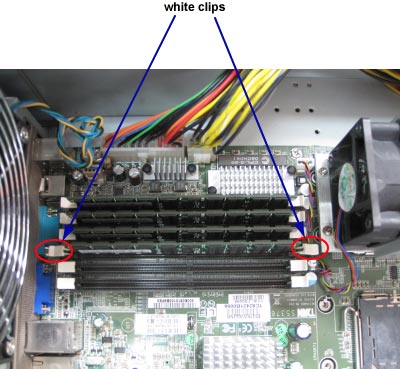
- Remove Memory. Push out the white clips downwards and pull out
Memory directly, and then take it away.
Figure 4. Remove Memory
- Remove glue cleanly on both latches before installing the new
memories.note:
Memories are fixed by glue on both latches. This glue is for transportation and it is not necessary after system installation.
- Insert the new memory into the memory slot.
1 Finalization
Procedure
- After the replacement is done, re-install the bracket, left panel, and restore the system.
- Turn the system power on. Verify system boot up without any problem.
- Perform one body or head scan.