Cradle Interlock Cable
Prerequisites
Procedure
- Undock patient transport, and move it out of exam room.
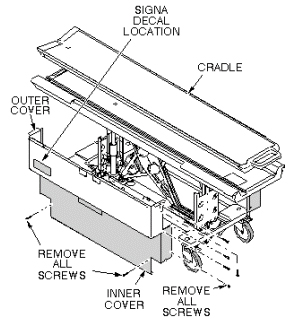
- Remove upper and lower side covers (see Figure 1).
Figure 1. REMOVAL OF PATIENT TABLE COVERS
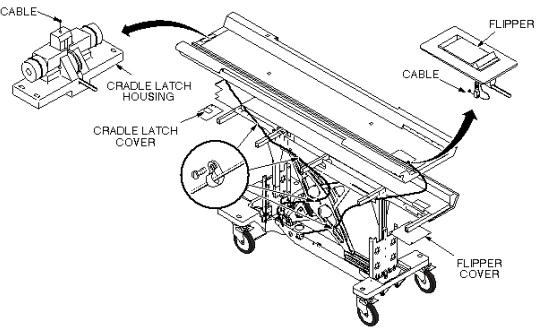
- Remove small cover below flipper assembly (see Figure 2).
Figure 2. INTERLOCK CABLE AND MAIN CRADLE LATCH CABLE ROUTING
- Remove cradle (see Figure 3).
Figure 3. PATIENT TRANSPORT CRADLE REMOVAL

- Loosen set screw at interlock lever.
- Unfasten cable end from interlock lever.
- Pull cable out of pin stop on flipper bar (see Figure 4).
- Insert new cable through head of pin stop so that swaged end
fits into hole in pin stop (see Figure 4).
Figure 4. INTERLOCK CABLE AND MAIN CRADLE LATCH CABLE ROUTING
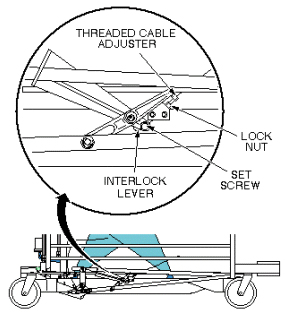
- Route cable through cable casing and insert through hole in interlock lever.
- Loop cable twice through hole in interlock lever and secure
with set screw. Tighten securely to prevent cable from slipping (see Figure 5).
Figure 5. INTERLOCK LEVER
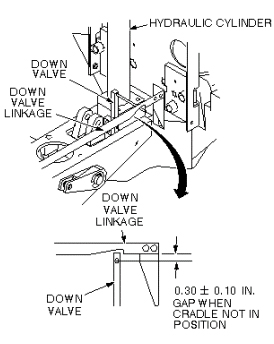
- Adjust for indicated gap in down valve linkage when cradle is
not in position. Use threaded cable adjuster for fine adjustments.
Tighten lock nut after adjustment is completed, then cut off excess
length of cable (see Figure 6).
Figure 6. DOWN VALVE LINKAGE ADJUSTMENT
- Replace cradle and upper and lower side covers. Note position of Signa logo on outer covers and position toward front of table (see Figure 1).
1 Finalization
Procedure
- While cradle is not at home position, verify that Table cannot move down and undock.
- While Cradle is at home position, verify that Table can move down/up, and undock.
- Verify that Table can dock.
- Verify that there is no part caught by wire or any movable module.
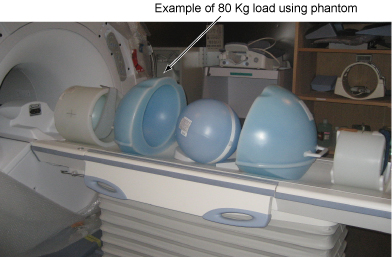
- Place the 80Kg Load evenly on the Cradle. If using the phantom, refer to the following illustration.
Figure 7. 80Kg Load
- Verify that Cradle moves in and out fully and smoothly.
- Verify that all of the parts and the screws are installed.
- Verify that there is no wound or dirt on the Table, Cradle, Pad, and Patient Strap.