1.5T Cardiac Coil Cable Replacement
Prerequisites
Follow this process to replace the cable assembly on the 1.5T HD 8CH Cardiac Coil made by GE/USAI, Catalog Number M3335MD.
1 Anterior Cable Replacement
Procedure
- Remove coil cover.
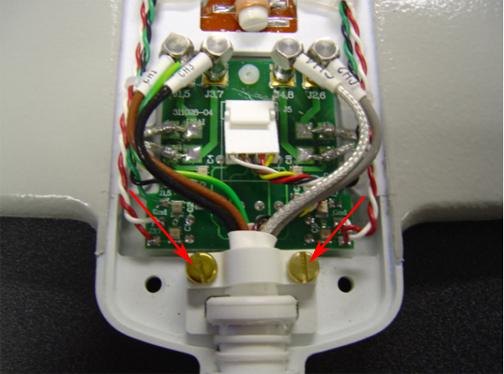
- Remove the two screws that hold down the cable assembly.
Figure 1. Remove Retaining Screws
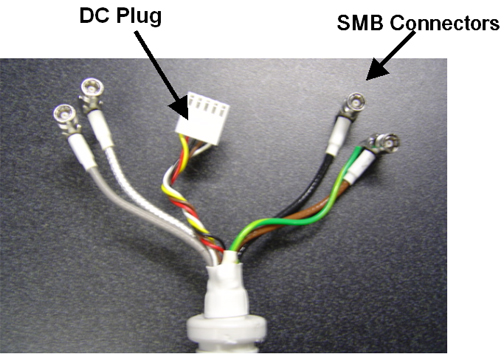
- Disconnect SMB plug and the DC Plug on the cable end from the
interface board.
Figure 2. Anterior Cable Assembly
- Remove the old cable assembly.
- Fix a new cable assembly on the anterior section of the coil and reattach the cable lock with two screws. Connect all four SMB plugs and the DC Plug to the corresponding receptacles on the interface board (see Figure 1).
- Close the coil cover.
2 Posterior Cable Replacement
Procedure
- Remove coil cover.
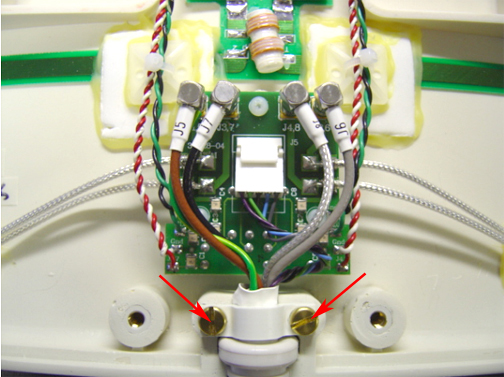
- Remove the two screws that hold down the cable assembly.
Figure 3. Remove Restraining Screws
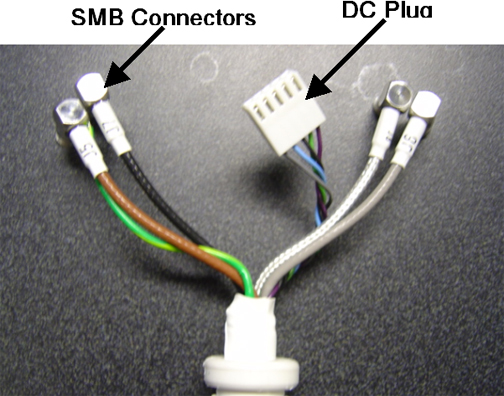
- Disconnect SMB plug and the DC Plug on the cable end from the
interface board.
Figure 4. Posterior Cable Assembly
- Remove the old cable assembly.
- Fix a new cable assembly on the posterior section of the coil and reattach the cable lock with two screws. Connect all four SMB plugs and the DC Plug to the corresponding receptacles on the interface board (see Figure 3).
3 Finalization
Finalization
No finalization steps.