1.5T 8 Channel Wrist Array Cable and Post Replacement
Prerequisites
Follow this process to replace field replaceable units on the 1.5T HD 8 Channel Wrist Array by Invivo.
1 Cable Replacement
Procedure
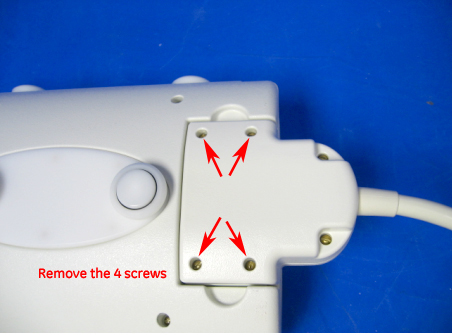
- Turn the coil upside down to access the cable assembly.
- Remove the 4 screws securing the cable assembly. Make sure to
identify which screws are located in each hole as the screw sizes
differ.
Figure 1. HD Wrist Array FRU
- Use indentation on each side of the part to remove the FRU after
removing screws.
Figure 2. Remove The FRU
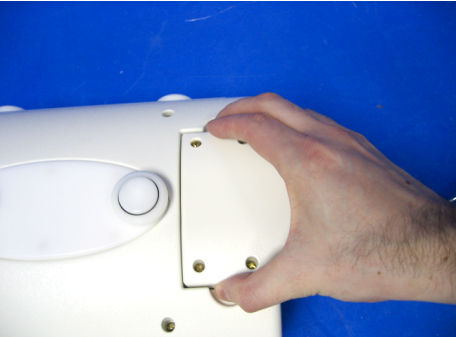
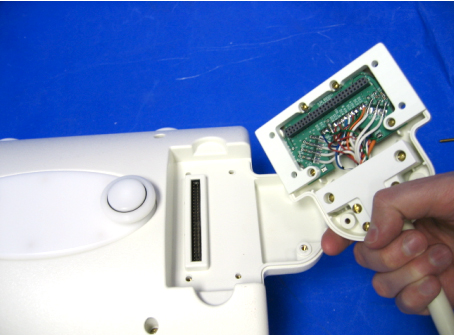
Figure 3. HD Wrist Array FRU Interior View
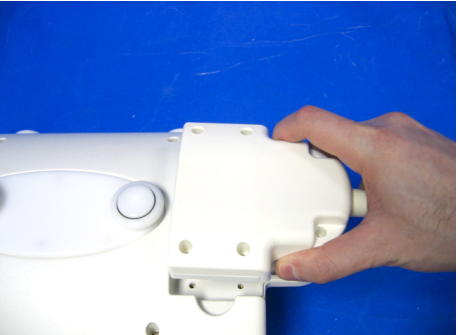
- Replace the cable assembly with the new one. Make sure to seat
the connector firmly once located in place and then reinstall 4 screws.
Figure 4. Wrist Array FRU Replacement
2 Post Replacement
Procedure
 caution
- Remove the six cable assembly screws and the cable assembly,
then remove the four cover screws and the top cover.
Figure 5. Cable and Cover Removal
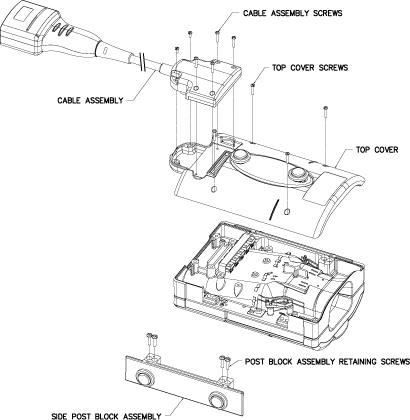
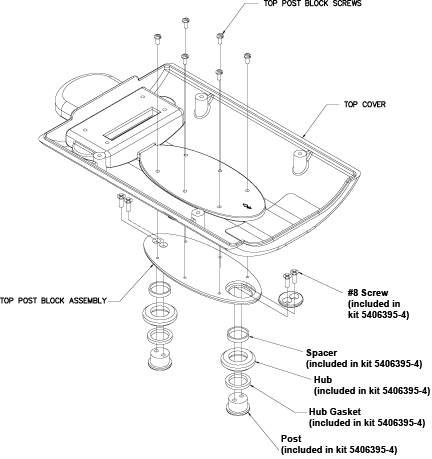
- Turn the Top Cover over and remove the six top post block screws,
then remove the top post block assembly. Replace the parts as shown
below as needed.
Figure 6. Top Post Block Disassembly
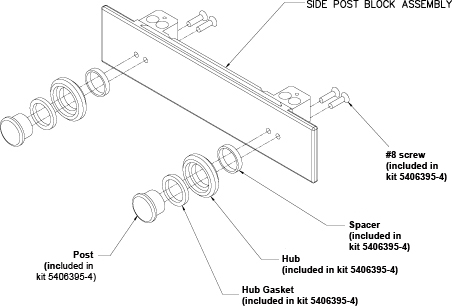
- Remove the four side post block assembly screws (see Figure 5). Replace the parts as shown below as needed.
Figure 7. Top Post Block Disassembly
- Reassemble the coil using the steps above.
 |
3 Finalization
Finalization
For Cable Replacement: Perform an MCQA test as explained in the 1.5T 8 Channel Wrist Array MCQA Test Setup document.
For Post Replacement: Attach coil to baseplate to ensure proper part installation.