1.5T 12-Channel Body Array Coil Setup for MCQA Test
Prerequisites
Follow this process to prepare for the automated SNR test using the 12-Channel Single or Dual Connector Body Array Coil by GE/USAI.
Coils do not ship with phantoms. Phantoms come in a unified phantom set with the MR system.
1 MCQA Setup for Legacy Phantom Kit
Procedure
 caution
- note:Position the coil in the cradle and connect the cable as shown in Figure 1.
If installing the coil for the first time in a system, refer to Auto Coil Install.
Figure 1. Coil Connection
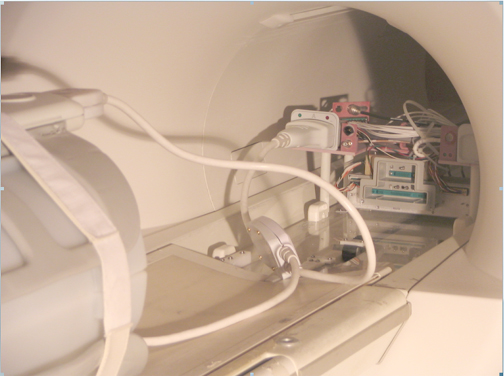 note:
note:Photograph is of the HDx single connector coil. The dual connector will be positioned in the same fashion, but the cable from the anterior will go to receptacle A and the cable from the posterior will go to receptacle B.
- Place a phantom in the coil as shown in Figure 2.
Figure 2. Phantom Placement and Positioning
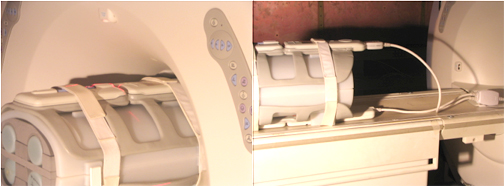
- Landmark on the coil crosshairs as shown in Figure 3. Do not landmark
on the cross.
Figure 3. Landmarking Coil

- Perform the Multi-Coil Quality Assurance Tool procedure.
2 TL Unified Phantom Setup
Procedure
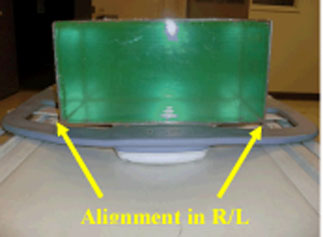
- Place the posterior section of the coil on the table. Place
the TL unified phantoms over the posterior section as shown in Figure 4 such that the
phantoms are well centered on both S/I direction as shown in Figure 5 and R/L direction
as shown with arrows in Figure 6.
Figure 4. TL Unified Phantoms Over Posterior Section
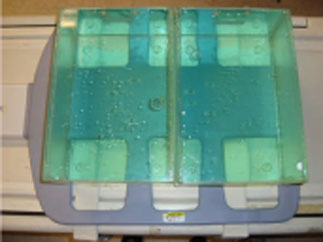
Figure 5. TL Unified Phantoms Centered on Posterior S/I Direction
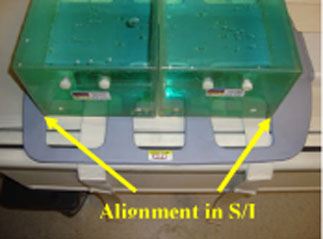
Figure 6. TL Unified Phantoms Centered on Posterior R/L Direction
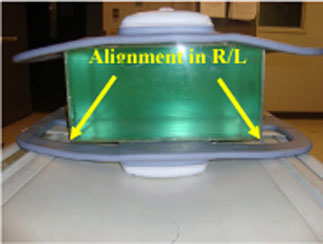
- Place the anterior section on the phantoms such that the coil
is well centered in both S/I and R/L directions with respect to the
phantom set as shown in the Figure 7 and Figure 8.
Figure 7. TL Unified Phantoms Centered on Anterior S/I Direction
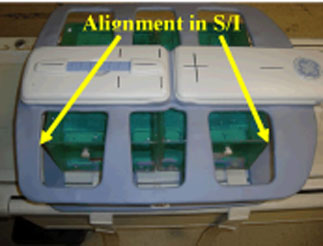
Figure 8. TL Unified Phantoms Centered on Anterior R/L Direction
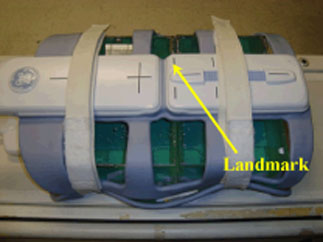
- Fasten the Velcro straps so that the coil firmly snugs the phantoms.
- Connect the coil to Port A of the system LPCA. Landmark the
coil at the center cross mark as shown in the following illustration
and advance to scan.
Figure 9. Landmarking Coil
- After coil and phantom are properly positioned, perform Multi-Coil Quality Assurance (MCQA) Tool.
3 Finalization
Finalization
No finalization steps.