The oscillatory mode is included within auto mode. Follow this procedure only if there is a need to repeat the oscillatory mode independently.
Prerequisites
Required conditions
The Oscillatory tab must be enabled in order to calibrate in this mode independently.
About this task
If the LONG term is still failing after running in manual mode, then the oscillatory mode can be run to bring the LONG term into specification.
Note: Oscillatory mode allows the user to pick the number of oscillatory fitting terms instead of the tool.
Procedure
Close the Grafidy tool if it is open from the previous manual or auto mode run.
To enable the Oscillatory tab, add the following flags to the /usr/g/bin/graf3/graf3.init file.
Open a C Shell
Note: The Shell window can only be launched when the EA3 user is included in the authorized EA3 group. Users not in this EA3 group will not have access to launch the Shell window. If you are not logged in as the proper logon user, log out and then log back on as the correct EA3 user with the authorized permissions.
Type cd /usr/g/bin/graf3.
Type gedit graf3.init
Add the following flags and set the values to 1 as shown below.
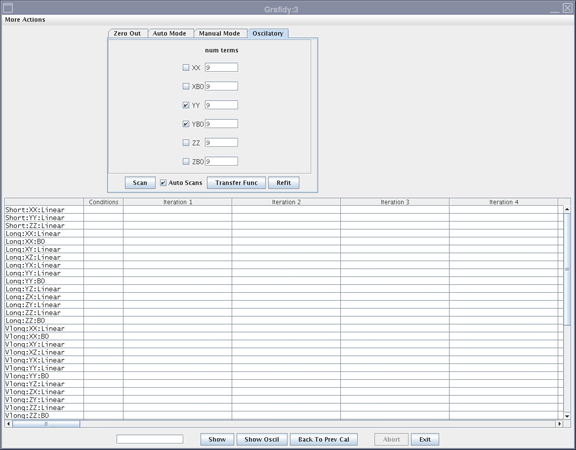
Open the Grafidy tool and click the Oscillatory tab.
Figure 1. Oscillatory tab
Determine if the existing terms should be zeroed out.
Note: If the user interface shows 9 terms, change the value to 3.
For new system calibrations, click on the Zero Out tab.
Select the oscillatory terms of the applicable axis and click Zero Out Selected Terms before proceeding to the next step.
For performance checks only, proceed to the next step.
Select the applicable axis to perform oscillatory mode compensation.
Click Transfer Func. Wait for scans to complete.
After the transfer function is complete, click Scan. Four scans are performed, followed by a fit and followed by another scan (five total).
This process takes approximately 16 minutes per axis.
Note: After a scan is complete, the screen remains inactive while software is performing the fit. The screen becomes active after fit and final scan are completed. Be patient and wait for the screen to become active.
Return to manual mode and re-scan the failing term.