• Optima MR450w BASE 1.5T System Service Methods
  • 5690012-2EN Revision 3
  • Object ID: 00000018WIA307BDD20GYZ
  • Topic ID: id_13106794 Version: 5.0
  • Date: Feb 21, 2021 9:12:13 PM

1.5T Breast Coil System Cable Replacement

Prerequisites

Table 1. Personnel requirements
Required personsPreliminary requirementsProcedureFinalization
1Not Applicable45 minutesNot Applicable
Table 2. Tools and test equipment
ItemQuantityEffectivityPart numberManufacturer
Standard Tool Kit1---
ESD Grounding Wrist Strap1---
Table 3. Consumables
ItemQuantityEffectivityPart numberManufacturer
Nylon Cable Ties2---
Table 4. Replacement parts
ItemQuantityEffectivityPart numberManufacturer
Output Cable Assembly, 1.5T Breast Coil1-

2412283

-

About this task

Follow this process to change the system cable for coils that have a cable available as a spare part. This process will be the same whether replacing the coil or the cable.

Procedure

  1. Put on the ESD Grounding Wrist Strap and ground.
  2. Place coil bottom side up. See Figure 1.
    Figure 1. Breast Coil: Bottom Side-Up
  3. Remove all screws (total of 18). See Figure 1.
  4. Remove the coil cover.
  5. Remove cable ties (2), see Figure 2.
    Figure 2. Location of Cable Ties
  6. Disconnect all RF cables (8). See Figure 3.
    Figure 3. RF Cable Locations
  7. Disconnect DC Cables (4). See Figure 4.
    Figure 4. DC Cable Locations
  8. Remove two screws from cable clamp and remove the clamp from coil. See Figure 5.
    Figure 5. Cable Clamp Location
  9. Remove Cable Assembly. See Figure 6.
    Figure 6. Cable Assembly Location
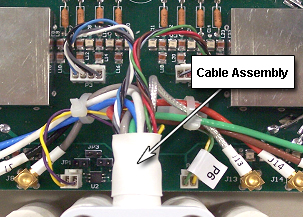
  10. Attach the new cable assembly by sliding the strain relief of the cable into the cutout of the housing, with its round section towards the bottom. Press the strain relief down firmly, so the edge of the housing fits into the groove of stain relief nicely.
  11. Reinstall the cable clamp. See Figure 5.
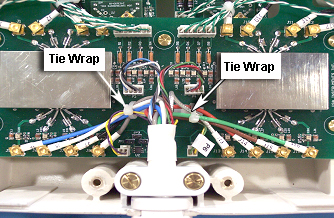
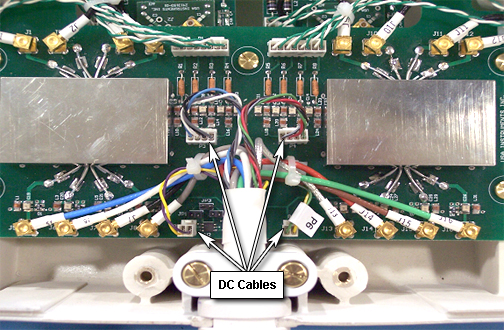
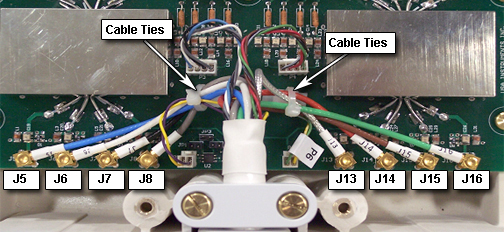
  12. Install all channel connections (8 RF coaxial and 4 DC connectors) by matching the designators on the cable with the designators on the PCB. Tie cables J5, J6, J7, J8, and P5 to the left cable tie holder on the PCB. Tie cables J13, J14, J15, J16, and P6 to the right cable tie holder. Route the cables as shown in Figure 7, so no cables touch the rectangular shield. Cables P3 and P4 should not be tied.
    Figure 7. Installation of New Cable Assembly
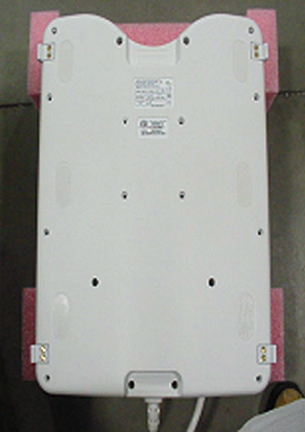
  13. Install the coil cover by replacing and securing all screws (total of 18). See Figure 1.

Finalization

  1. Perform a system test to confirm that the repaired coil operates properly.