- Topic ID: id_17423185
- Version: 4.0
- Date: Dec 3, 2019 1:49:03 AM
Open Console Network Switch Replacement
Prerequisites
Overview
This procedure shall be followed when replacing the Open Console Network Switch.
1 Network Switch Removal Preparation
Procedure
- Shutdown system. Select one of the following methods to Power
OFF the Console:
-
If Applications are up, click on the [Shut Down] button on desktop display and select Shutdown.
-
If Applications are down, open a Terminal Window. Type: halt , then press ENTER.
-
When halt command has finished, power Off the console at the front panel switch.
-
- Apply LOTO. See Equipment Service - Lockout-Tagout-PPE procedure.
2 Network Switch Removal
Procedure
- Open the Console side cover to gain access to the Ethernet switch. Refer to Cover Removal and Installation instructions from the procedure list.
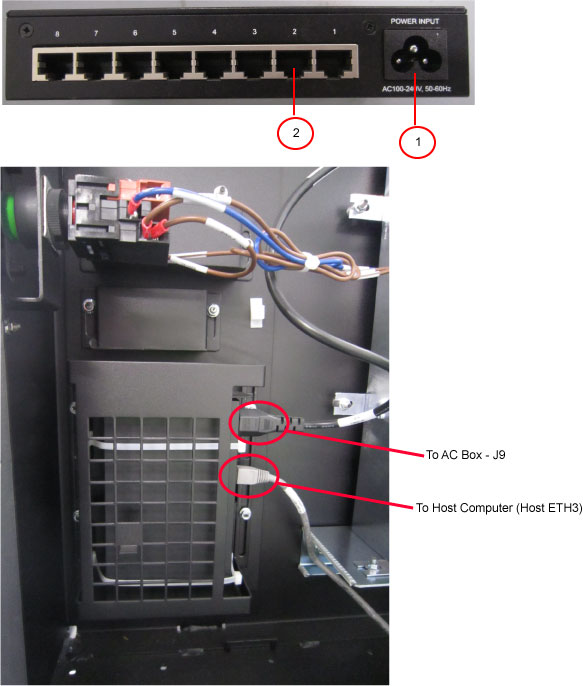
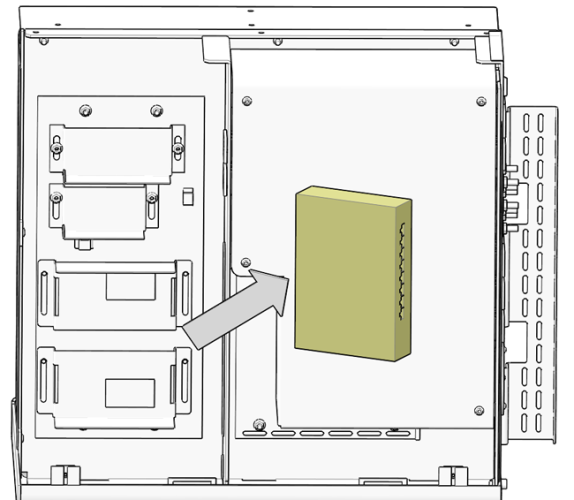
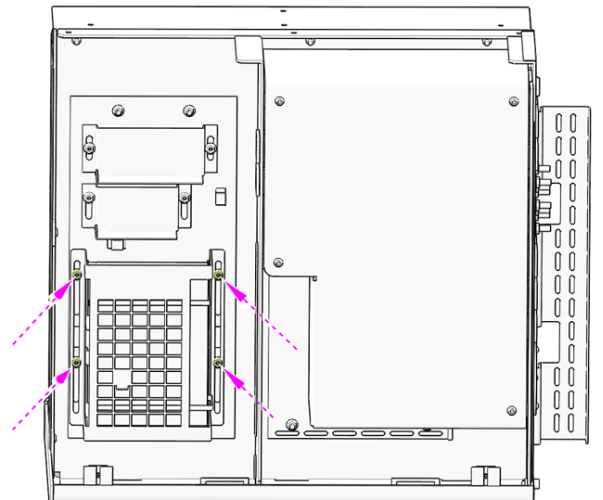
- Locate the Network Switch inside the Open Console chassis.
Figure 1. Network Switch Location

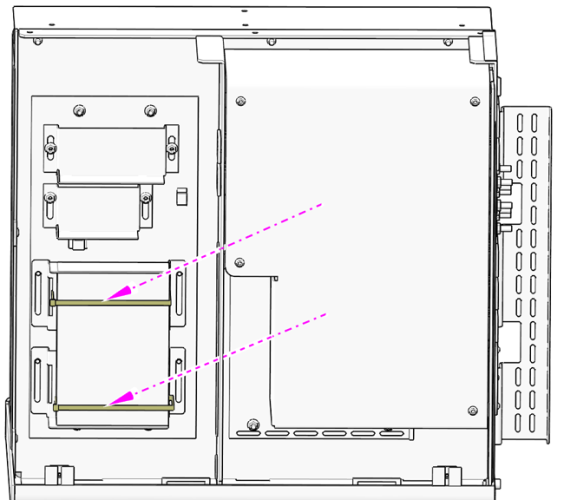
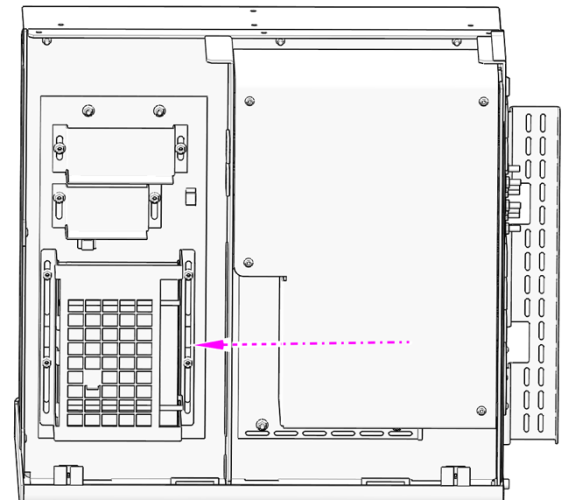
- Disconnect all cables attached to the Network switch. Make certain
that all cables are properly labeled.
Figure 2. Network Switch Connections
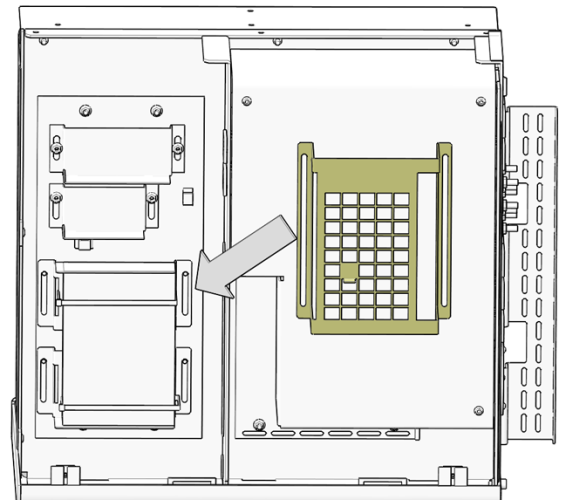
- Remove the Video Splitter Mounting bracket, that covers the
Network Switch. Remove the four (4) Hexagon Flanged Nuts (M5), remove
the bracket and set aside.
Figure 3. Video Splitter Mounting Bracket Removal
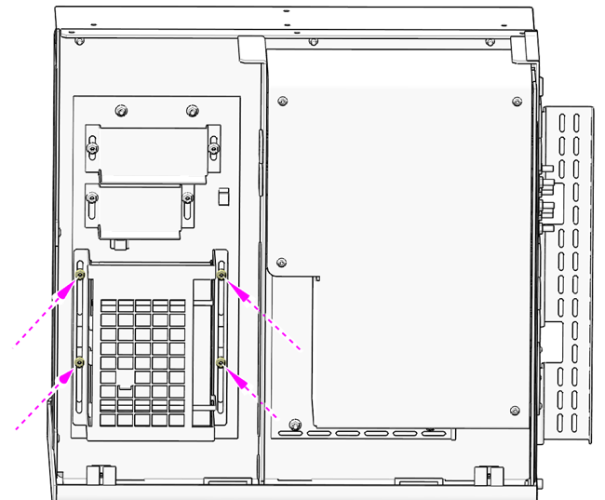
 note: If equipped with Optional Video Splitter, this component will need to be removed from it’s mounting bracket first.
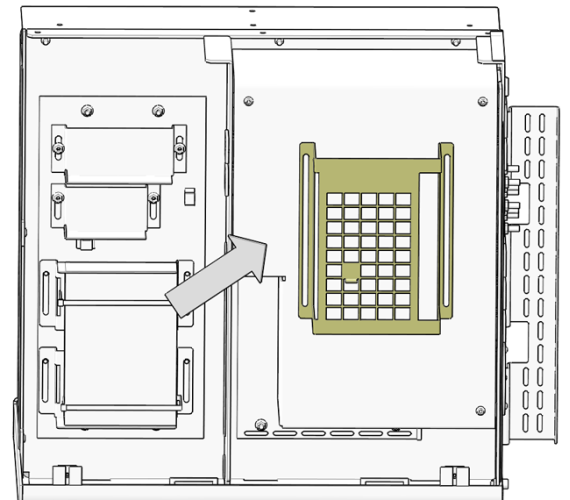
 - Cut and remove the two cable ties holding the Network Switch
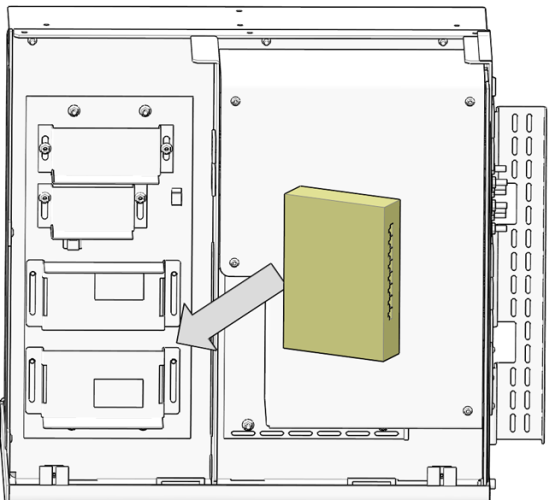
to the chassis. Remove switch and set aside.
Figure 4. Network Switch Removal
3 Network Switch Installation
Procedure
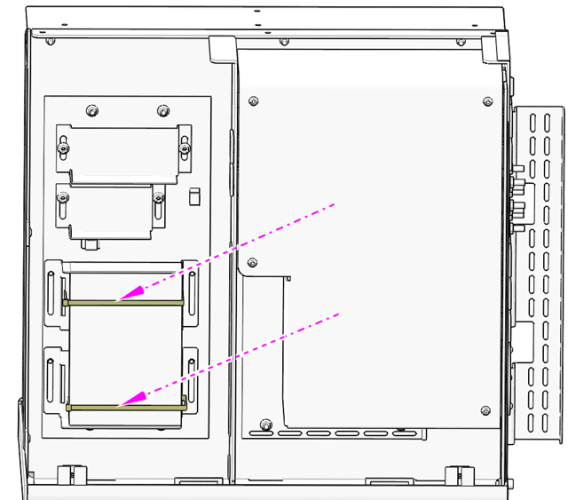
- Insert the replacement Network Switch onto the network switch
mounting bracket and install two cable ties to hold it in place.
Figure 5. Network Switch Install
- Install the Video Splitter Mounting bracket over the Network
Switch and reinstall and tighten the four (4) Hexagon Flanged Nuts
(M5).
Figure 6. Video Splitter Mounting Bracket Install
- Reconnect all the Network Switch cables removed earlier. See
Illustration 3 above.
Figure 7. Network Switch Cable Connections Location
 note: If so equipped, reinstall the Video Splitter (optional)
 - Remove LOTO on Open Console chassis. For procedures, see Equipment Service - Lockout-Tagout-PPE.
4 Functional Checks, Alignments and Setups
Procedure
- Turn on Circuit Breakers/Switches on the console. Watch for Link LEDS to light on the Network switch. Link LEDs will become active (light) once power has been restored and Ethernet connectivity is established.
- Install Open Console side cover. Refer to instructions from the procedure list.
5 Finalization
Perform the instructions from the procedure list.