- Topic ID: id_17423179
- Version: 3.0
- Date: Aug 10, 2021 9:57:02 PM
HP Host Computer Z820 Scanfile HDD Replacement
Prerequisites
Overview
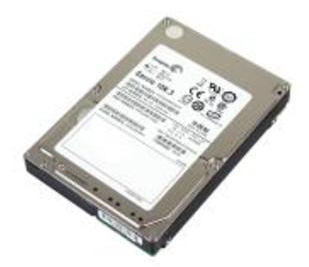
This procedure shall be followed when replacing the Scan Data Disk Array (SDDA) Hard Drive in the Z820 computer.
Figure 1. SDDA Hard Drive
1 SDDA Hard Drive Replacement Preparation and Location
Procedure
- Select one of the following methods to Power OFF the Operator
Console:
- If Applications are up, click on the [Shut Down] button and
select [Shutdown].
The Operator Console monitor will display a 'Power Down' message when it is acceptable to power OFF the Operator Console.
- If Applications are down, open a Unix Shell. Type: halt.
- If Applications are up, click on the [Shut Down] button and
select [Shutdown].
- Power OFF the console at the front panel switch.
- Remove the front and left side covers from the console.
Refer to
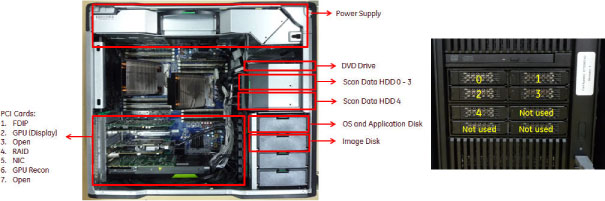
- Locate SDDA Hard Drive FRUs by referencing the Illustration
below.
Figure 2. SDDA Hard Drive Location
2 SDDA Hard Drive Removal
Procedure
- Release the SDDA Hard Drive Tray by pressing the Tray Removal
Lever Release button in the Icy Dock® Bay.
Figure 3. SDDA Hard Drive with Tray Assembly Removal
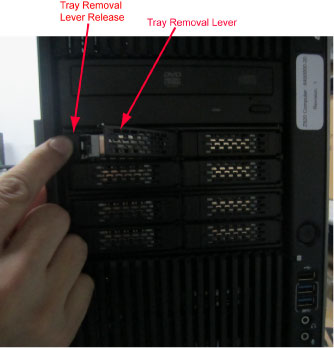
- Remove the SDDA Hard Drive with Tray assembly from Icy Dock® bay using the Tray Removal Lever.
- Remove the SDDA Hard Drive with Tray assembly out the front of the Z820 computer and set aside.
3 SDDA Hard Drive FRU Preparation
Procedure
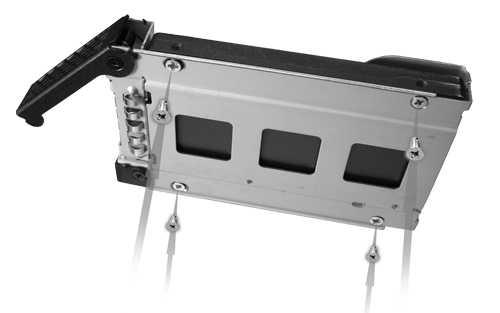
- The replacement SDDA Hard Drive does not come with the Icy Dock® Tray. Remove the SDDA Hard Drive from the original SDDA Hard Drive with Tray assembly.
- Mount the replacement SDDA Hard Drive onto the original Icy
Dock® Tray, reusing the mounting hardware.
Figure 4. SDDA Hard Drive Mounting in Tray Assembly
4 SDDA Hard Drive Install
Procedure
- Slide the replacement SDDA Hard Drive with Tray assembly into the Icy Dock® bay in the Z820 computer.
- Fully seat the SDDA Hard Drive in the Icy Dock® bay by closing and latching the Tray Removal Lever.
5 Finalization
Procedure
- Power ON the operator console. Start up sequence stops before application start up.
- Run “Reconfig” ,and select “Recreate Scan
Disk Array” (2 or more HDD replacement) or “Rebuild Scan
Disk Array” (only one HDD replacement), and press “Accept”.note:
Rebuild Scan Disk Array takes approximately 20 minutes.
- System reboots automatically and stops before application.
- Open shell window and type st to start up application.
- Refer to System Scanning Test to confirm proper operation.
- Reinstall the console covers.