- Topic ID: id_17423047
- Version: 4.0
- Date: Jan 20, 2020 8:33:37 PM
Gantry Top Fan Replacement
Prerequisites
Overview
The top fans are controlled by the stationary CFC board. You can swap the fan connections to verify that the fan is defective.
1 Cover Removal
Procedure
 warning
- Remove gantry right side cover.
Refer to
- Stop the rotor of X-ray tube in case of Liquid Bearing Tube before HVDC off. Refer to Liquid Bearing Tube Rotor stop procedure for details.
- Turn OFF the three (3) main power switches (Axial Drive, HVDC and 120VAC) on the Service Switch Panel.
- Remove the applicable top cover and slide the rear cover backward.
 |
2 Top Fan Assembly Replacement
Procedure
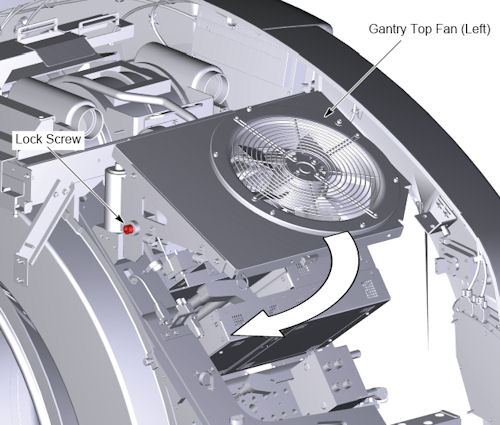
- Loosen the lock screw of the top fan assembly, and rotate the
top fan assembly.
Figure 1. Lock Screw of the Top Fan Assembly
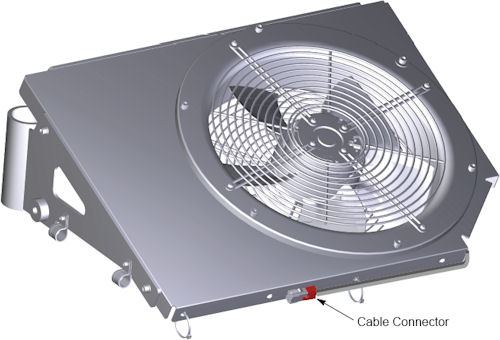
- Disconnect the cable connector from the top fan assembly.
Figure 2. Cable Connector of Top Fan
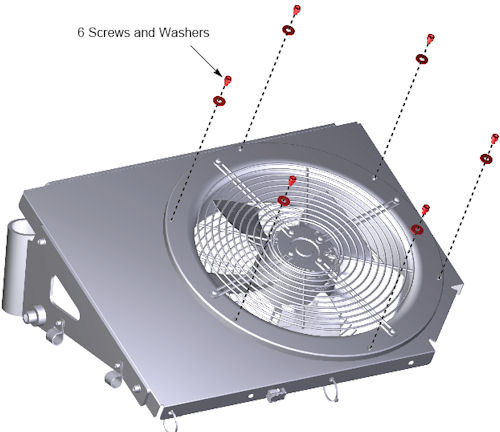
- Remove 6 screws that holding the fan to the fan mount base.
Figure 3. 6 Screws
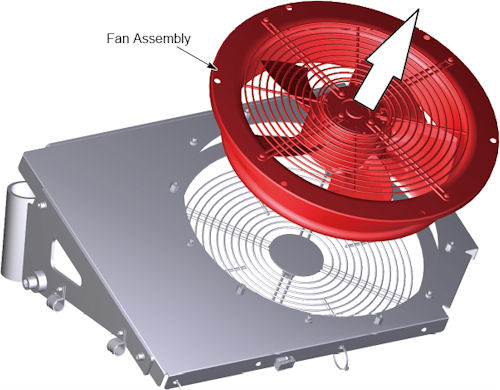
- Remove the fan assembly from the fan mount base.
Figure 4. Fan Assembly Removal
- Attach the new fan assembly to the fan mount base, and tighten the 6 screws.
- Connect the cable connector to the fan assembly.
- Rotate the top fan assembly to the original position, and tighten the lock screw.
3 Finalization
Procedure
- Reinstall top and side covers per cover procedures including
gantry power up steps.
Refer to
- Verify all fans start immediately after a power reset to the gantry. The fans will then either turn off or change to a system defined speed dependent on the current gantry temperature.