- Topic ID: id_15460249
- Version: 4.0
- Date: Jun 4, 2020 7:59:35 PM
AWE Connection Option Installation
1 Personnel Requirements
2 Overview
This procedure outlines the process required to install and set up the AW Server Client software on Optima CT660, Revolution EVO and VCT system.
3 Preliminary Requirements
3.1 Pre-requisite
Customer has the following options:
-
"Basic Front End - 3rd Party integration" option for AW Server 2.0
-
“Full front end integration (Hybrid): (3rd Party Integration)” option for AW Server 3.2
3.2 Required Conditions
3.3 Verified Software Version
4 Procedure
4.1 Install Option Software (15HW25.2 or earlier)
Refer to Install Option Software (16HW14.x or later) if the system software version is 16HW14.x or later.
4.1.1 Install Software Option Key
-
Install the supplied “AWE connection” software key according to the Install Software Options procedure.
-
-
4.1.2 Install AWS Client Software
-
Record the IP address of AWS Server and the User Name and Password for configuration on CT console in later steps.
note:The User Name and Password are one of the accounts configured on AW server.
Consult with the site IT admin for which one assigned to this use.
-
Open a Unix shell and login as root.
Type: su-ENTER
Type the root password and press ENTER.
-
Type the following:
launchCTWebBrowserAWS http://xxx.xxx.xxx.xxx
note:“xxx.xxx.xxx.xxx” is AW server's IP address.
-
The AW Server Download screen appears.
Figure 1. AW Server Download Screen

-
Click the “Linux Client” Download button.
-
Select “Save File”.
Figure 2. Opening AWE - solo-install.rpm
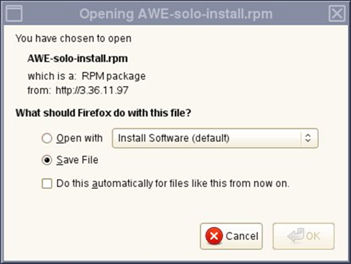
-
Confirm that “root” is selected as Save in folder and click the “Save” button.
Figure 3. File Name Entering
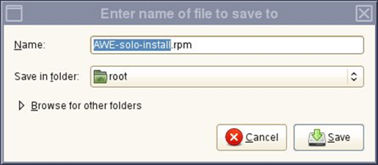
-
When download is completed, the following window appears. Close this window.
Figure 4. Download completed window
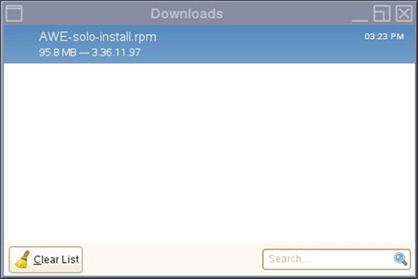
-
Close the AW Server Download screen.
-
Open a Unix shell and login as root.
Type: su–ENTER
Type the root password and press ENTER
-
Type the following:
/usr/g/scripts/InstallAWSClientOnConsole
-
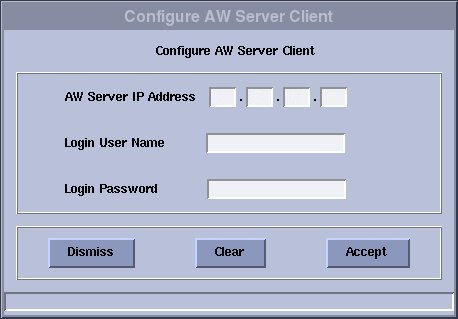
After the Client software installation, the "Configure AW Server Client" window appears automatically.
-
Input the AW Server IP Address, User Name and Password and click Accept.
Figure 5. Configure AW Server Client
-
Confirm that “AWS client software installation is finished” message appears in Unix shell.
-
Reboot the System. Select [Shutdown] on the Desktop and select [Restart], then [OK] on the Attention Window.
-
Declare AWS on the CT System.
On CT Console, select ImageWorks ->Network ->Remote Hosts, enter the required Parameters and select save.
4.2 Install Option Software (16HW14.x or later)
-
Install “AWE Connection” software key. The “Configure AW Server Client” window appears automatically.
Figure 6. Configure AW Server Client
-
Input correct AW Server information and click Accept .
note:If wrong information is entered in IP Address or User Name or Password, the Install Options GUI will hang. Wait about 15 minutes until process is time out or Restart the system and repeat the install option process again.
-
After the option installed successfully, reboot the CT application.
4.3 Enable Integration
-
On AW Server, enter service tool and perform the following.
For SW Server 2.0
-
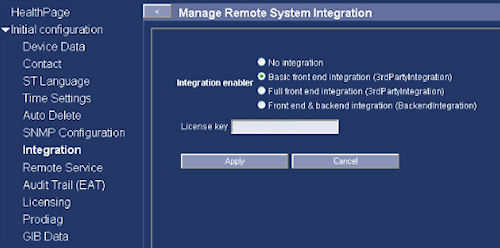
Select Initial configuration -> Integration.
-
Select Basic front end integration (3rdPartyIntegration) as Integration enabler.
-
Input License key and Click on Apply. refer to Figure 7.
Figure 7. Enable Integration for AW Server 2.0
For SW Server 3.2
-
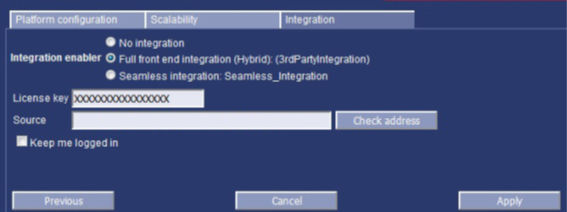
Select Initial configuration -> Platform Configuration -> Integration.
-
Select Full front end integration (Hybrid): (3rdPartyIntegration) as Integration enabler.
-
Input License key and the source and then click on Apply. refer to Figure 8.
Figure 8. Enable Integration for AW Server 3.2
-
-
Declare CT on AW Server,
The CT system must be declared in AW server as a DICOM host. Refer to AW server installation manual for the detailed configuration procedure.
5 Finalization
-
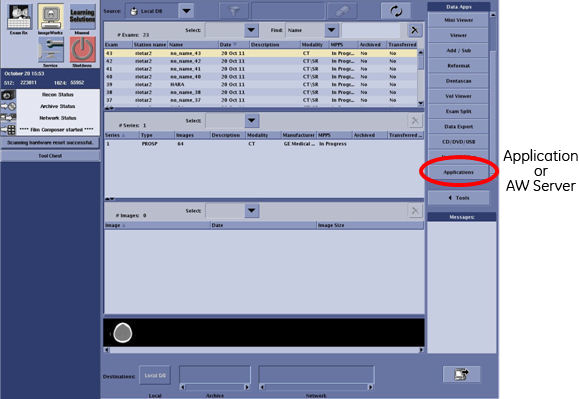
Open ImageWorks desktop Browser.
note:Before launching the AW server application, the selected exam and series in the console exam list needs to be transferred to AW server.
-
Confirm that "Applications" button or “AW Server” button (16HW14.x or later) exists on Image works browser and can launch the AW server from CT Console by clicking the “Application” or “AW Server” button.
Figure 9. Desktop Browser
-
Execute the System State Save to save the AWS Configuration.
6 Appendix
6.1 AWS Client Software Update Procedure
The following procedure is required when AW Server is upgraded and new AWS client software needs to be re-installed on 15HW25.2 or earlier system. Refer to AWS Client Software Update Procedure (For 16HW14.x or later) if system software versoin is 16HW14.x or later.
-
Open a Unix shell.
-
Login as root and enter the proper password.
Type: su-ENTER
Type the root password and press ENTER
-
In the Unix shell, type the following:
/usr/g/scripts/UninstallAWSClientOnConsole
-
Download and install the new AWS Client software according to Install AWS Client Software.
-
Shutdown and restart the system.
6.2 How to disable Security Connection Setting
The “This Connection is Untrusted” window may appear depending on the combination of AW Server version and CT software version.
-
AWS2.0:
-
Optima CT660: all sw version
-
Optima CT660 (M40):15HW13.7 or earlier
-
Revolution EVO: 15HW13.7 or earlier
-
LightSpeed VCT: 13HW31.8
-
-
AWS3.2:
-
Revolution EVO: 16HW14.9
-
LightSpeed VCT: 16HW36.4
-
Disable the security setting according to the following procedure.
With following combination, access to the AW Server service tools menu is rejected. In this case, you will need to access to the service tools menu from another machine.
AWS3.2:
-
Optima CT660 (M40): 16HW45.1
-
Revolution EVO: 16HW45.1
-
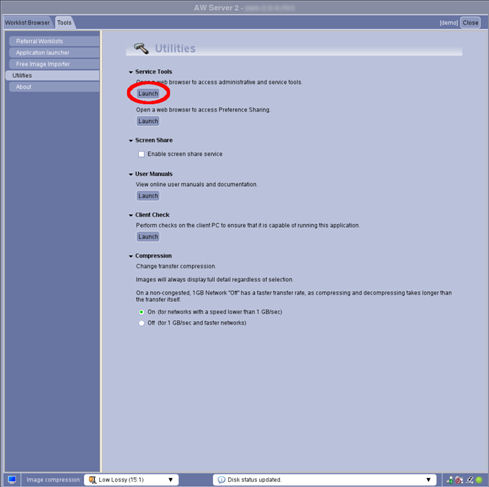
Open AW Server client from Applications menu in the ImageWorks.
-
On the client, select “Tools” tab to show tools menu.
-
Click “Launch” to open web browser to access administrative and service tools.
Figure 10. AW Server Utilities
-
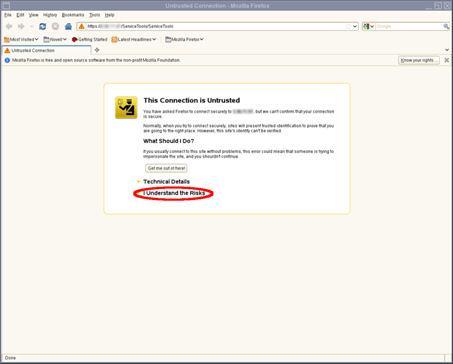
“This Connection is Untrusted” page appears in Mozilla Firefox web browser. Click “I Understand the Risks” link.
Figure 11. Untrusted Connection
-
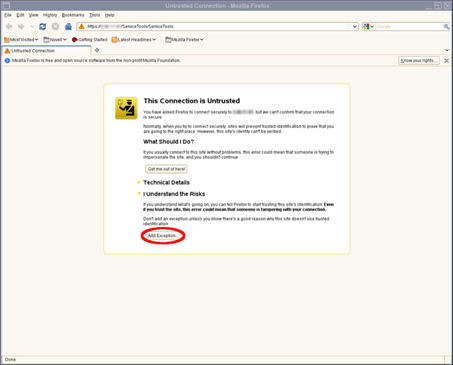
On the web browser click “Add Exception...” button.
Figure 12. Untrusted Connection - Add Exception
-
“Add Security Exception” pop-up window appears. Click the “Confirm Security Exception” button.
Figure 13. Security Exception
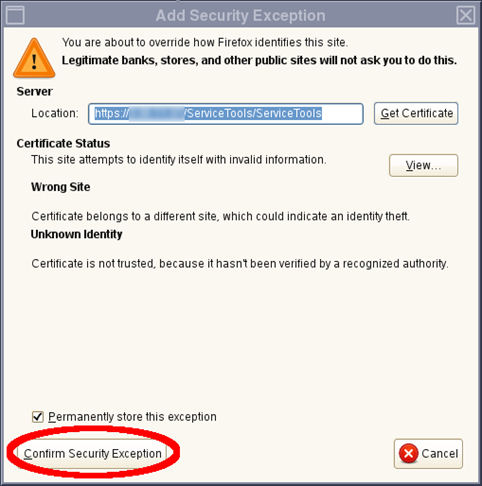
The pop up closed and “This Connection is Untrusted” page will not appear from next time.
6.3 AWS Client Software Update Procedure (For 16HW14.x or later)
The following procedure is required when AW Server is upgraded and new AWS client software needs to be re-installed on 16HW14.x or later system.
-
Uninstall “AWE connection” option key according to Install Software Options procedure. And reboot the system.
-
Reinstall “AWE connection” option key and reboot the system.
-
The “Configure AW Server Client” window appears automatically.
Figure 14. Configure AW Server Client
-
Input correct AW Server information and click Accept.
-
After the option installed successfully, reboot the system