- Topic ID: id_11038716
- Version: 3.0
- Date: Jun 10, 2020 2:29:05 AM
NIO16 Host Computer (Z820) Scan Data HDD Replacement
Prerequisites
Overview
This procedure shall be followed when replacing the Scan Data Hard Disk Drive in the z820 host computer.
1 Scan Data Hard Drive Replacement Preparation and Location
Procedure
- Shutdown system. Select one of the following methods to Power
OFF the Console:
- If Applications are up, click on the [Shut Down] button on desktop
display and select [Shutdown].
The Operator Console monitor will display a 'Power Down' message when it is acceptable to power OFF the Operator Console.
- If Applications are down, open a Terminal Window. Type: halt , then press ENTER
- When halt command has finished, power Off the console at the front panel switch.
- If Applications are up, click on the [Shut Down] button on desktop
display and select [Shutdown].
- Apply LOTO.
- Remove the front and left side covers from the console.
Refer to Replacement → Console → Console Cover Removal and Installation.
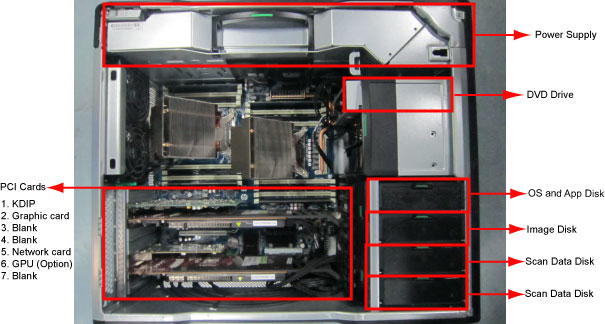
- Locate Scan Data Hard Drive FRUs by referencing the Illustration
below.
Figure 1. Scan Data Hard Drive Location
2 Scan Data HDD Removal
Procedure
- Open the Z820 computer side access panel.
- Remove the original Hard Drive assembly from the computer’s
drive bay. See below illustration.
Figure 2. Hard Drive Assembly
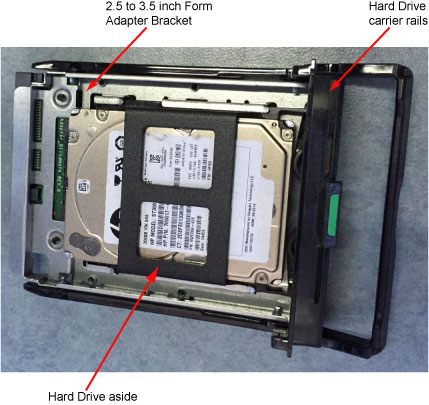
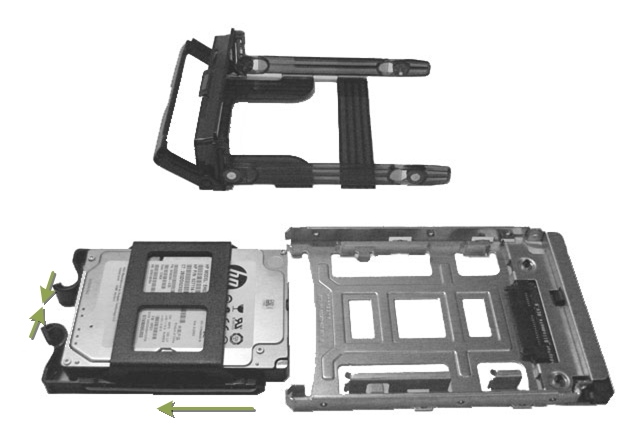
- Remove the 2.5 to 3.5 inch Form Factor Adapter Bracket with
Hard Drive from the Hard Drive carrier rails. See below illustration.
Figure 3. Factor Adapter Bracket with Hard Drive from the Hard Drive carrier rails
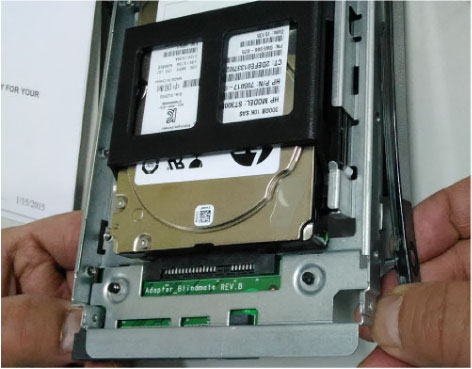
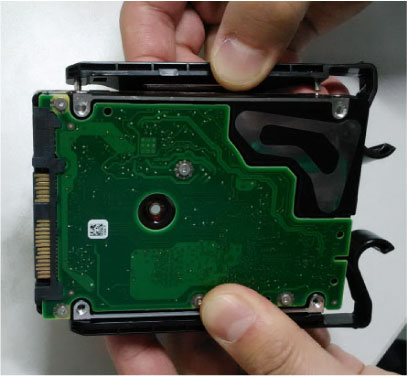
- Pull out the Hard Drive from the 2.5 to 3.5 inch Form Factor
Adapter Bracket horizontally. See below illustration.
Figure 4. Remove Hard Drive from the 2.5 to 3.5 inch Form Factor Adapter Bracket
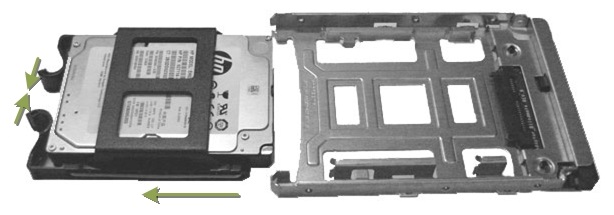
- Remove the 2.5 inch Hard Drive from the Hard Drive aside. See
below illustration
Figure 5. Hard Drive aside
3 Scan Data HDD FRU Preparation
Procedure
- Install replacement Hard Drive into the original 2.5 to 3.5 inch Form Factor Adapter Bracket removed from original Hard Drive.
- Install replacement Hard Drive with Form Factor Adapter Bracket
into original Hard Drive carrier rails.
Figure 6. Hard Drive Form Factor Brackets and Carrier Rail Assembly
4 Scan Data HDD Install
Procedure
- Install the replacement Scan Data Hard Drive assembly into the computer drive bay
- Close Side Access Panel.
5 Finalization
Procedure
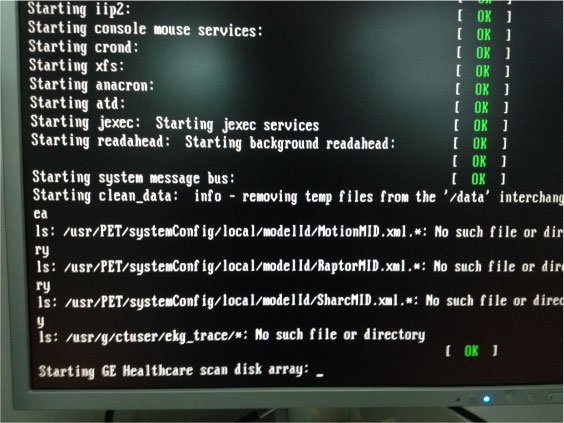
- Power ON the operator console. When below screen appears, perform
[Shift + F8] and press [Enter] key to skip scan disk array.
- Run “Reconfig”, select “System”, select “Yes” under the “Recreate Scan Database” and press “Accept”.
- Reboot system and type st to start up application.
- Open a shell window and type gre-raid -q command by root account, make sure RAID setup successfully.
- Do once Axial, Helical and Cine scan to test HDD performance, check image from image browse, make sure it worked properly..
- Reinstall the console covers.