- Topic ID: id_17423483
- Version: 4.0
- Date: Jan 20, 2020 8:36:24 PM
Head Holder Rubber Sheet Replacement
Prerequisites
Overview
Procedure
- notice
- Remove existing rubber sheets from the head holder.
- Rubber Sheet Selection:

- notice
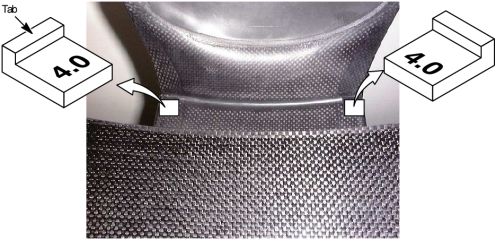
note: When selecting the thicker rubber, the head holder can be latched securely with less horizontal free–play. However, this causes hard latching and a customer might use the head holder with no latched, so that the head holder might drop from the cradle and a patient might be injured. So, try the different rubber in thickness to select the proper one.- First place the two 4.0 mm rubbers (the thickest rubber) onto
both edges of the head holder as shown.
-
The rubber must be placed with its tab facing out.
-
The thickness is printed on the rubber.
-
You have only to place the rubber onto the holder. You do not need to set it in an upright position when selecting the rubber.
Figure 1. Rubber Sheet
-
- notice
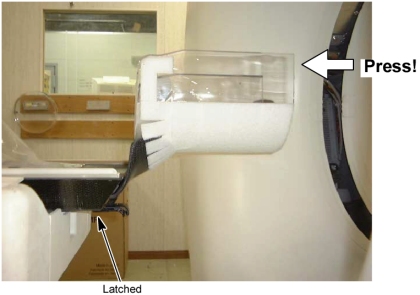
- Insert it all the way into the cradle and press the head holder
at proper pressure.
Figure 2. Head Holder Fitting
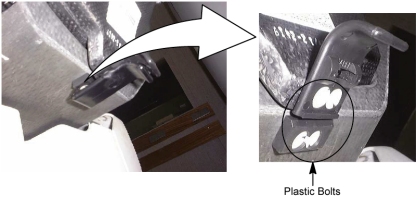
- Check if the head holder is latched on the cradle at the fist
step of the latch mechanism. (The head holder does not need to be
latched at the second step.)
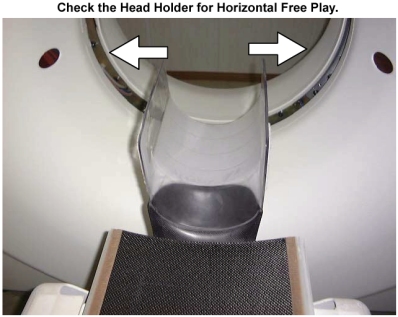
Check if the head holder has a small free–play in the horizontal direction.
Figure 3. Head Holder Stability
- When the head holder is not latched (the rubber is too thick
to install), repeat steps a to c using the second– thickest rubber
(3.5mm).
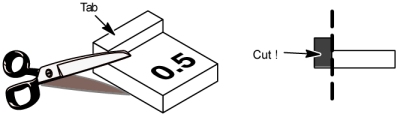
Even if the thinnest rubber (0.5mm) can not be used, cut the tab of the 0.5mm rubber.
Figure 4. Rubber Sheet Cutting
note: After adjustment, ask your customer to check the head holder free–play. - Rubber Installation:
- Clean any dirt off the attaching surface of the rubbers using an alcohol as shown.
- Peel off a papers from the rubbers, then attach the rubbers
on the head holder as shown. Hold the rubber a few seconds with your
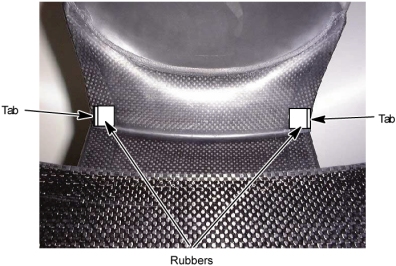
fingers to attach it securely onto the head holder.note: The rubber must be attached with its tab facing out.
Figure 5. Position of Rubber Sheets
- Latch the head holder to the cradle, then verify tha the head holder has a small free–play in the horizontal direction.
|
Finalization
No finalization steps.