- Topic ID: id_17479548
- Version: 1.0
- Date: Aug 28, 2018 3:55:36 PM
DAS PS Fuse Board Replacement
Prerequisites
Overview
This procedure defines the steps necessary to replace the DAS PS fuse board.
Procedure
- Remove the gantry right side cover and disable “Axial Drive”, “HVDC” and “120VAC” switches from the service switch panel.
- Remove the gantry left side cover.
- Position the DAS at the 12 o’clock position, and lock the gantry in position using the rotational lock.
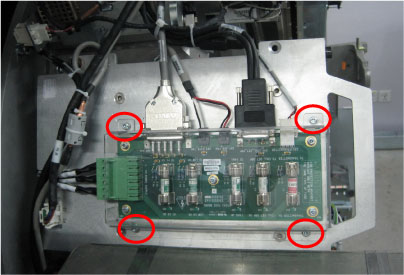
- Remove the fuse board plastic cover by unscrewing its four screws.
Figure 1. Plastic Cover Removal
- Disconnect all cable connectors from the fuse board.
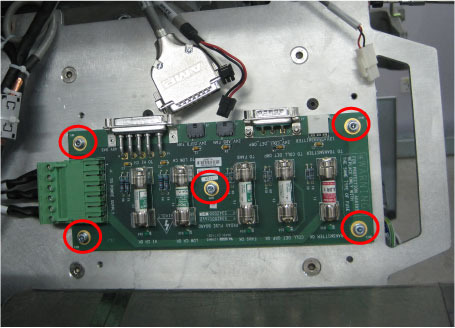
- Remove the defective fuse board from the DAS PS mounting cover
by unscrewing its five screws.
Figure 2. Fuse Board Removal
- Get the new fuse board and secure it to the DAS PS mounting cover. (Torque: 1N-m)
- Reconnect all cable connectors to the fuse board and reinstall the plastic cover.
- Disengage the rotational lock.
- Turn ON “Axial Drive”, “HVDC” and “120VAC” switches.
- Restore the gantry to original configuration.
Finalization
No finalization steps.