- Topic ID: id_16157543
- Version: 2.0
- Date: Nov 27, 2020 2:10:55 AM
Diagnostic Data Collection Tool
Diagnostic Data Collection is a tool that allows the user to scan and create scan files using user selectable scan types and parameters as an aid in troubleshooting and verifying the data integrity of the DAS/Detector subsystem.
HOW TO ACCESS DDC - GENERAL SERVICE
-
Select DIAGNOSTICS.
-
Select DIAGNOSTIC DATA COLLECTION.
-
Use DDC to collect DAS data with and without x-ray and/or rotation.
-
Use the Scan Analysis tool to examine collected data.
-
1 Scan Types and Parameters
The Diagnostic Data Collection (DDC) tool supports the following scan types:
-
Static X-Ray Off.
-
Static X-Ray On.
-
Rotating X-Ray Off.
-
Rotating X-Ray On.
Each scan type is presented as a selectable button on the left-hand side of the DDC screen. Each scan type has an associated set of scan parameters that the user may select.
There are additional scan parameters displayed on the screen that the user will not be allowed to modify, presented as insensitive for the following reasons:
-
The parameters are not required for the scan type selected.
-
The parameters will not be functional until a future release.
The following table shows what scan parameters are available in each of the four scan types:
2 Options
For each of the scan types selected, the user may specify the following options, which are presented in the DDC GUI as buttons close to the bottom of the screen (see Figure 1):
-
Auto Scan
-
TXXT
2.1 Auto Scan
For each of the scan types selected the user may specify the auto scan option.
2.2 TXXT
TXXT (Trigger On, X-ray On, X-ray Off, Trigger Off) is an option for the Static X-Ray On and the Rotating X-Ray On scan type selections. This button becomes insensitive when the Static X-Ray Off or Rotating X-Ray Off scan type is selected.
The TXXT button is associated with the following scan parameters:
-
X-ray Duration
-
Dly Until X-ray On
3 DDC Interface
The Diagnostic Data Collection Interface (see Figure 1) consists of three main areas:
-
Command Area
-
Work Area
-
Status Message Area
Figure 1. DDC Interface - 4 Slice (example is of Static X-Ray-Off)
Figure 2. DDC Interface - 16 Slice (example is of Static X-Ray-Off)
3.1 Command Area
The Command Area consists of a vertical palette of push buttons located on the left hand side of the screen. These include the four scan type selection buttons and two miscellaneous buttons; the Protocol Name and the Position Tube buttons.
3.1.1 Scan Type Buttons
The four scan type buttons, described previously in Scan Types and Parameters, are provided to select the scan type indicated by the button label. When the user selects a scan type, the corresponding user-modifiable scan parameters become sensitive, and the parameters that the user may not modify become insensitive.
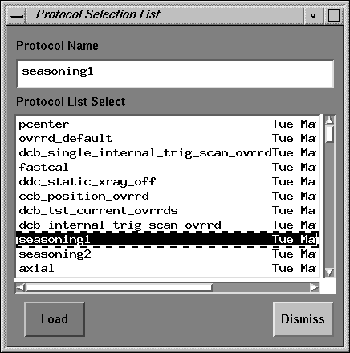
3.1.2 Protocol Name Button
When this button is selected, the Protocol Selection List pop-up window (see Figure 3) will appear. This list contains all the available protocols on the system. When the user selects a protocol for loading, the values of the scan parameters (that were stored in the protocol file) display in the appropriate areas of the screen.
Figure 3. DDC Protocol List
Diagnostic Data Collection (DDC) Protocols are located in the following directory on the OC:
/usr/g/protocol/service/v1.1
Most of these protocols are used by tools and diagnostic scans. Depending on troubleshooting experience, these protocols can be selected from within DDC, and accepted “as is” or some of the parameters can changed for the current exam. Changes to the protocols cannot be changed and saved as well as new service protocols cannot be created.
3.1.3 Position Tube Button
When this button is selected, the Tube Position pop-up window (see Figure 4) appears. The tube positioning function allows the user to position the tube between 0 and 360 degrees of the rotation.
Figure 4. Position Tube Pop-Up Window

3.2 Work Area
All scan parameters in the fields to the right of the Command Area that may be modified, depending on the scan type and protocol selected, are displayed in the Work Area. Each scan parameter value is presented in a text field or indicated by a toggle button in a depressed state. When a value is displayed and is sensitive in a text field, a new value can be entered directly to replace the old value.
3.3 Status Message Area
Status messages display in this area at the very bottom of the GUI screen. The messages displayed in this area are not persistent and will disappear after a few seconds.
4 Reconstruct DDC Images
Use ReconRx screens to list/select the DDC-acquired data. Use ReconRx to reconstruct the DDC-acquired data into images.
DDC scans appear in Recon Rx List/Select when they consist of:
-
Rotating X-Ray On scans
-
Full rotation scans consisting of 984 views
-
Scans that have a corresponding cal file
5 DDC With Tracking Off
Figure 5. Diagnostic Data Collection Screen - 4 Slice
Figure 6. Diagnostic Data Collection Screen - 8 Slice
To produce an image without tracking:
-
Using DDC, create a non-tracking air cal. Use KV, mA, Filter, Focal Spot, and Aperture to duplicate patient scanning.
-
Nothing should be in the beam.
-
Select Calibration Vector Option Non-Tracking Cal. This creates a temporary file that the air cal portion of data reconstruction uses.
-
Scan.
-
Place the phantom that you want scanned and reconstructed center in the beam.
-
Select the exact same parameters that was used for the temporary Aircal, except for Calibration Vector option, select Non-Tracking Scan.
-
Scan and record the exam number.
-
Retro-Recon this exam number using Application ReCon menu options. Be sure to adjust the Field Of View (FOV) that matches the phantom size of FOV that your interested in viewing.
-
View the images view the browser.