- Topic ID: id_2030488
- Version: 2.0
- Date: Sep 13, 2021 2:15:11 AM
CERTIFICATE MANAGEMENT UI
The Certificate Management UI is designed for organizing public and private SSL certificates. It allows application on the scanner desktop to connect to the external servers securely using the SSL/TLS certificates that are imported into the Certificate Management application
1 Generate Host Certificates
To generate certificates using below command
Procedure
- Login as EA3 Admin
- Open an xterm
- Run the following command as root
# openssl req -newkey rsa:2048 -nodes -keyout hostkey.pem -x509 -days 365 -out hostcert.pem
note: During openssl command execution, user must enter input against ench itemCountry Name (2 letter code): [AU]
State or Province Name (full name): [Some-State]
Locality Name (eg, city): []
Organization Name (eg, company): [Internet Widgits Pty Ltd]
Organizational Unit Name (eg, section): [CT]
Common Name (e.g. server FQDN or YOUR name): [hostname]
Email Address: []
- When run this command two certificates will generate
- hostkey.pem -- Private Key (This can be used in Device/Server itself)
- hostcert.pem – Public Certificate (It can be used for to connect other devices)
2 Copy the certificates into USB
Procedure
- mountUSB
- cd /USB
- copy <path to certificates> /USB
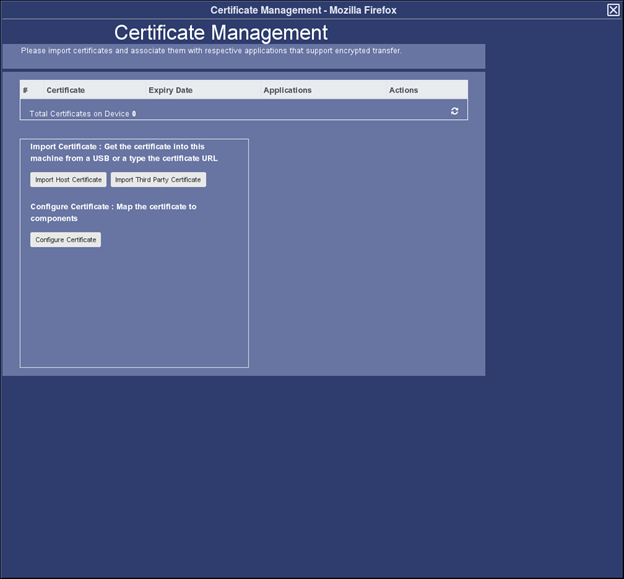
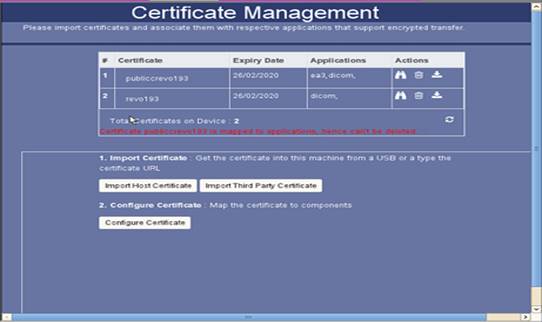
3 Launch Certificate Management UI
Procedure
- Login to EA3/HIPAA authentication page as administrator role or GE service role
- From System utilities Menu, select Service, to open the service desktop.
- Select Utilities Tab, select Security Center.
- Select Certificate management GUI menu item from Application Tab.
Figure 1. Certificate Management
 note: Application tab is not displayed when the current user doesn’t have EA3 admin or GE Service role.
4 Importing Certificate
4.1 Import Host certificate
Host certificate needs to be imported using USB.
After clicking on Import host certificate button following UI will be displayed:
Figure 2. Certificate Management- Import Host Certificate
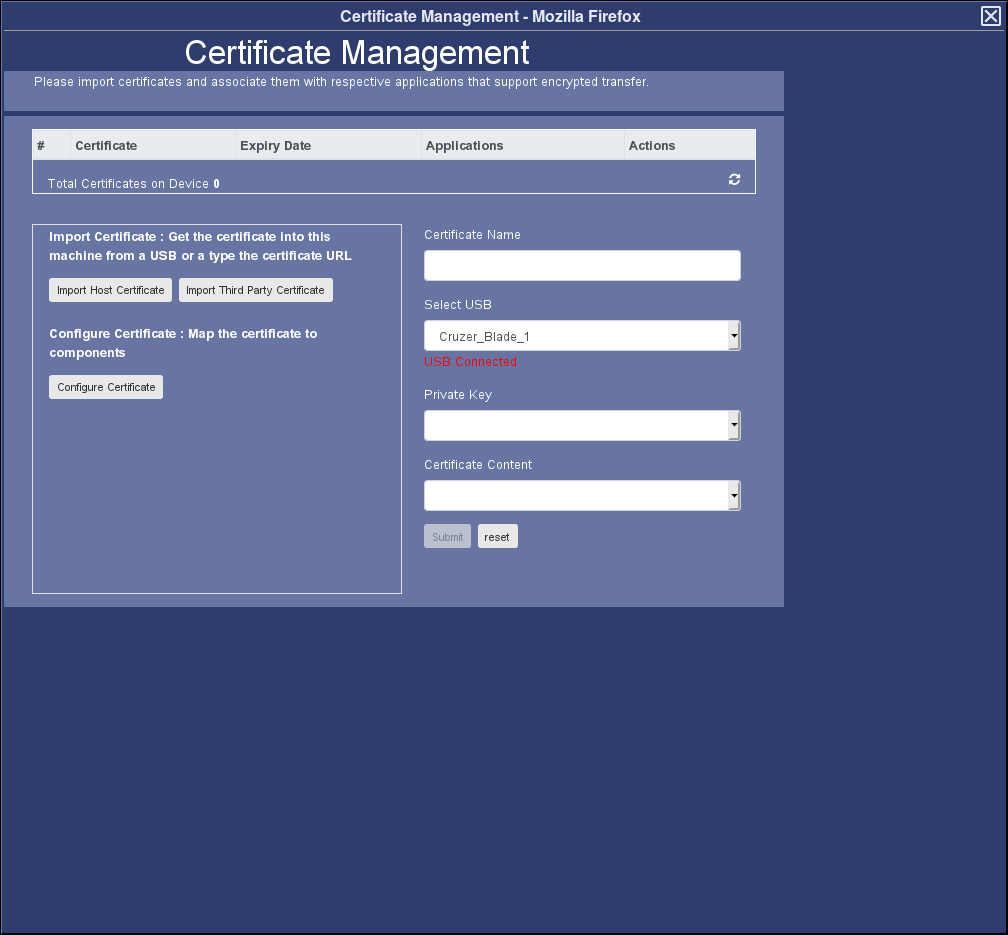
Procedure
- Enter certificate name.
- Select USB from dropdown
- Select the private key from dropdown
- Select the certificate content from dropdown and click on submit.
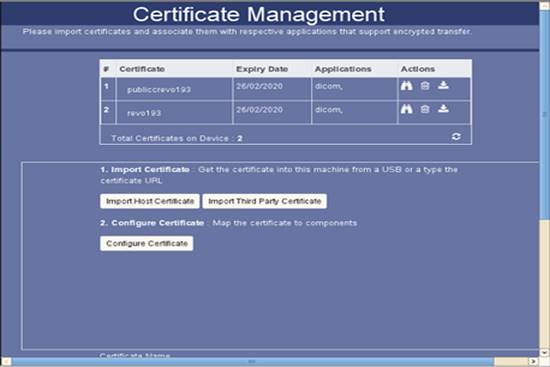
If certificate imported successfully then it will show success message.
The imported certificates will display in the table as shown below:
Figure 3. Certificate Management- Imported Host Certificate
4.2 Import Third-party certificate
Third-Party certificates can be imported using USB or URL.
After clicking on the “Import Third party certificate” button below screen will be displayed:
Figure 4. Certificate Management- Import Third party Certificate
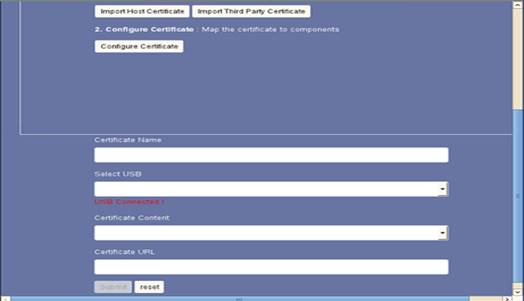
Procedure
- Steps to import Third party certificate using USB:
- Enter certificate name.
- Select USB from dropdown
- Select the certificate content from dropdown and click on submit
- Steps to import Third party certificate using URL:
- Provide certificate name.
- Provide certificate URL
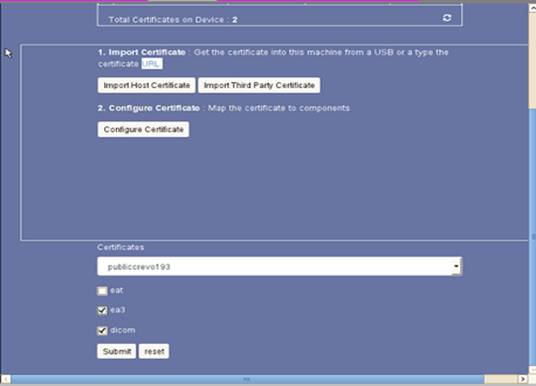
4.3 Configuring certificate to Applications
Procedure
- To configure certificates, click on the Configure certificate. Select the certificate and check the checkbox to which application that particular certificate should be configured.
Figure 5. Configure Certificate -based on selection
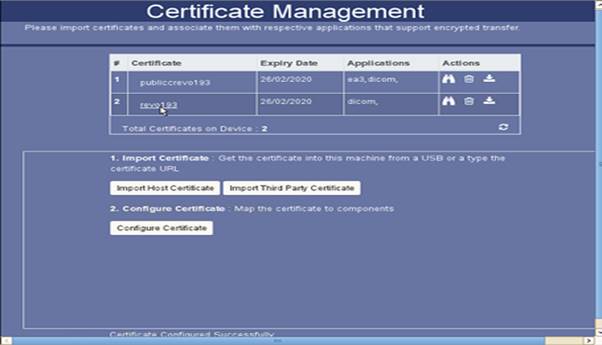
- After configuring it will display the success message and after refreshing the table the applications configured to particular certificates will display in the table.
Figure 6. Configured Certificate
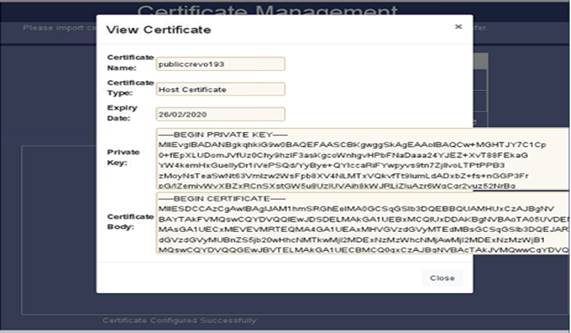
4.4 View certificate screen:
Procedure
- After clicking on the view icon of any certificate below screen will display.
Figure 7. View Configured Certificates
4.5 Delete certificate screen:
Procedure
- After clicking on the delete icon of any certificate below screen will display.
Figure 8. Delete Configured Certificates
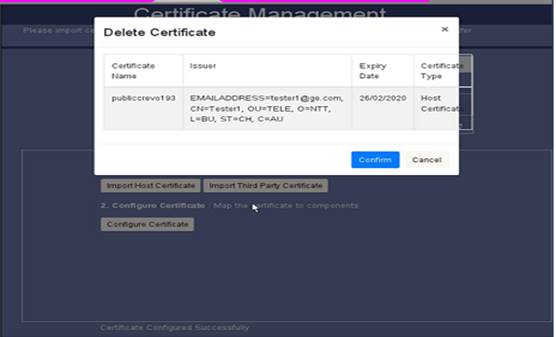
- Upon clicking on the confirm button, certificate will be deleted.
If certificate is configured to some applications and if we try to delete that certificate, it will not delete and show error message.
Figure 9. Message during deletion of Configured Certificates
 note: If we try to import already existing certificate it will display error message “Certificate Name already Exists hence failed to save”
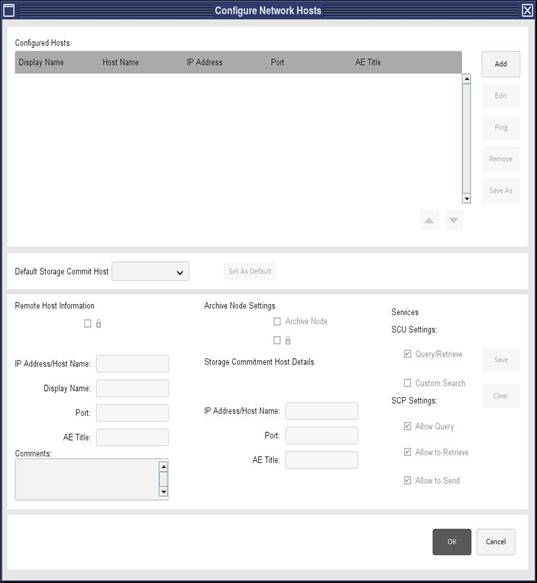
4.6 Configure a TLS capable DICOM network host
Follow the below steps to configure DICOM Image transfer over TLS.
Procedure
- Click on Network Configuration
- The following popup titled Configure Network Hosts dialog will get displayed:
Figure 10. Configure Network Hosts
- Click on Add button in the Configure Network Hosts UI.
Figure 11. Configure Network Hosts
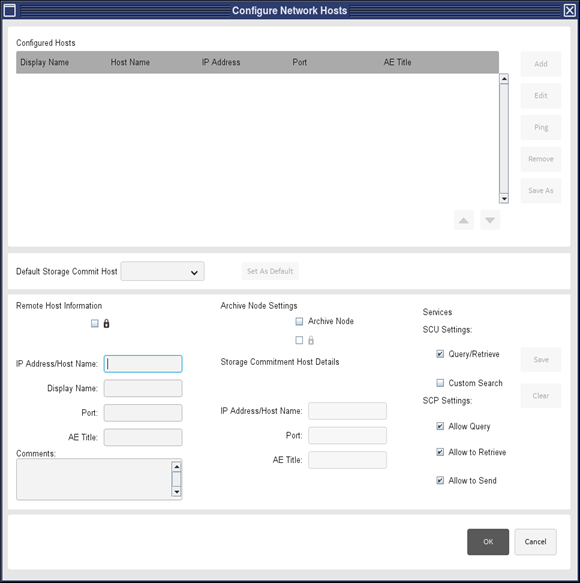
- Select the Secure Lock (
 ) checkbox under Remote Host Information.
 - Enter IPv4 address.
- Enter Hostname.
- Enter (or edit the default if needed) the Port number on which the remote DICOM TLS server is listening.
- Enter AE title.
- Click ok.
Figure 12. Configured Network Hosts
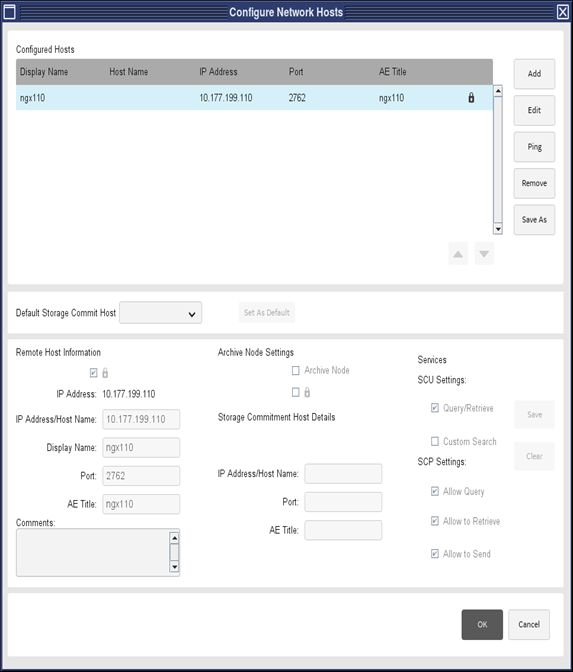
- Make sure the secure lock icon is displayed in the network host entry in the configured hosts list.
- Select configured network host entry and click on Ping. Ensure that remote host is alive. select Exam/Series/Image and perform any network operation on the configured host.