True-In-One Console Cover Removal and Installation
Prerequisites
Overview
Procedure Effectivity:
1 Side Covers
1.1 Removal Procedure
Procedure
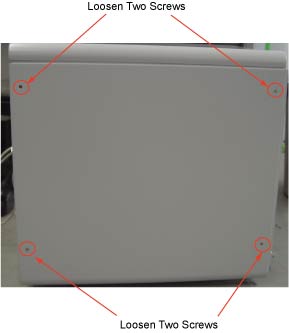
Remove the four screws at the side cover. See Figure 1
Figure 1. Side Cover Removal
Lift cover away, so that tabs disengage from bottom lip of opening
1.2 Installation Procedure
Procedure
Swing cover into position.
Insert top edge of side cover into inside of top cover. The
distance between side cover rear edge and chassis should be about
20mm
Move side cover forward and fix it on chassis
Tighten the four screws at the side cover.
2 Top Cover
2.1 Removal Procedure
Procedure
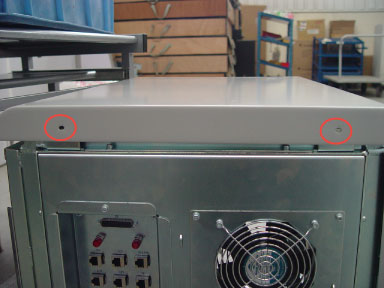
Remove the two screws at behind of top cover. See Figure 2
Figure 2. Top Cover Removal
Slide cover backward and lift it away.
2.2 Installation Procedure
Procedure
Insert two pins of top cover into the hole in the chassis.
Slide cover forward and fix cover on chassis.
Tighten two screws at behind of top cover
3 Front Cover
3.1 Removal Procedure
Procedure
From the service desktop, shut down the system.
Turn off console power.
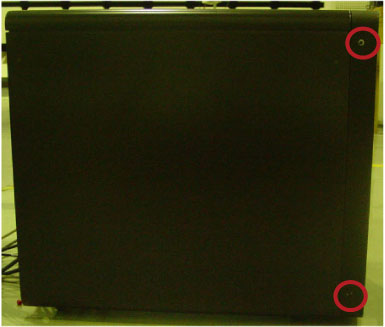
Remove two screws at right side of console (two screws on each
side). See Figure 3.
Figure 3. Front Cover Removal
Rotate bottom of cover outward and upward until it may be lifted
free of the console at the top.
3.2 Installation Procedure
Procedure
Place the front cover onto console.
Tighten two screws at both right and left side of console.
4 Power Switch Adjust
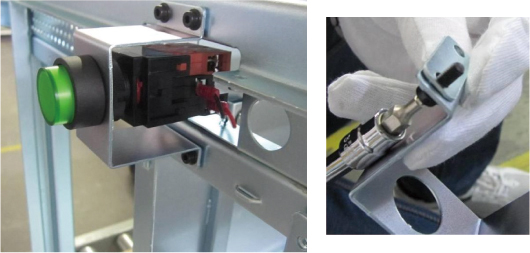
If the console power switch cannot fit properly and could not
function well, adjust the Console power switch bracket by adding or
removing the adjustment plate of the power switch bracket as below
illustration. See Figure 4. Two additional adjustment plates are stick
inside TIO console between ICOM and AC Outlet box.