- Topic ID: id_18717889
- Version: 2.0
- Date: Sep 26, 2020 10:13:43 PM
DAS Filter Replacement
Prerequisites
Overview
This procedure describes the replacement of the Gantry DAS Filter.
The DAS filters have a foam fitted filter on one side of the frame. Once the foam filter deteriorates, FEs can order a new foam filer as following in Table 5
1 Board Removal
Procedure
- notice
- Position the table to its lowest position.
- Remove the gantry right side cover.
- notice
- Turn OFF Axial Enable, HVDC, and 120VAC switches on the Service Switch panel.
- Remove the gantry top and front covers. refer to Gantry Front Cover Removal and Re-Install
- Position the DAS at the 9 o'clock position.
- Lock the gantry in position using the rotational lock.
- Put on wrist strap and use ESD precautions.
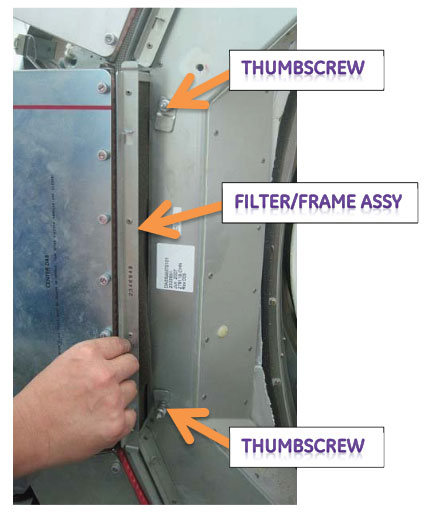
- Loosen the thumbscrew that holds the filter/frame assy, and
remove the filter/frame assy from the DAS plenum.
Figure 1. Thumbscrews
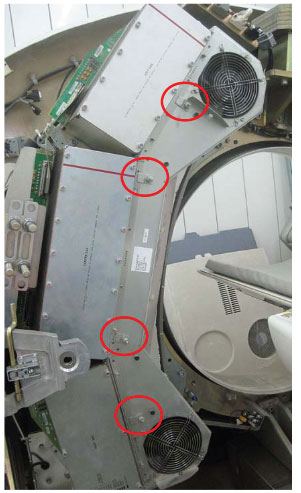
Figure 2. Filter/Frame Assy Removal
 |
|
2 DAS Filter Installation
Procedure
- notice
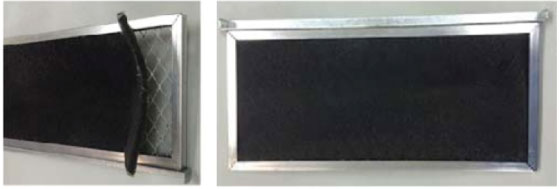
- Remove the dirty and broken filter from the aluminum frame,
then install the new one.
Figure 3. Filter Removal
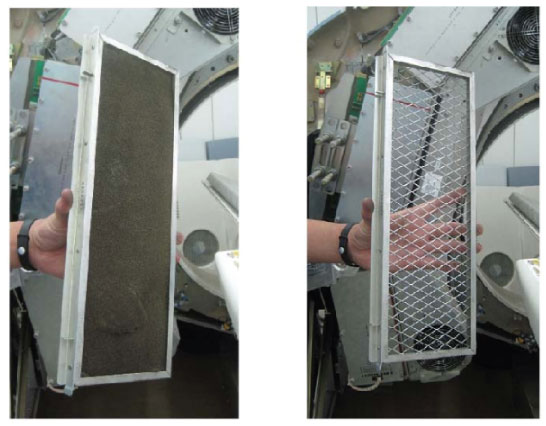
Figure 4. New Filter Installation
- Re-insert the filter/frame assy into the DAS plenum, and secure it with thumbscrew.
- Turn on the Axial and HVDC switches, on the Service Switch Board.
- Disengage rotational lock.
- Re-Install the Gantry Cover