- Topic ID: id_16158009
- Version: 3.0
- Date: Nov 27, 2020 2:16:28 AM
DAS Air Plenum Removal and Installation
Prerequisites
Overview
Remove Air plenum:
-
Rotate and lock gantry at the 12 O’clock position.
-
Disconnect fan power harness.
-
Remove air plenum.
1 Plenum Removal
Procedure
- notice
- Remove gantry covers, shut OFF power, and lock the gantry in position Accessing the DAS Assembly.
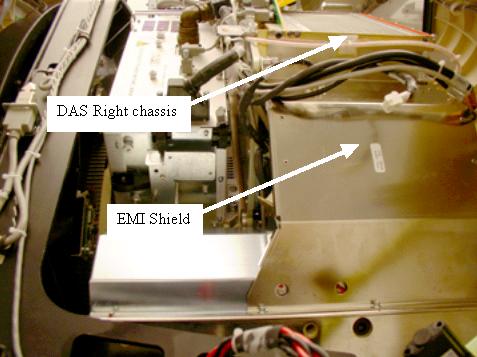
- Unscrew four (4) screws, and remove the EMI shielding plate if it exists
on the system (not all systems have this plate). See Figure 1.
Figure 1. DAS shielding plate
- Disconnect Fan AC power at Connector J22.
- Set air baffles on either end of the duct to the “Removal Position”
(see Figure 2):
- Loosen knurl nuts
- Slide baffle into position
- Hand tighten knurl nuts
Figure 2. DAS Air Plenum: Baffle & Mounting Bolts
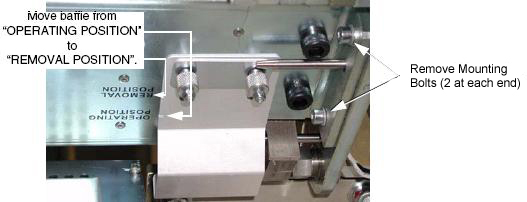
- Remove four (4) mounting bolts (2 at each end). See Figure 2.
- Carefully slide the plenum towards the front, without catching wires or Detector flexes.
- Set the plenum aside, on a clean surface.
- Continue with replacement procedures that required removal of this plenum.
 |
2 Plenum Installation
Procedure
- Ensure that baffles are secured in “REMOVAL POSITION”.
Figure 3. DAS Air Plenum Installation
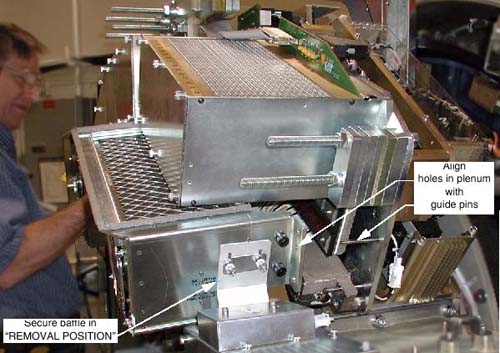
- Lift plenum into place, and align guide holes with guide pins.
- Slide plenum onto guide pins.
- Fasten plenum securely into place, using the four (4) mounting bolts
and four lock washers. Torque to the following values depending on which system
type you have.
- Return baffles to the “OPERATING POSITION”.
- Install the EMI shielding plate using four (4) screws, lock washers,
and flat washers. Torque to values shown in Table 5.
- Connect Fan AC power at Connector J22.
- Remove rotational lock, restore power and reassemble gantry covers.
3 Finalization
No finalization steps.