- Topic ID: id_15460131
- Version: 4.0
- Date: Apr 22, 2019 12:56:51 AM
Gantry Filter Cleaning and Rotational Checks
1 Safety
 |
|

|
|
2 Detector Plenum Filter Cleaning
-
Remove the fan plate to access the filter assembly. (With the fan plate off, the filter is exposed for cleaning.) (For procedures to remove the fan plate, see Plenum Fan, Fan Plate Assembly Replacement
-
Use the HEPA vacuum to clean the filter through the opening in the plenum behind the fan plate.
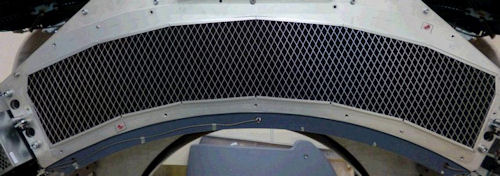
note:Be careful around the plenum thermistors. See Figure 1, showing the thermistors, cabling and grillwork covering the filter.
The grill is there to provide stiffness to the filter assembly and to make sure the EMC mesh on the back of the filter is not damaged during cleaning.Figure 1. Plenum Filter and Thermistors

-
Reinstall the fan plate and connections, following the recommended torque specs found in the Plenum Fan, Fan Plate Assembly Replacement procedure.
-
Clean off any debris that may be on the detector face plate using warm soapy water.
3 Detector Plenum Filter Cleaning (Cj M40)
-
Remove the Plenum Duct Fan as follows:
-
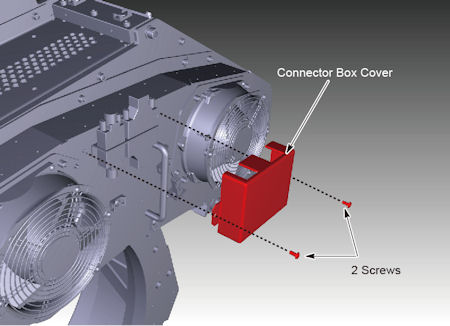
Remove the connector box cover.
Figure 2. Connector Box Cover Removal
-
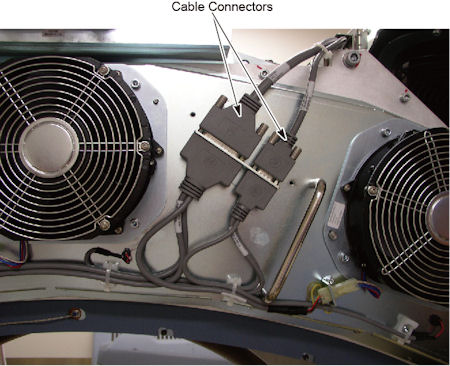
Disconnect two cable connectors.
Figure 3. Cable Connectors
-
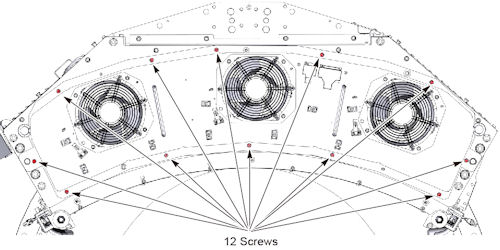
Remove 12 screws holding the plenum duct fan to the DAS assembly.
Figure 4. Location of 12 Screws
-
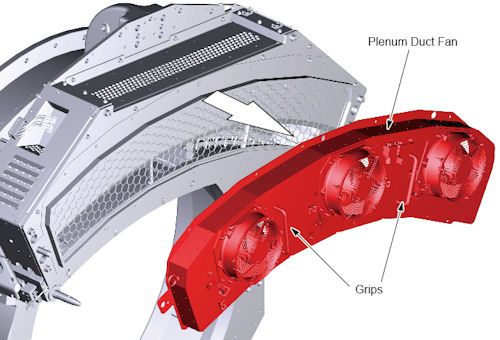
Hold the grips on the plenum with both hands, and remove the plenum duct fan straight away from the gantry to avoid bending the plenum alignment pins on either side of the plenum.
Figure 5. Plenum Duct Fan
-
-
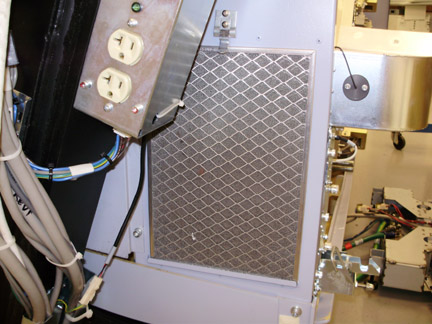
Use the HEPA vacuum to clean the filter through the opening in the plenum behind the fan plate.
note:The grill is there to provide stiffness to the filter assembly and to make sure the EMC mesh on the back of the filter is not damaged during cleaning.Figure 6. Plenum Air Filter
-
Reinstall the plenum dust fan and connections, following the recommended torque specs found in the Detector Air Plenum Removal and Installation procedure.
-
Clean off any debris that may be on the detector face plate using warm soapy water.
4 Gantry Filter Cleaning
-
Initially vacuum the gantry filter while it is in place to avoid shaking dust and debris loose.
Figure 7. Gantry Filter on Gantry Left
-
Remove the gantry filter and vacuum it from the front to pull the dust and debris out of the filter.
note:Vacuuming from the back first may pull dust deeper into the filter making it harder to remove.
Vacuum the back (after cleaning the front) to remove any dust that penetrated the filter.
-
Reinstall the gantry filter.
5 Gantry Top Cover Fans
Vacuum the fans on the top of the gantry cover.
6 Rotating Path Components and Cables Inspection
-
Remove the gantry rotational lock, if engaged.
-
Rotate the gantry by hand and inspect all cables in the rotational path for signs of wear.
-
Check that all cable keepers are installed and tight.
-
Inspect the gantry cover cable and confirm that all cable keepers are in place, and the cables are not falling into the rotational path.