- Topic ID: task_pvl_4ty_yrb
- Version: 2.0
- Date: Mar 2, 2022 10:16:01 PM
SmartMAR Feature Connection
Prerequisites
1 Reference Document
Procedure
- Edison 1.5 HealthLink Platform Site Installation Manual (DOC2445146)
- Edison 1.5 HealthLink Platform Service Guide (DOC2445143)
- Smart Subscription SmartMAR Installation Manual. (5872348-1EN)
2 How to Check CT eth0 IP address
The CT Private IP address is necessary by CT option key install.
Procedure
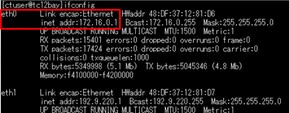
- Open shell and type following command.
ifconfig and press [Enter]
- Record the [inet adder:] of eth0.
eth0 inet addr : ___________________
- Type exit and press [Enter] for close shell.
Figure 1. Example inet addr is 172.16.0.1
3 How to Check CT Hostname
The CT Scanner Hostname is necessary by Device Registry on EHL Admin Console.
Procedure
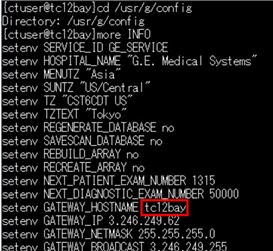
- Open shell and type more /usr/g/config/INFO and press [Enter].
- Record the hostname (GATEWAY_HOSTNAME)
GATEWAY_HOSTNAME : ________________________
Figure 2. CT Hostname
- Type exit and press [Enter] for close the shell.
4 CT Option [SmartSubscription - SmartMAR] Install
Refer to [Software] → [Software Installation Procedure (LFC)] → [Install Software Options by eLicense] in [Optima CT660 Service Methods] for Option key Install Procedure
Procedure
- Install Option [SmartSubscription - SmartMAR]
5 How to set for Remote Recon enable
Procedure
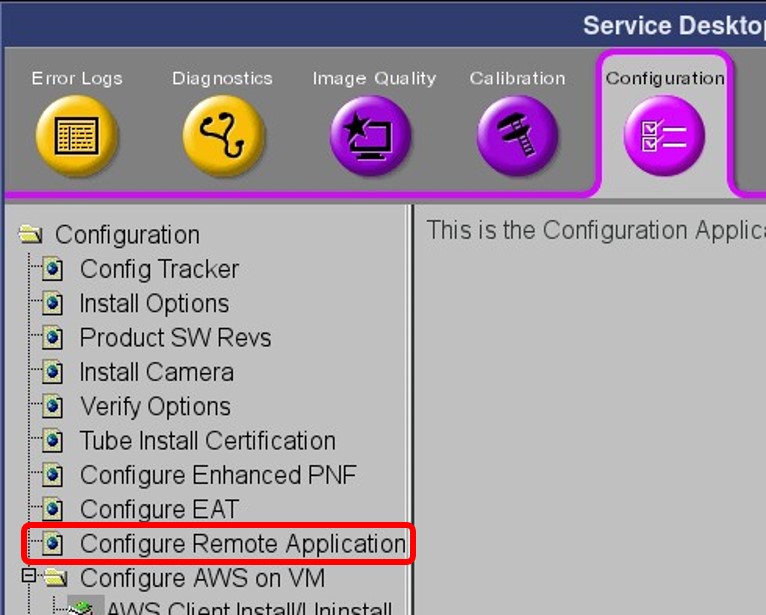
- Open CSD and Click “Configure Remote Application” in Configuration Tab.
Figure 3. Configure Remote Application
- Confirm the following window is appeared.
Figure 4. Device Bootstrap
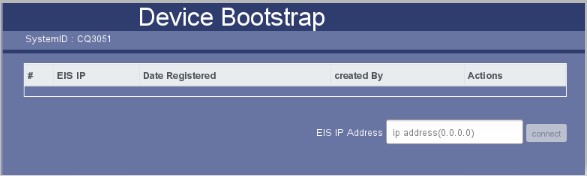
- Enter the “Edison private proxy IP (external-net1)” to EIS IP Address and click “Connect”note: Use the IP address recorded in the previous step.
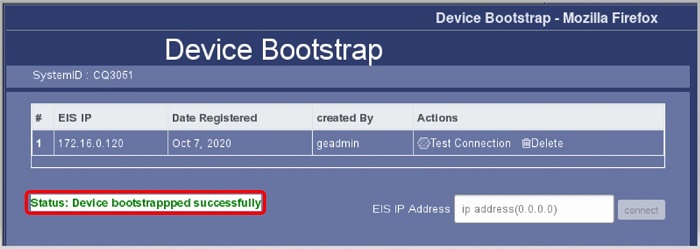
- Confirm the following Message in the window.
Status: Device Bootstrapped Successfully
Figure 5. Message in Device Bootstrap window
- Close this window using click upper right corner.
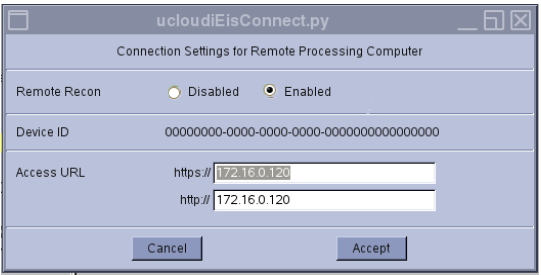
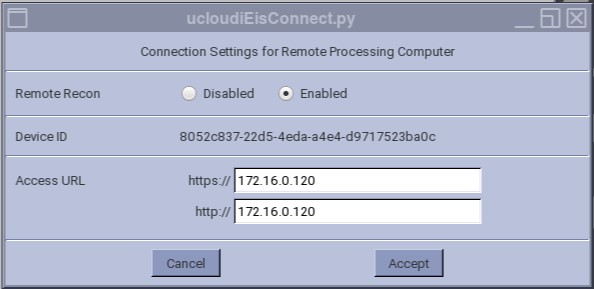
- The following window pops up. Select “Enabled” on the “Remote Recon” selection.
Figure 6. Attention –Connection setting for Remote Recon
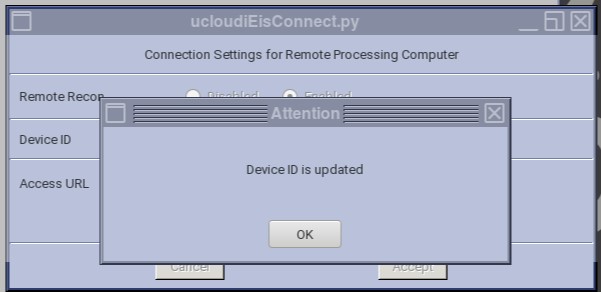
- Then Device ID will update automatically. Click "OK" to proceed.
Figure 7. Attention - Device ID is update
- Select “Enabled” to enable “Remote Recon” feature and click “Accept” to proceed.
Figure 8. Enable Remote Recon
- Click “OK” to proceed.
Figure 9. Attention Window
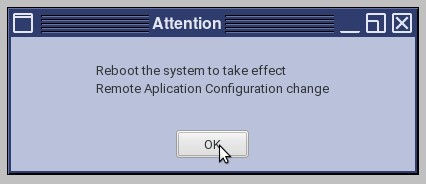
- Reboot the CT system for this option to take effect.
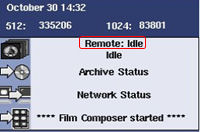
- After CT Console is rebooted, confirm following status.
“Remote: Idle” is display in Recon status of FSA
Figure 10. Remote Recon Status
6 Add Remote Host to Network Manager for EHL
Procedure
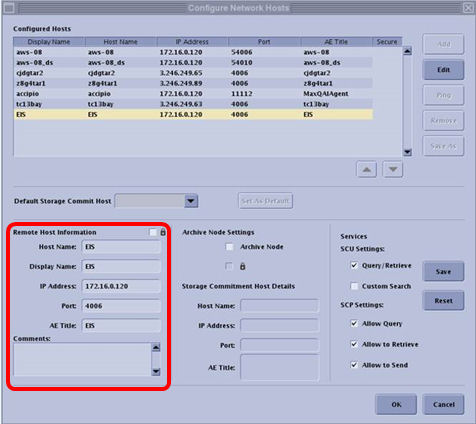
- On the Image Works Browser, click "Network Configuration" under the "Tools" sub-menu.
- Add the following remote hosts [EIS].
Refer to [Check Private Proxy IP address of EHL] of [Smart Subscription SmartMAR Installation Manual about Recorded Edison private proxy IP address.
Figure 11. Remote Host Information
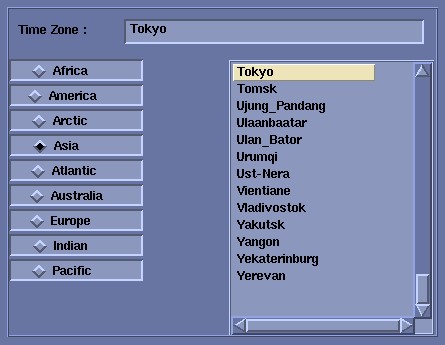
7 Setting the Remote Recon Time/Zone
Procedure
- Open shell and type /usr/local/bin/update_dig_timezone.py "Time/Zone". Then, press [Enter].note:
The “Time/Zone” should be match with the CT Console configuration
Example: /usr/local/bin/update_dig_timezone.py "Asia/Tokyo"
Figure 12. Time Zone
- Type cd /usr/local/bin and press [Enter].
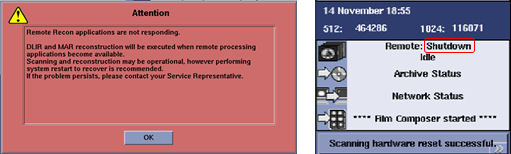
Type restart_recon_pods.py and press [Enter].
The following status is showing during this process is running.
Figure 13. Example: Status during process execution
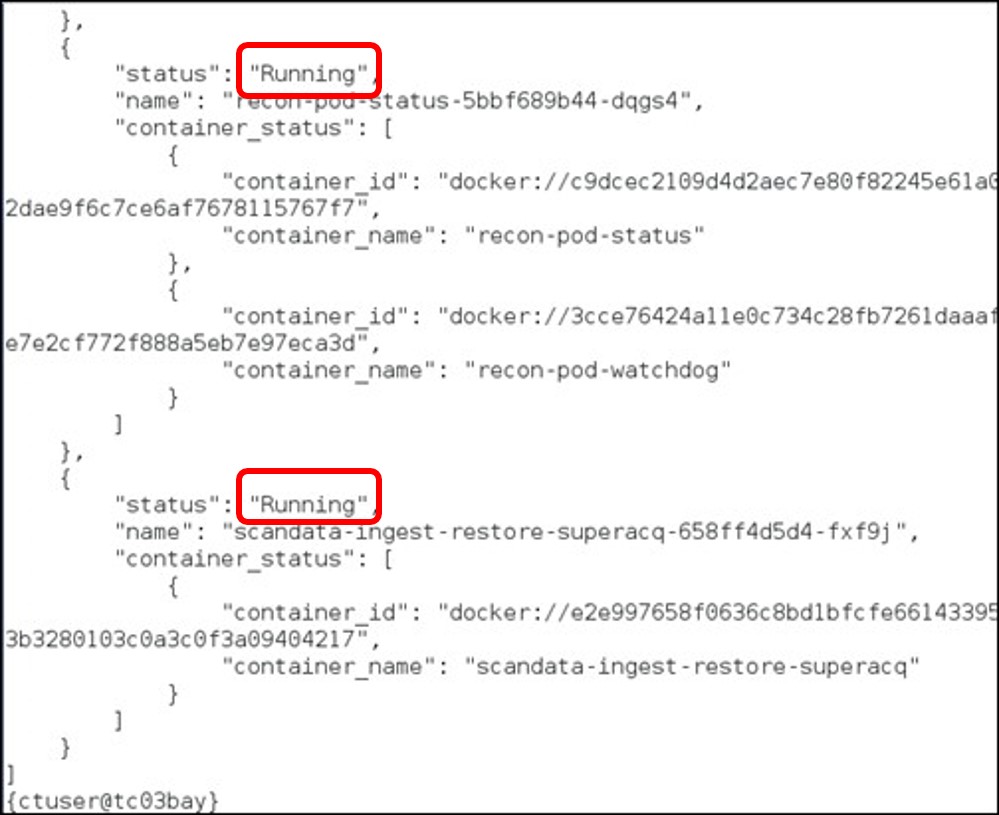
- Type get_pods.py and press [Enter].
- Confirm that the all status are “Running” as shown below.
Figure 14. Containers Status
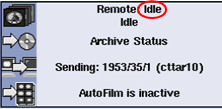
- Remote Recon status will return to “Idle” when after the process is complete.
Figure 15. Remote Recon Status
- Confirm that the all status are “Running” as shown below.
8 Finalization: System Function Check
Procedure
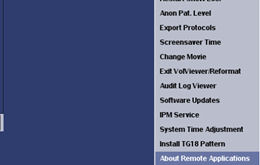
- On the Image Works Browser, click “About Remote Applications” under the “Tool Chest” sub-menu.
Figure 16. Tool Chest - Sub-menu
- Confirm the Application Label of “SmartMAR” window is display.
Figure 17. Example: Application Label
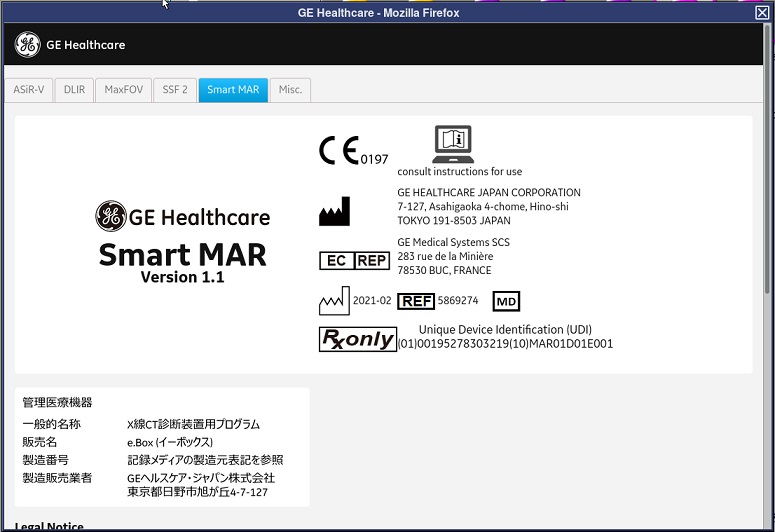
- Record the Unique Device Identification (UDI).
- UDI (01) : ___________________
- UDI (10) : ___________________
Figure 18. Example: Application Label
- Create New Exam using SmartMAR in PMR2 and execute the Scanning.Example: The "Recon Option" TAB, GUI example is shown below, and execute the Scanning.
Figure 19. Recon Option TAB on PMR2
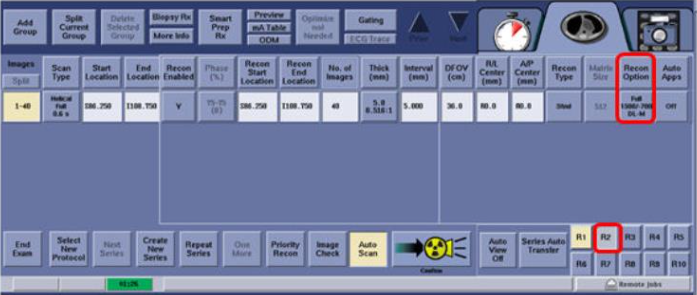
Figure 20. SmartMAR Setup
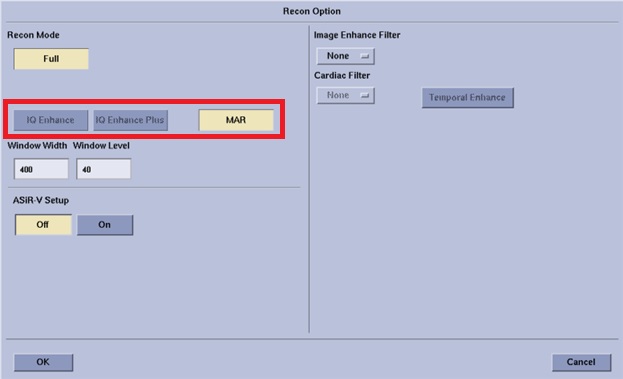
- Confirm SmartMAR images are reconstructed with no error.
Figure 21. Example: SmartMAR Setup ON