- Topic ID: task_r1r_hln_13b
- Version: 3.0
- Date: May 22, 2020 4:17:30 AM
Open Console (Z8G4) Scan Data SSD Module Replacement
Prerequisites
Overview
This procedure shall be followed when replacing the Scan Data SSD (Solid State Disk) Module in the Z8G4 computer.
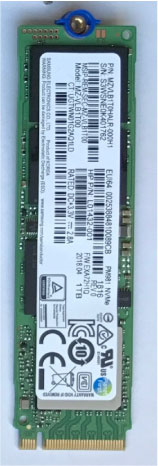
Figure 1. Scan Data SSD Module
1 Scan Data SSD Module Replacement Preparation and Location
Procedure
- Select one of the following methods to Power OFF the Operator Console:
- If Applications are up, click on the [Shut Down] button and select [Shutdown].
The Operator Console monitor will display a 'System halted' message when it is acceptable to power OFF the Operator Console.
- If Applications are down, open a Unix Shell. Type: halt.
- If Applications are up, click on the [Shut Down] button and select [Shutdown].
- Power OFF the console at the front panel switch.
- Apply LOTO. See Equipment Service - Lockout-Tagout-PPE
- Locate Scan Data SSD by referencing the Illustration below.
Figure 2. Scan Data SSD Assembly Location
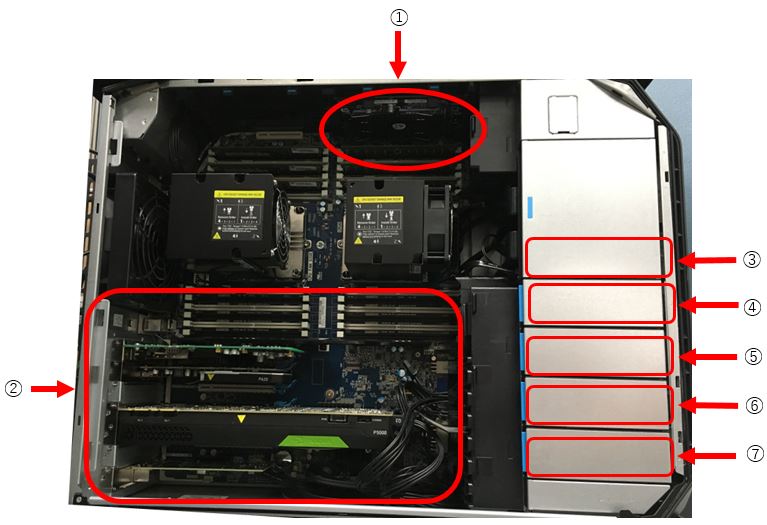
① Scan Data SSD Assembly ② PCI Slot ③ DVD Drive ④ Empty ⑤ Empty ⑥ Image Disk ⑦ OS and App Disk
2 Scan Data SSD Module Removal
Procedure
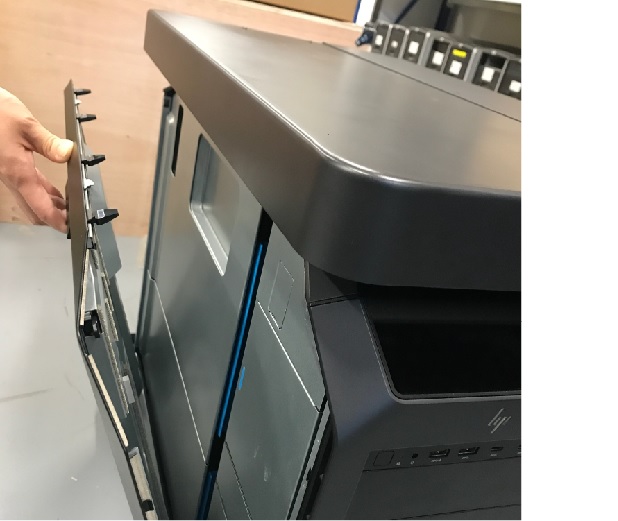
- Pull out the latch to release the host computer left side cover.
Figure 3. Side Access Panel Removal
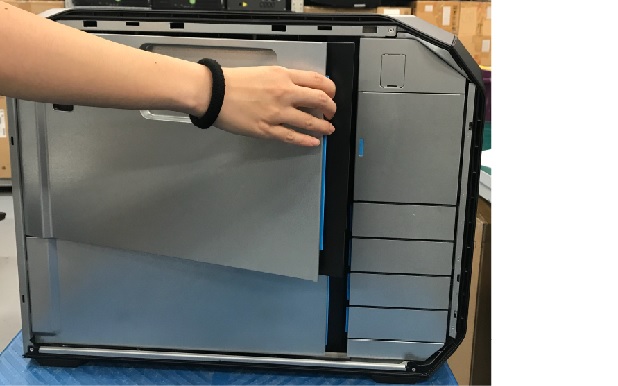
- Open and remove the module small side cover
Figure 4. Remove module small side cover
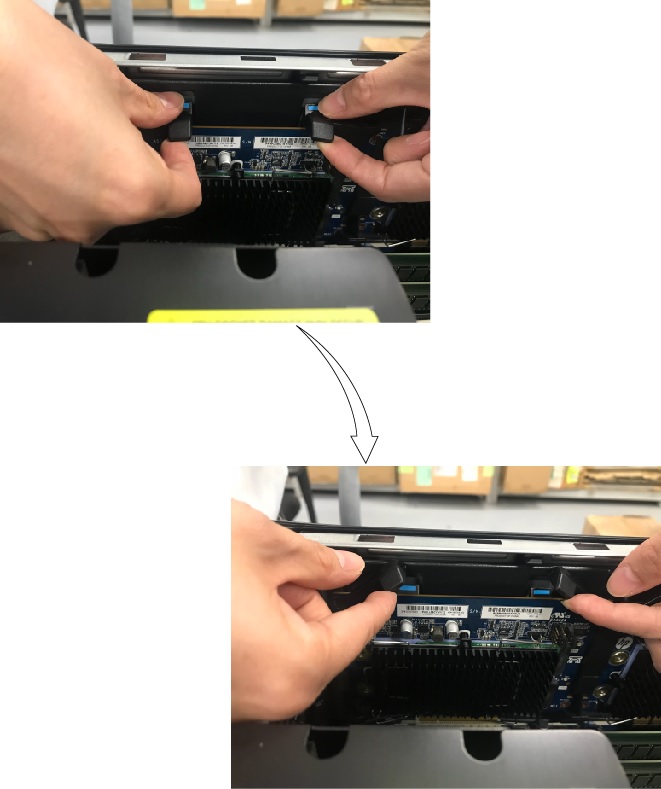
- Press down the latch, release the clamp and lift up the scan data SSD assembly from the slot carefully.
Figure 5. Scan Data SSD Assembly Removal
- Remove the SSD module from the SSD assembly.
Figure 6. Remove SSD Module 1
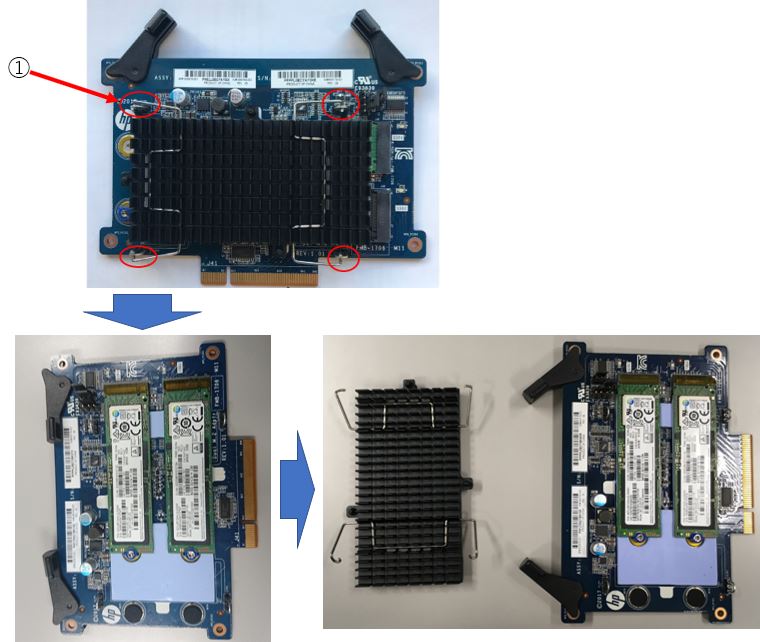
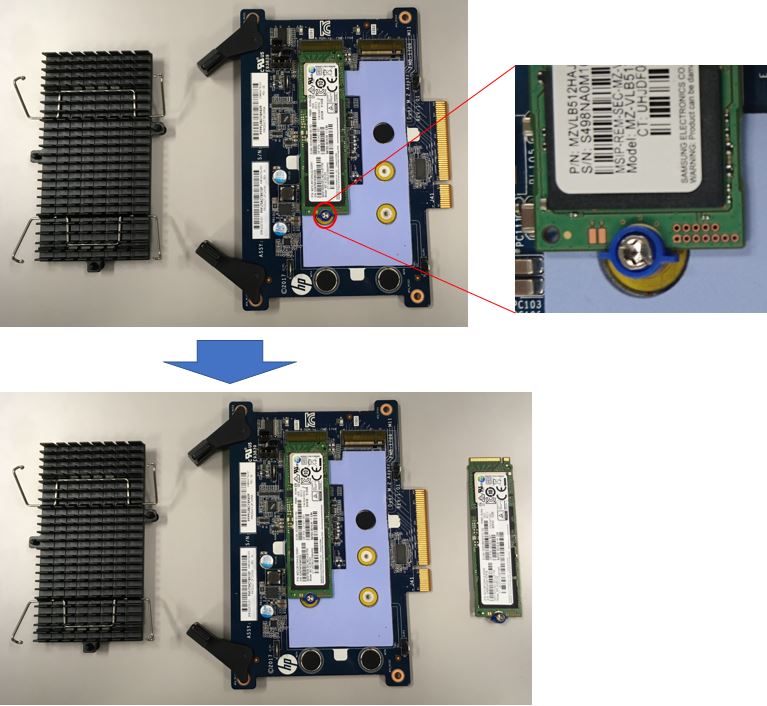
① Release the hook and remove the SSD module from the SSD assembly. - Remove the SSD module from the SSD assembly by removing the screw.
Figure 7. Remove SSD module 2
3 Scan Data SSD Module Install
Procedure
- Install the new SSD module in the Scan Data SSD Assemble and tighten the screw.
- Install the heat sink in the SSD assembly by tighten the hook.
- Install the Scan Data SSD assembly which is replaced to new SSD module, align the keyway with the slot key, and firmly seat the Scan Data SSD assembly in the slot.
- Retention Clamp
4 Finalization
Procedure
- Reinstall module small side cover.
- Reinstall the host computer left side panel.
- Power ON the operator console. Start up sequence stops before application start up.
- Rebuild RAID
- When a SSD module fails, replace it and execute following commands to rescue scan files.
-
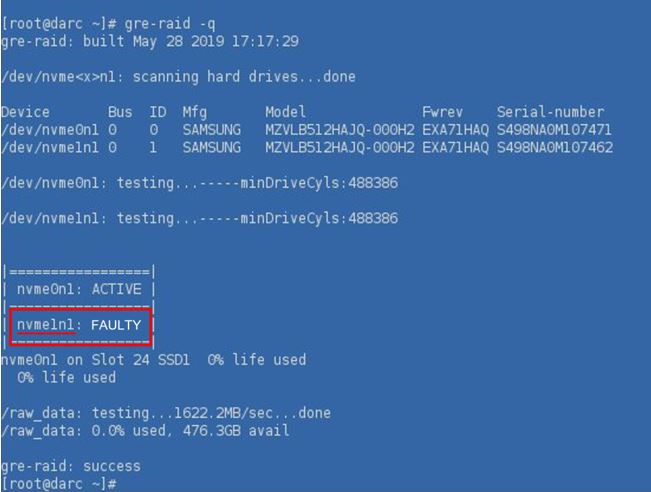
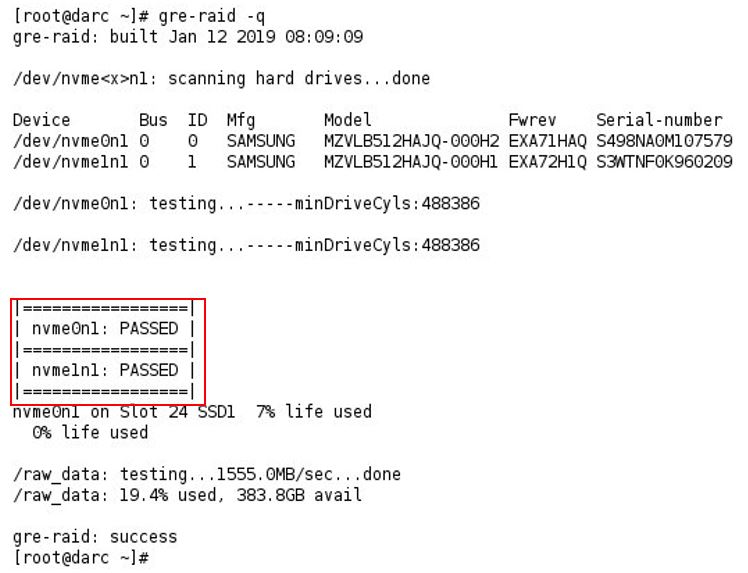
Check which module replaced. Use gre-raid –q command on DARC at root user.
{ctuser@host}ssh darc
{ctuser@darc}su –
Password: root user password
{root@darc}gre-raid -q
Figure 8. gre-raid –q Command
-
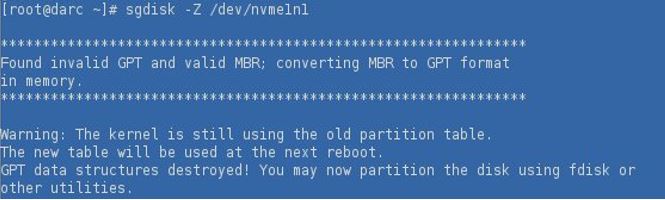
Use sgdisk –Z command to erase disk partition.
{root@darc}sgdisk -Z /dev/nvme1n1
note:Please use the actual failed module name on site instead of nvme1n1 in above command.
Figure 9. sgdisk –Z Command
-
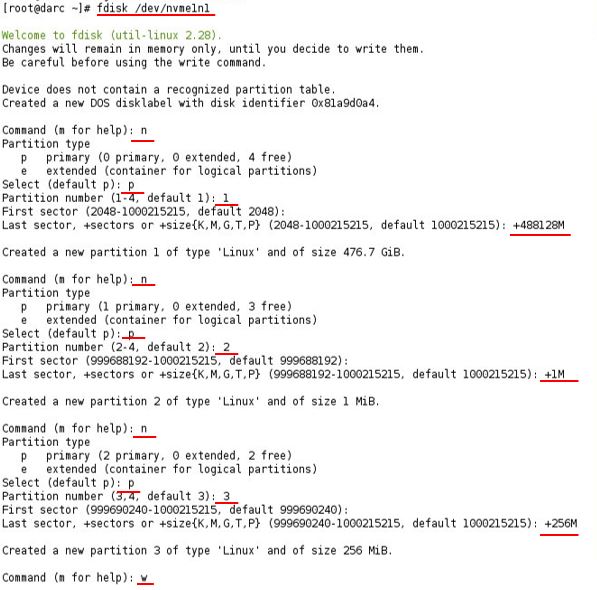
Use fdisk command to create partition for new module.
{root@darc}fdisk /dev/nvme1n1
Command (m for help): n (Enter)
Select (default p): p (Enter)
Partition number (1-4, default 1): 1 (Enter)
First sector(2048-1000215215, default 2048): (blank) (Enter)
Last sector, +sectors or +size{K, M, G, T, P}(default 1000215215):+488128M (Enter)
Command (m for help): n (Enter)
Select (default p): p (Enter)
Partition number (2-4, default 2): 2 (Enter)
First sector (999688192-1000215215, default 999688192): (blank) (Enter)
Last sector, +sectors or +size{K, M, G, T, P} (999688192-1000215215, default 1000215215):+1M (Enter)
Command (m for help): n (Enter)
Select (default p): p (Enter)
Partition number (3-4, default 3): 3 (Enter)
First sector (999690240-1000215215, default 999690240): (blank) (Enter)
Last sector, +sectors or +size{K, M, G, T, P} (999690240-1000215215, default 1000215215): +256M (Enter)
Command (m for help): w (Enter)
note:Please use the actual failed module name on site instead of nvme1n1 in above command.
Figure 10. fdisk Command
-
Use “mdadm --zero-superblock” command to erase disk superblock.
{root@darc}mdadm --zero-superblock /dev/nvme1n1p1
note:Please use the actual failed module name on site instead of nvme1n1 in above command.
-
Use “mdadm --add” command to add new module into RAID disk array.
{root@darc}mdadm --add /dev/md0 /dev/nvme1n1p1
note:Please use the actual failed module name on site instead of nvme1n1 in above command.
-
Use “mdadm –D” command to check the RAID rebuild status.
{root@darc}mdadm -D /dev/md0
Figure 11. RAID Rebuild Status from 0% to 100% complete
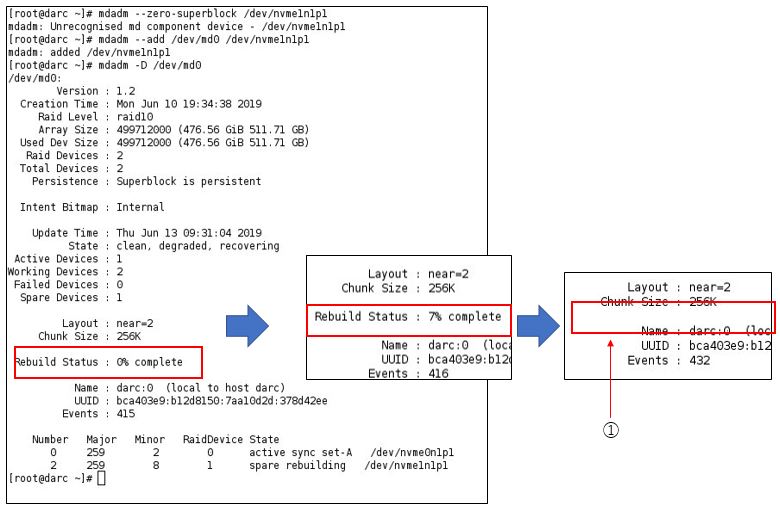
① The displayed status disappears when the status rebuilding is 100% complete. -
Use “gre-raid -q” command to check RAID rebuild completed.
{root@darc}gre-raid -q
Figure 12. RAID Rebuild Status
-
- In case of two failed modules were found, replace them and execute Recreate Scan Disk Array in Reconfig menu. Scan file will be erased.
Recreate Scan Disk Array takes approximately 10 minutes.
System reboots automatically and stops before application.
- When a SSD module fails, replace it and execute following commands to rescue scan files.
- Open shell window and type st to start up application.
- Refer to System Scanning Test to confirm proper operation.
- Remove LOTO on console.