This procedure describes and illustrates the steps necessary
to replace the DVD Peripheral Tower.
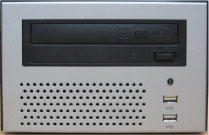
Figure 1. PMT (Single Bay)
1 Power-off (Shut Down) the Console
System requires a power-down sequence when replacing the DVD
Peripheral Tower. Operating System may not recognize the USB port
connections if the DVD Peripheral Tower is replaced without cycling
the console power.
Procedure
Select one of the following methods to power off the Operator
Console:
If applications are running, click
the Shut Down button on desktop display and select Shut Down.
If applications are down, open a Terminal
Window. Type: halt , then press Enter.
The Operator Console monitor will display a System
Halted message when it is acceptable to power off the Operator
Console.
Power OFF the Operator Console at the front panel switch.
2 Remove Old DVD Peripheral Tower
Procedure
Remove the USB cable connections from the back of the peripheral
tower chassis being replaced.
note:
Verify that all cables are labeled and clearly marked;
if necessary, add a label for clarity.
Remove the power cord(s) at the rear of the DVD Peripheral Tower
chassis.
Remove the original DVD Peripheral Tower and set aside.
3 Install Replacement DVD Peripheral Tower
Procedure
Place the replacement DVD Peripheral Tower chassis on the Operator
Console.
Mount the power cord(s) to the rear of the DVD Peripheral Tower
chassis. Verify that the power switch on the DVD Peripheral Tower
power supply is turned to the ON position.
Replace the rear USB cable connections.
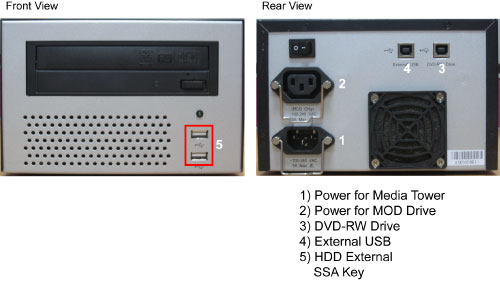
Figure 2. DVD Peripheral Tower Connections
4 Functional Checks, Alignments and Setups
Procedure
Power On console.
Confirm that the power switch on the rear of the DVD Peripheral
Tower assembly is turned on.
Confirm that the green Power Status LED on the DVD Peripheral
Tower front panel is lit.
Figure 3. DVD Peripheral Tower Power Status LED
Verify that the cooling fan at the rear of the DVD Peripheral
Tower is operational.