- Topic ID: id_18480324
- Version: 3.0
- Date: Jan 20, 2020 8:34:10 PM
Ball Bearing Tube Restoration Procedure
Prerequisites
Overview
This section explains the procedure to install Performix40 Tube from Performix40 Plus Tube. The software 15HW25.x can be used on both of Performix40 Tube and Performix40 Plus Tube, then LFC is not needed.
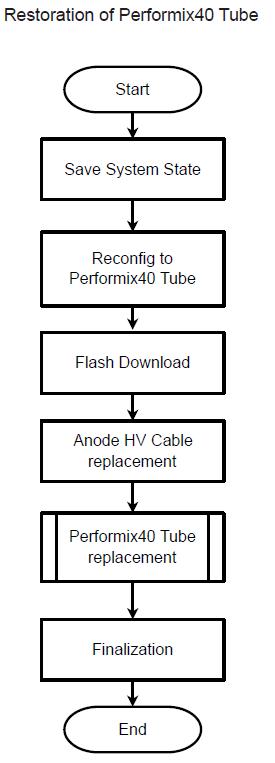
Figure 1. Flowchart of BB Tube Restoration
Procedure
- Perform Save System State
- Using CSD > Utilities > System State.
- Insert DVD or USB memory and press “Save System State”.
- Insert DVD or USB memory and press “Save System State”.
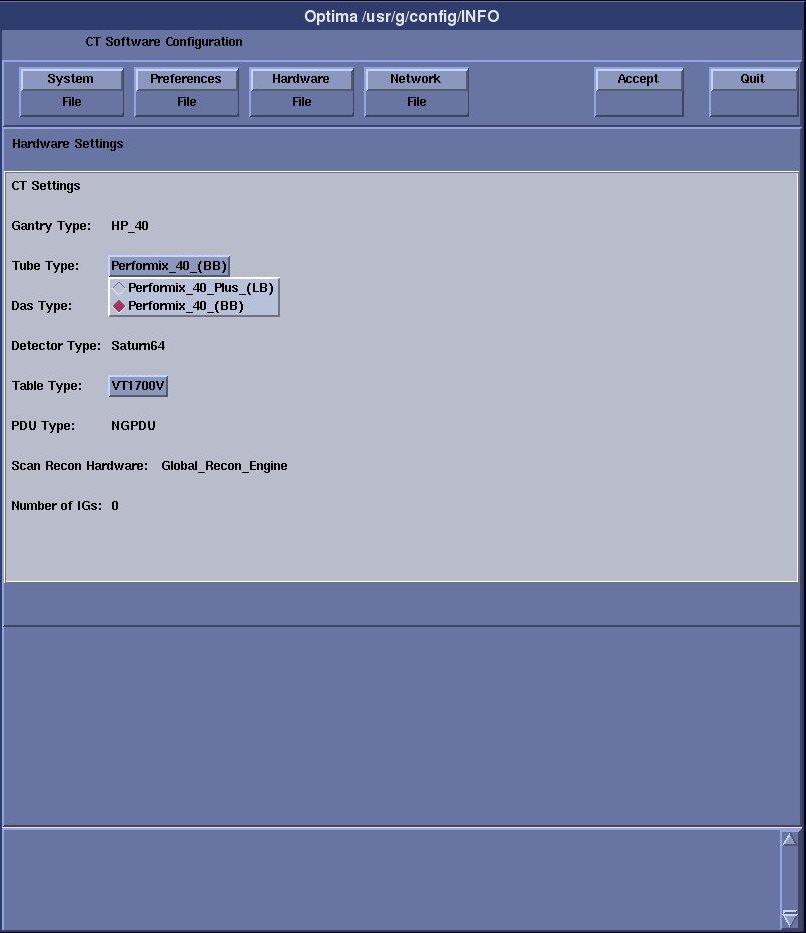
- Execute “reconfig” to change Tube type to Performix40
(BB). Go to Hardware Tab and select Performix40 (BB) from Tube type.
Refer to the System Configuration - RIO.
Figure 2. Screen capture of reconfig for Tube type.
- Perform Flash Download
- Using CSD > Utilities > Flash Download.
- Press “Update”.
- Once the Gantry Hardware Flash Downloads successfully, select [Dismiss].
- Replace Anode HV Cable with original one (5128609-11).
- Install Performix40 Tube. Refer to the X-ray Tube Replacement.
Finalization
- Perform sanity scan with the following technique and confirm
they completed successfully.
Scout, Axial and Helical.
- Keep Perenna Anode HV Cable Assembly (5429083) at customer safe place in further use.