- Topic ID: id_17423227
- Version: 4.0
- Date: Apr 22, 2019 12:56:50 AM
General Console Cleaning and Inspection
1 General Console Cleaning and Inspection
1.1 NIO64 Console Chassis, Filter Cleaning and Inspection
-
Remove the front, left and right sides covers. (For procedures, see
note:If the amount of dust is thick, remove this dust from screens and fans by hand.
Do Not open the console components, such as the computers and AC Box to clean inside.
-
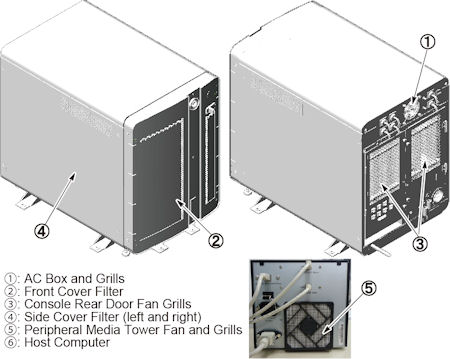
Use a vacuum cleaner with a HEPA filter and soft brush to carefully clean the following components:
Figure 1. OC Filters
-
Clean and vacuum the keyboard.
-
Visually inspect the following items for wear:
-
Check for loose or worn cables. All console component cable connections should be tight to the touch.
-
Check that the trackball and mouse operation is smooth. Clean the ball, as needed.
-
-
Reinstall the console covers.
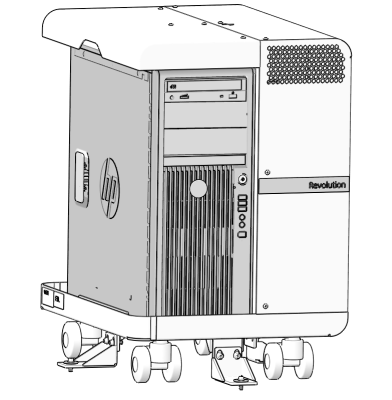
1.2 Open Console Cleaning and Inspection
Open Console has no filters.
-
Inspect Open Console. If necessary clean exterior surfaces.
-
Vacuum exterior air intakes and exhaust ports of the host computer and open chassis vents.
-
Clean and vacuum the keyboard.
-
Visually inspect the following items for wear:
-
Check for loose or worn cables. All console component cable connections should be tight to the touch.
-
Check that the trackball and mouse operation is smooth. Clean the ball, as needed.
Figure 2. Open Console
-
2 Visual Fan Inspection
Open Console has no visual fan.
-
Check that the fans in the rear of the console are operational.
note:It is not necessary to remove the rear covers
-
Confirm that the fan in the media tower is operational.
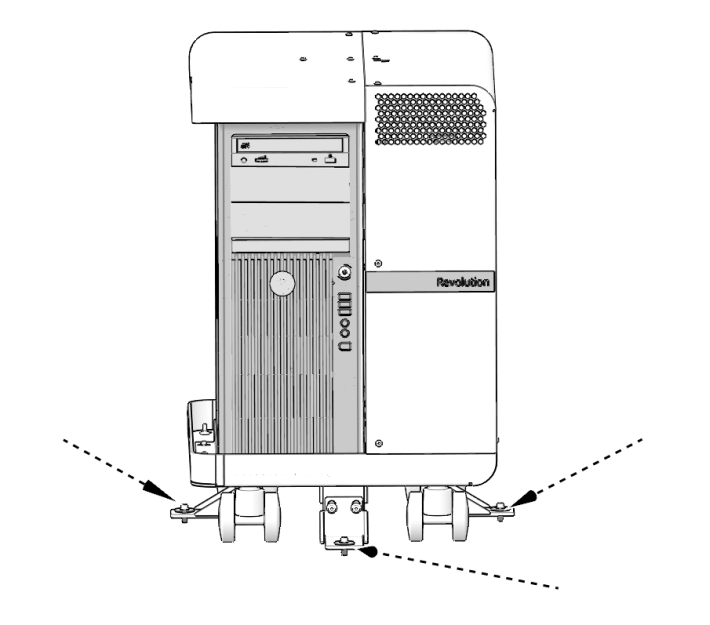
3 Seismic Anchor Inspection
-
Not every system has seismic anchors. If your system does, check to see if you can move the anchor washer by hand.
-
If moveable, follow the procedures in the state-issued seismic installation directions for your site, to inspect the anchors and re-torque them, if necessary.
note:Due to variances in local ordinances and mounting hardware, torque values may vary.
Figure 3. Console Seismic
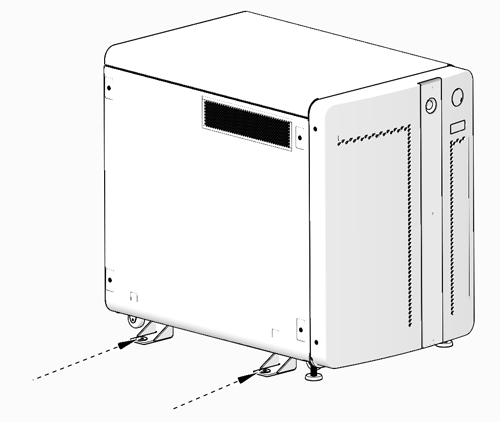
Figure 4. Open Console Seismic