- Topic ID: concept_h1p_ph1_y3b
- Version: 4.0
- Date: Jan 23, 2022 10:49:35 PM
Low Performance Pixel Function (Merc40 Detector)
1 Overview
This procedure explains how to maintain LPP (Low Performance Pixel) data for Merc40 Detector. In order to add LPP data, the dedicated tool name "Detector HART Tool" is used.
The tool is located under Replacement tab of CSD (Common Service Desktop) and requires class M service key. And this tool has remote capability of execution.
1.1 Use case
Ring artifact could be happened due to detector module interconnection issue. If one pixel has "short to ground" failure, bad channel correction could resolve the issue using neighborhood healthy pixel data. To achieve that, bad pixel shall be identified at interconnectivity test during FastCal automatically.
However if the interconnect failure were instable/intermittent, then there is a case that FastCal can't detect them and escaped. In this case it will cause intermittent ring artifact or streak artifact. The LPP tool can be used to add above pixels as Bad pixel and set them as permanent bad channel to apply bad channel correction consistently.
So it is required to check bad channel pixel location on bad image data by using Scan Analysis tool etc.
1.2 Remote capability
The tool is designed as GUI tool and has the capability of remote execution via CSD Redirect feature on ISD or FFA. And the usage of the tool is exactly the same as one on console. No class M service key is required for remote use.
2 Procedure
2.1 Bad pixel addition
- Insert Class M Service key and execute Check Security.
- Click Detector HART Tool under CSD Replacement tab. The following GUI is displayed.
Figure 1. Read HART Confirmation
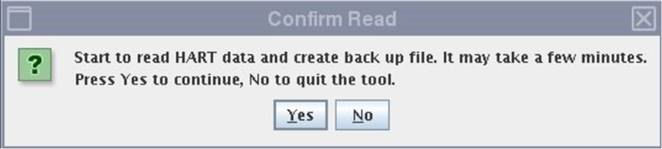
- Press Yes to read HART data, wait for a few minutes and the following GUI is displayed.
Figure 2. Detector HART Information
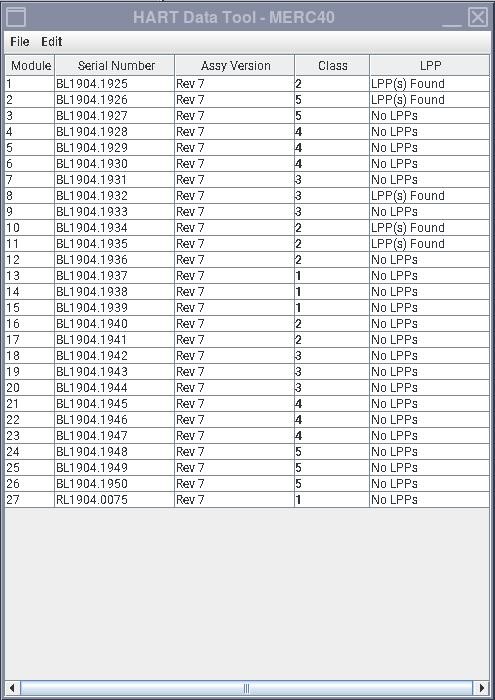 note: LPP(s) found are the LPP which was originally set and already applied the bad channel detection. It is NOT the newly appeared low performance pixel which you are going to set LPP.
 - Press Module number to modify Bad pixel data at the left side. Figure Figure 3 is displayed. Then click Bad Pixel tab and current Bad pixel mapping is displayed (see Figure 4).note: Only one module can be operated all at once. If you would like to modify another module, close current module and open another module.

- notice
Figure 3. Module HART Information
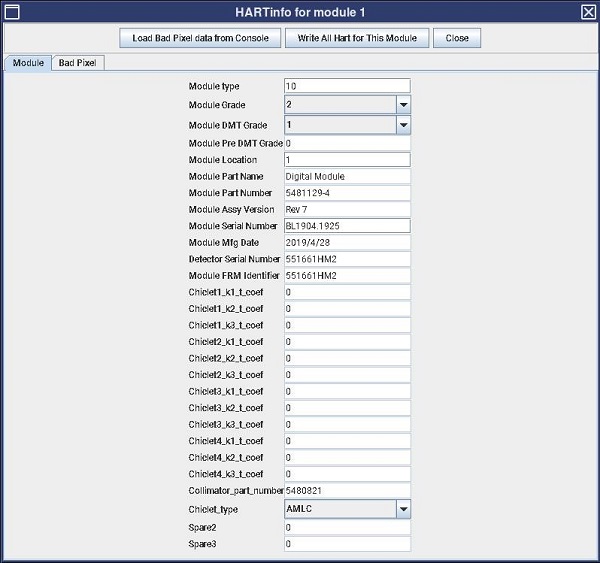
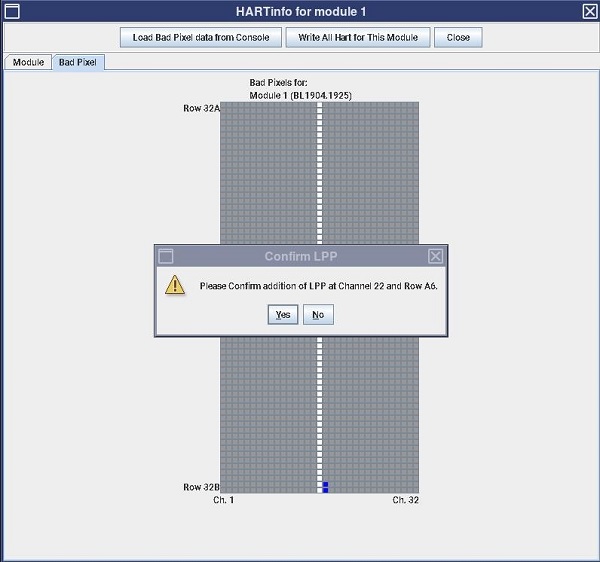
- Press Bad Pixel tab to switch the display to Bad pixel data.
Figure 4. Bad pixel mapping
 note: If the module had the original LPP pixel, then it was appeared as blue pixel as shown in Figure 4. It is NOT the newly appeared low performance pixel which you are going to set LPP.note: New FRU Middle Modules (7-12, 16-20) or Outer Modules (2-6, 21-26), may ship with a few bad pixels on ch2-ch31, The Bad Pixels are only 1x-short LPP, those Pixels will be mapped out during fast cal. The interconnectivity test during fastcal and /or DAS tool test will show the Exclusion zone Passed.
If interconnectivity test shows the exclusion Failed, the module should be replaced again.
- Determine channel number by conversion from MSD Plot Ch.# to Module Ch.# by Scan Analysis tool. Refer to the attached spread sheet for channel value conversion.Channel Conversion Table
- As figure Figure 5 depicts, add the Bad Pixel by Clicking cell on the GUI. After you confirmed that you correctly added the LPP on the target pixel, then press Yes after confirming the information.
Figure 5. Bad Pixel addition (example of Ch.22 RowA6)
 note:
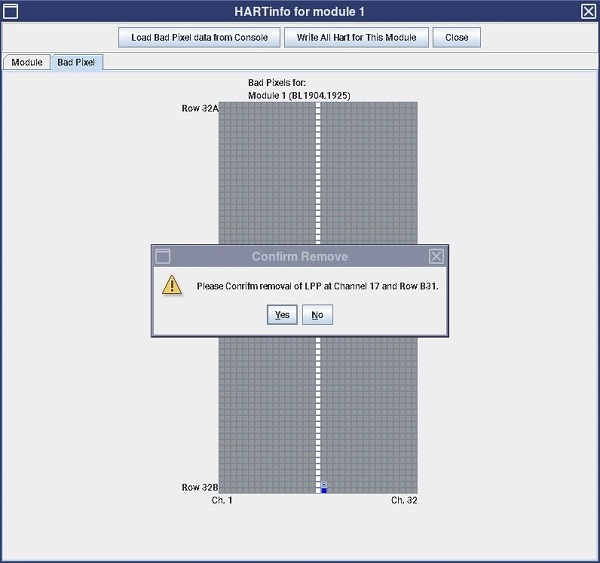
note:If you would like to delete Bad pixel, press the Bad pixel to delete the data, then pop-up message is displayed for confirmation of channel and row. Select Yes if it's OK to delete it, as figure Figure 6 depicts.
Figure 6. Bad Pixel Removal (example of Ch.17 RowB31)
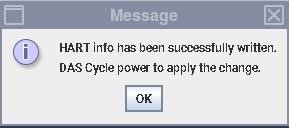
- Press Write All Hart for This module button update LPP data of Merc40 Detector. You will be asked to confirm the confirmation as figure Figure 7 depicts, press Yes. It takes approx. 1minute for completion with a message window like figure Figure 8 pops up.
Figure 7. Write All Hart for This Module
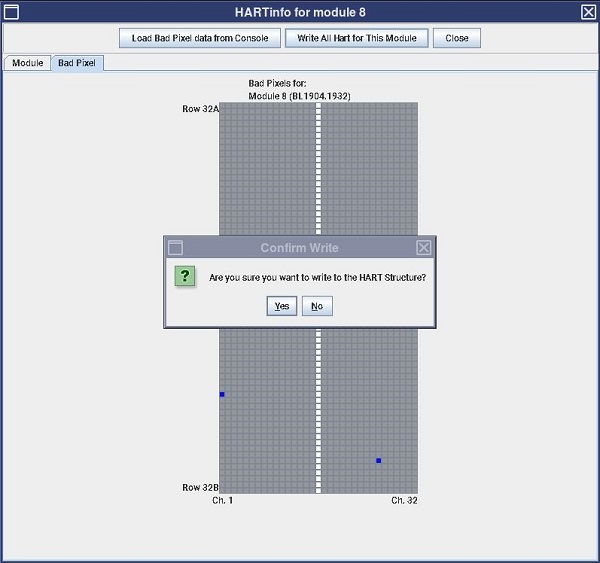
Figure 8. Written completion message
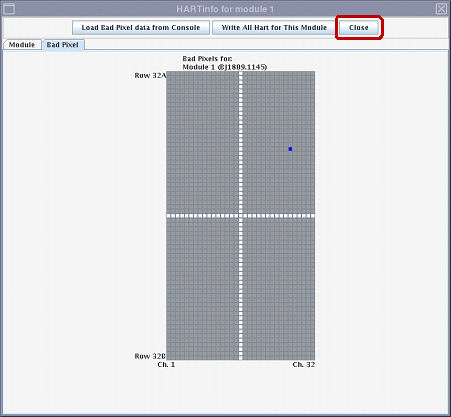
- Press Close button to close the window.
Figure 9. Close Bad Pixel window
- Repeat the above procedure for modules that is needed to update Bad pixel data.
- Press File menu and select Quit to quit the tool. See Figure 3.
2.2 Post Processing
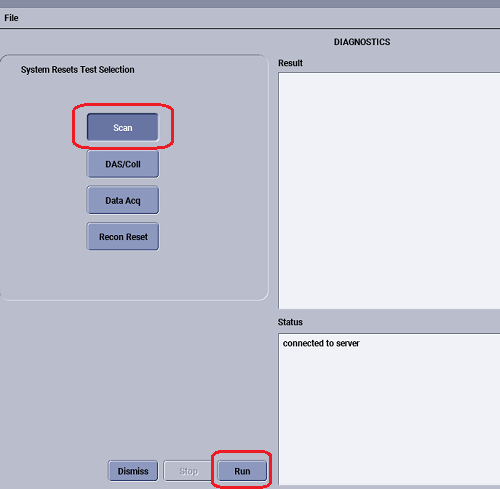
- Select System Resets in CSD (see Figure 10), click Scan, then click Run (see Figure 11).
Figure 10. System Resets
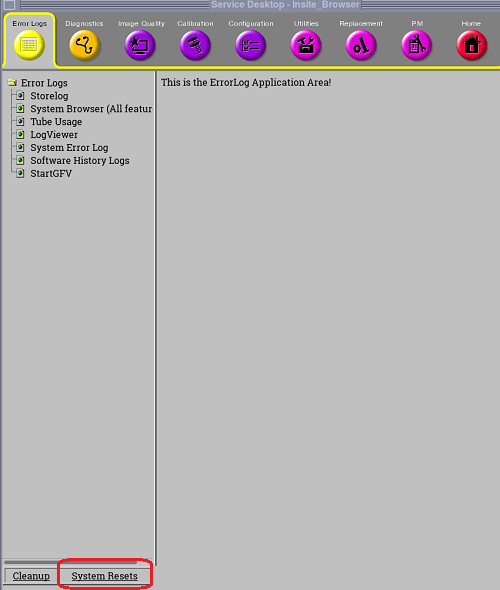
Figure 11. Scan - Run
- Execute FastCal.
- After FastCal, review syslog to check the additional LPP pixel were correctly found as short to ground and pass the bad channel criteria.
- Execute some axial scans and confirm no image artifact exists.
3 Dedicated files for this tool
- HART information file:/usr/g/service/state/DetectorHART_hostname_backup_2019_11_26_100307.xmlnote: hostname and time stamp are varied.
- Execution log file:
/usr/g/service/state/detectorHartLog.csv
As an example, the history of Bad pixel addition is logged as below. Please ignore about number between time stamp and description.
"2018/11/27" , 18:22:45 , 4, "addBadPixel: New LPP at module:4 chan:7 row:10"
"2018/11/27" , 18:22:45 , 0, "Added LPP at Channel7 and Row A23."