- Topic ID: id_11038850
- Version: 5.0
- Date: Apr 22, 2019 12:55:26 AM
Evaluation of Image Flip and Rotate Compatibility
Prerequisites
Overview
A new image reconstruction feature has been included with the system that affects the displayed image orientation. This procedure demonstrates the Hospital Review Station capability to properly orientate images reconstructed with this feature.
This procedure should be performed prior to enabling the Flip / Rotate feature on the scanner.
The default setting for the scanner software is to disable this feature. The feature must not be enabled until all of the following conditions have been satisfied.
-
The Customer asks for the feature to be enabled.
-
This procedure has been executed and the results demonstrate the desired Hospital Review Station supports the feature.
1 Setup
The following checks are to be performed to ensure the Image Flip / Rotate test environment is installed and available to be used by this procedure.
Procedure
- Verify exam 99999 is listed in the Image Works browser. See Figure 1, “Select
Exam and Series to Transfer.”
- Patient Name = ACR DICOM IMAGE ORIENTATIONS
- Patient ID = FIELD TEST IMAGES DATA SET
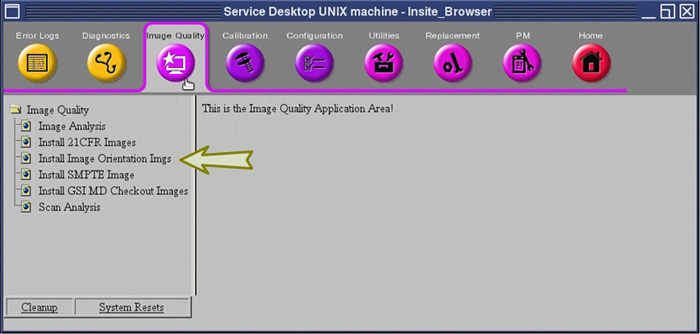
note:If the exam does not exist, refer to Figure 2, “Reloading the Test Images,” for instructions..
- Identify the Hospital Review Station equipment that is to be evaluated. Your Customer will supply this information.
- Using the Image Works browser, add these Review Station destinations to the network remote host list. Add all destinations that will be evaluated.
- Using the Image Works browser, verify the connection to these Review Station destinations by using the Ping DICOM host menu selection. Ping all destinations of all Review Stations that will be evaluated.
2 Test - Exam 99999
Procedure
- To demonstrate the capability of the Review Station equipment
to properly orientate the Flip / Rotate images, use the Image Works
browser to send Exam 99999 to the remote destination. See Figure 1, “Select
Exam and Series to Transfer.”note:
Series 997 can be ignored.
- Proceed to Finalization.
3 Reloading Test Images
4 Screens
Figure 1. Select Exam and Series to Transfer
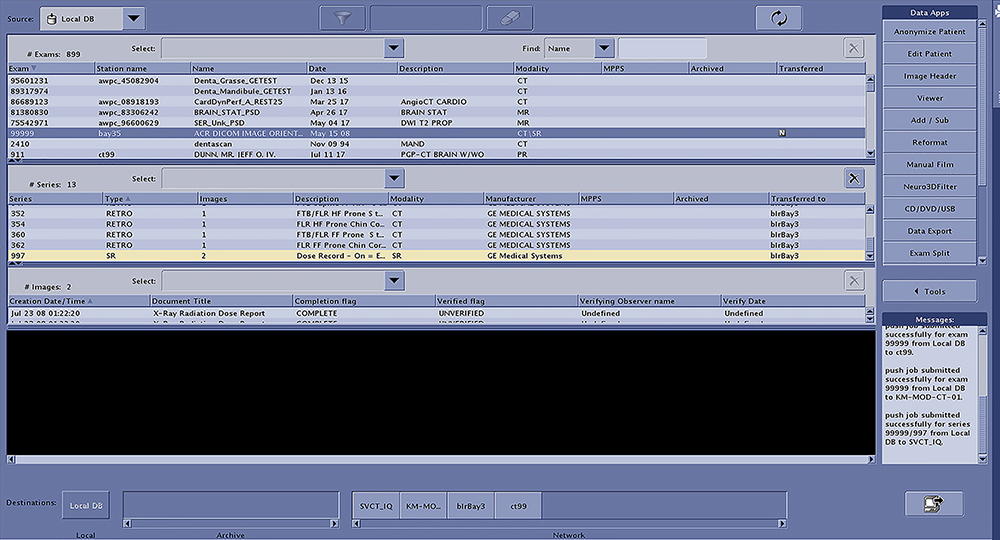
Figure 2. Reloading the Test Images
5 Finalization
Procedure
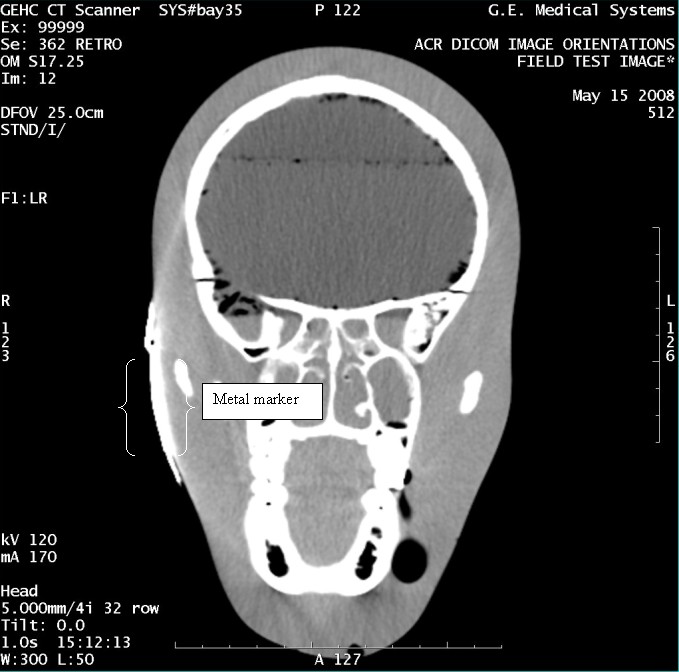
- With the support of the site personnel, examine the images sent
to the Review Station (i.e., 12 series, each with 1 image) and compare
their orientation to the images in this document.
- Each image contains a metal marker on the phantom's right cheek.
- Each image in this document contains a description of the expected
orientation of the metal marker (i.e. to prove Left and Right) as
well as the Posterior and Anterior orientation description.note:
The sample images included in this document use “R”, “L”, “P”, and “A” for “Right”, “Left”, “Posterior” and “Anterior” orientation. The Hospital Review Station may use a different style of annotation. The style used is not relevant to this procedure.
- Each image in this document has sufficient space to store the observed results for up to 4 Review Stations.
- Enter ‘Y’ in the space to indicate the observed result matches the expected.
- Enter ‘N’ in the space to indicate the observed result does not match the expected.
- Enter “NA” in the space if a column is not being used.
- Repeat for each destination.
- notice
- If there are no differences in the image orientation on ALL Review Stations, the scanner Flip / Rotate feature may be enabled at the request of the site personnel.
- If there are differences in the Review Station images as compared
to the images in this procedure, the scanner Image Flip / Rotate feature
must not be enabled.
Figure 3. Exam 99999, Series 307
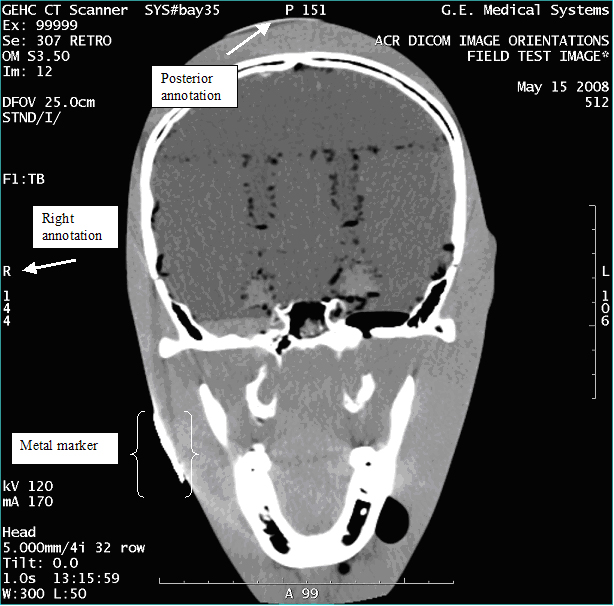
Figure 4. Exam 99999, Series 315

Figure 5. Exam 99999, Series 320
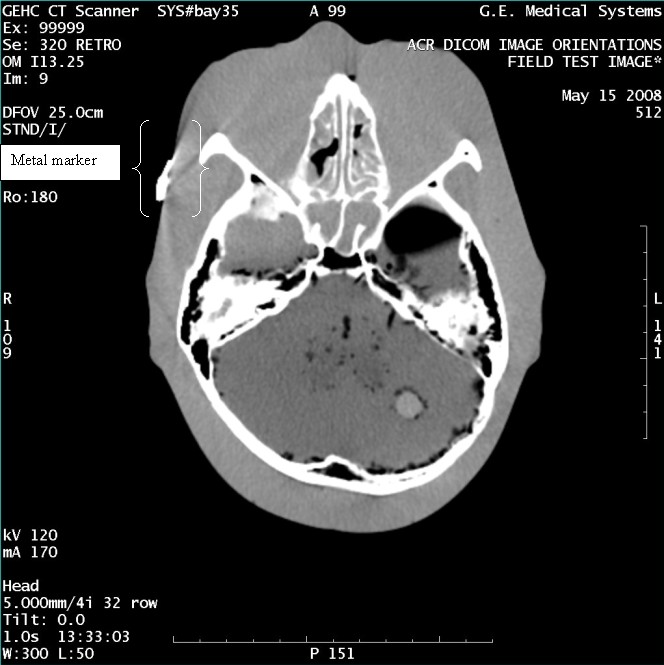
Figure 6. Exam 99999, Series 322
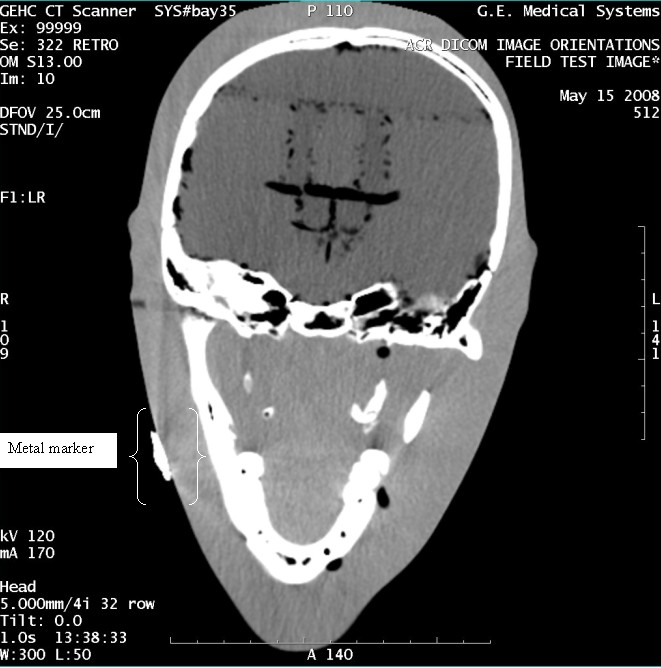
Figure 7. Exam 99999, Series 328
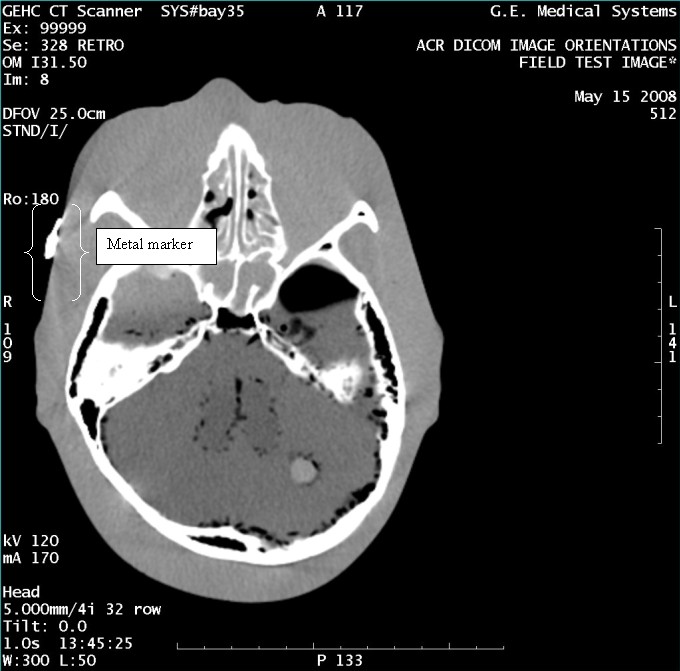
Figure 8. Exam 99999, Series 330
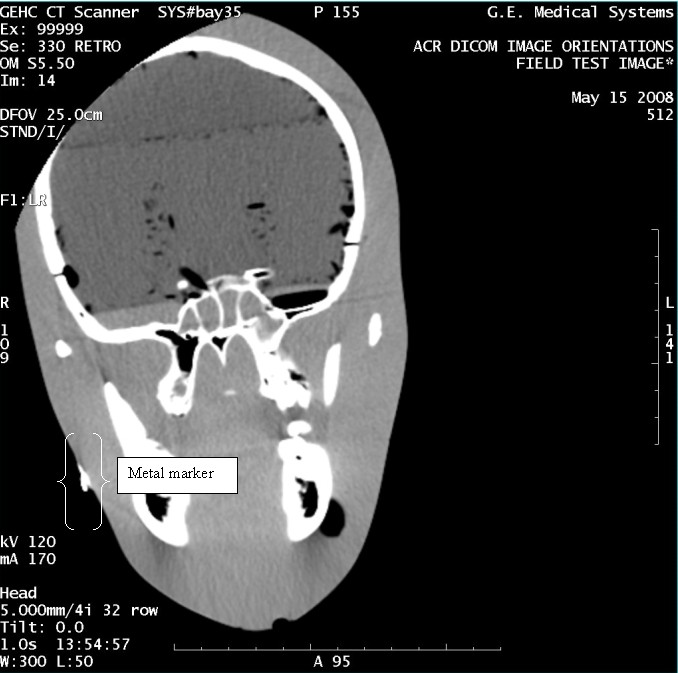
Figure 9. Exam 99999, Series 339
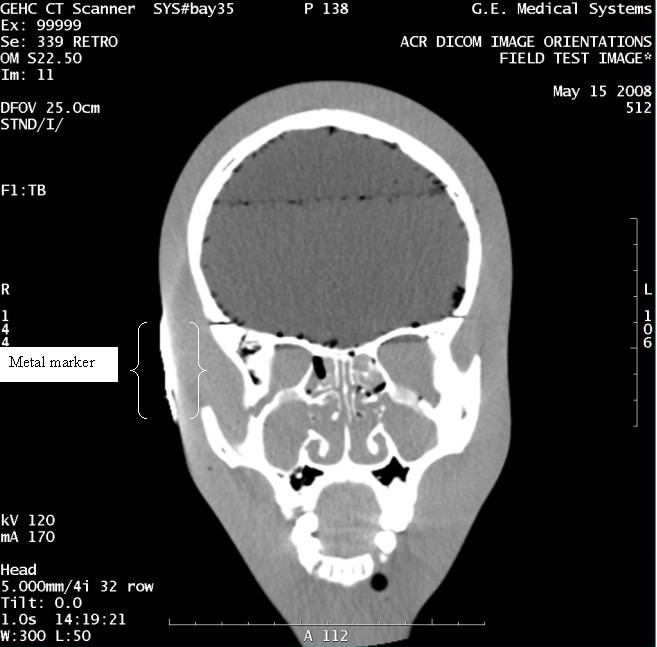
Figure 10. Exam 99999, Series 347
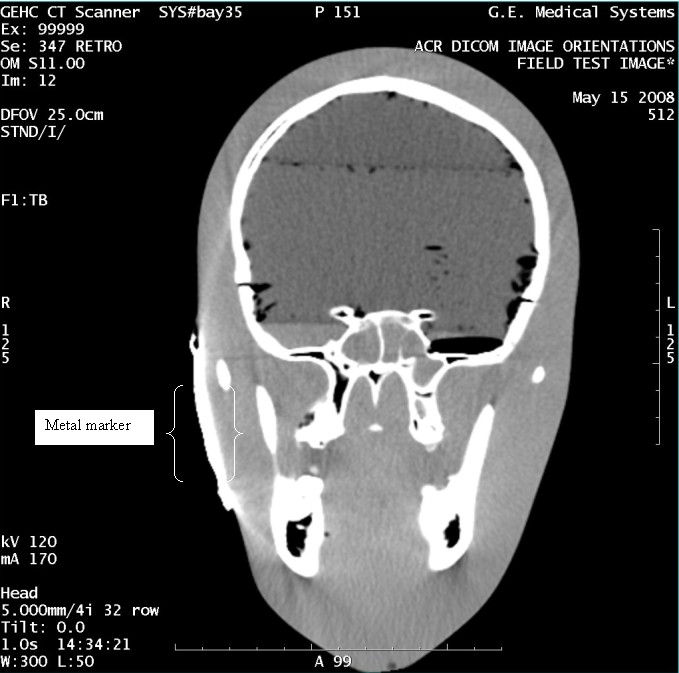
Figure 11. Exam 99999, Series 352
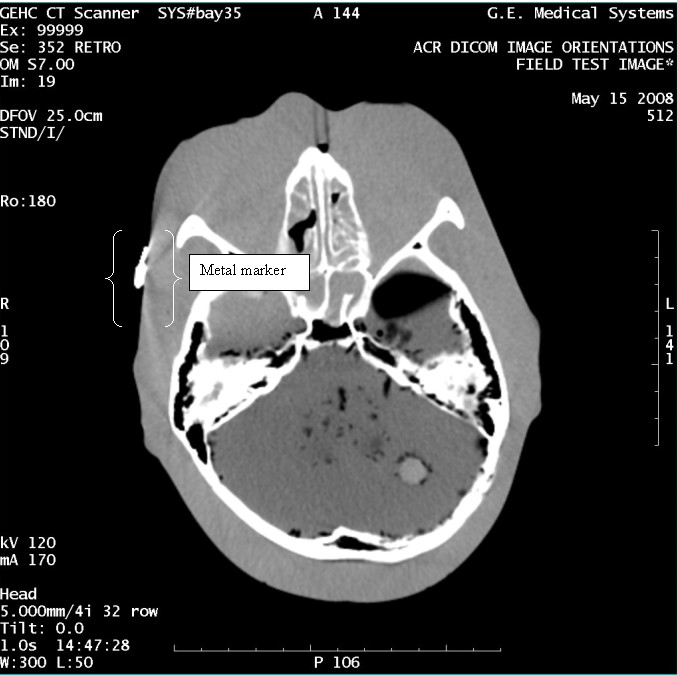
Figure 12. Exam 99999, Series 354

Figure 13. Exam 99999, Series 360
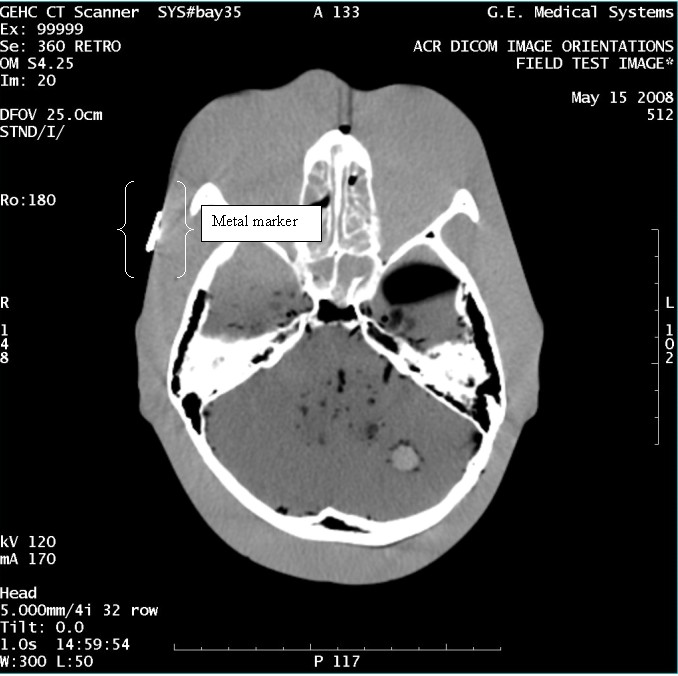
Figure 14. Exam 99999, Series 362
 |