- Topic ID: id_11038960
- Version: 3.0
- Date: Apr 22, 2019 12:56:23 AM
Console Cover Removal and Installation
Prerequisites
1 Side Covers
1.1 Removal Procedure
Procedure
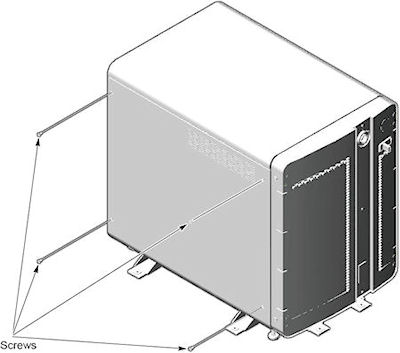
- Remove the four screws at the side cover.
Figure 1. 4 Screws of Side Cover
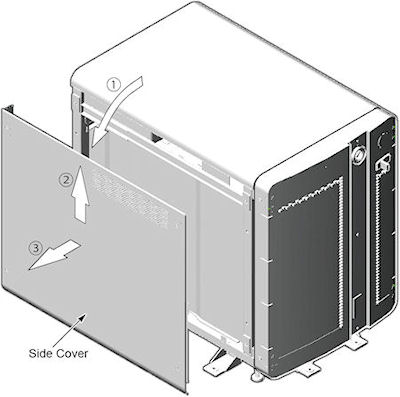
- Lift cover away, so that tabs disengage from bottom lip of opening.
Figure 2. Side Cover Removal
1.2 Installation Procedure
Procedure
- Swing cover into position.
- Insert top edge of side cover into inside of top cover. The distance between side cover rear edge and chassis should be about 20mm.
- Move side cover forward and fix it on chassis.
- Tighten the four screws at the side cover.
2 Top Cover
2.1 Removal Procedure
Procedure
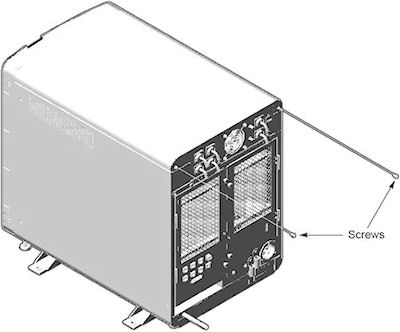
- Remove the two screws at behind of top cover.
Figure 3. 2 Screws of Top Cover
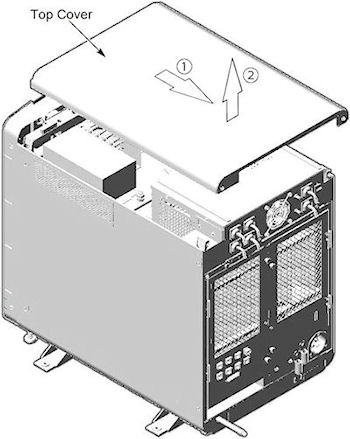
- Slide cover backward and lift it away.
Figure 4. Top Cover Removal
2.2 Installation Procedure
Procedure
- Insert two pins of top cover into the hole in the chassis.
- Slide cover forward and fix cover on chassis.
- Tighten two screws at behind of top cover
3 Front Cover
3.1 Removal Procedure
Procedure
- From the service desktop, shut down the system.
- Turn off console power.
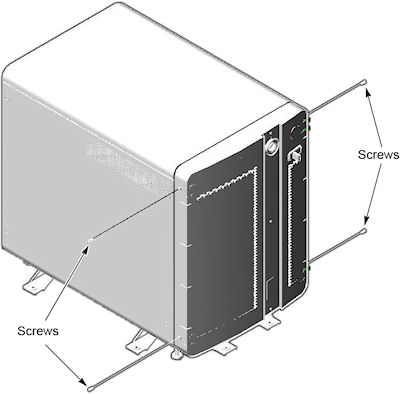
- Remove four screws (two screws on each side).
Figure 5. 4 Screws of Top Cover
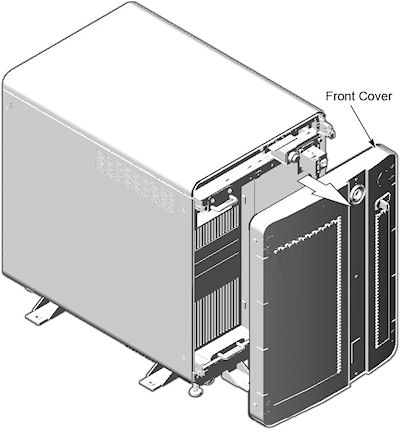
- Rotate bottom of cover outward and upward until it may be lifted
free of the console at the top.
Figure 6. Top Cover Removal
3.2 Installation Procedure
Procedure
- Place the front cover onto console.
- Tighten two screws at both side of console.