- Topic ID: id_11039067
- Version: 4.0
- Date: Mar 29, 2022 8:54:15 AM
Collimator Cleaning Procedure
Prerequisites
Overview
This procedure details the steps necessary to remove the contamination without removing the X-Ray Tube. The entire process will take approximately 3 hours. Tube/Collimator Alignments do not need to be performed. If you wish, you can check the alignments after completing the cleaning process. Any adjustments will require a complete Detailed Phantom Calibration.
Figure 1. Clean Process Flowchart
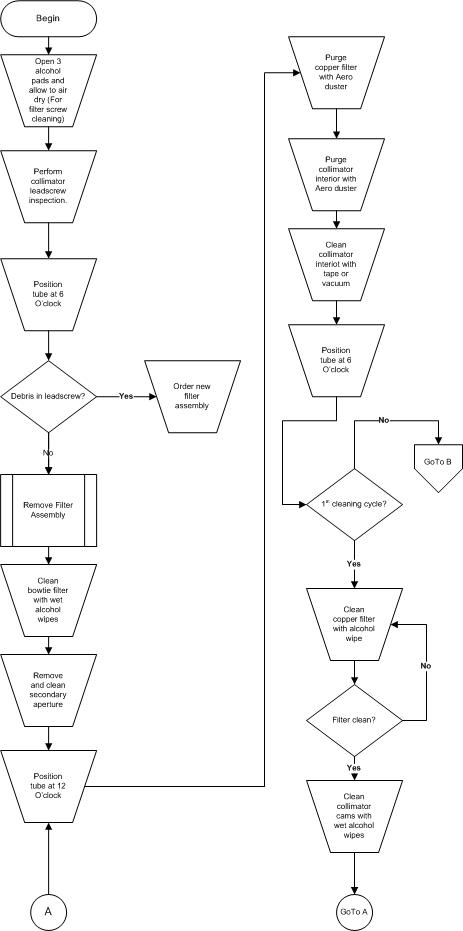
Figure 2. Collimator Cleaning Flowchart (continued)
Procedure
- Remove the Gantry Covers as needed.
 warning
- Perform Gantry Power Lockout/Tagout procedures.
- Open three (3) Lint Free Alcohol Pads, unfold and allow to air dry.
- Position the gantry with the Collimator at six-o'clock.
- Command apertures to the largest thickness and filter to closed position.
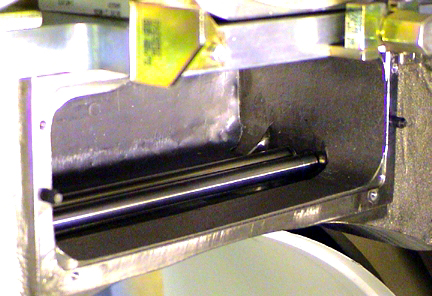
Remove the Mylar filter. Using a flashlight, inspect the lead-screw
and determine whether there are small gold colored brass filings on
the threads. Refer to Figure 3 below for an example of contamination (color appears
gray, but will actually be gold colored). If contamination is present,
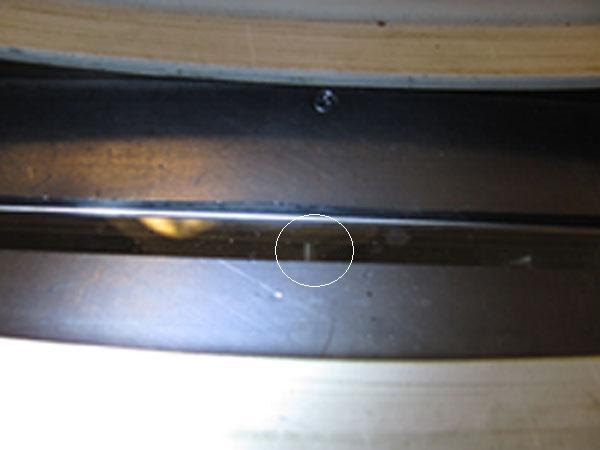
replace the filter assembly utilizing Filter Assembly Replacement procedure in Step 6. Refer to Figure 4 for a reference of where the lead-screw is located within the scan
window. If replacement of the filter assembly is not required, proceed
with the remainder of the steps in this procedure.
Figure 3. Contaminated Collimator Filter Lead-screw
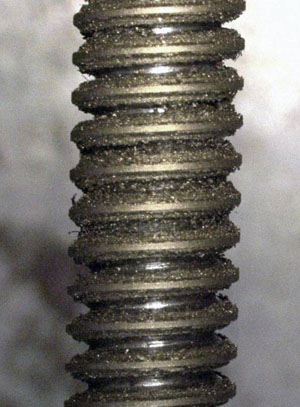
Figure 4. Reference Photo
- Remove Collimator Filter Assembly:
- Clean Bowtie Filter with fresh, wet alcohol pads.Clean until pads are no longer soiled.
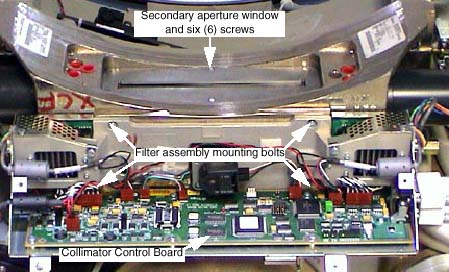
- Remove Secondary Aperture and Output Window. See Figure 5.
- Use fresh, wet alcohol pads to clean the window and output port.
- Inspect output port and carefully remove any metal or lead that protrudes into the x-ray beam path.
-
Take care not to lose the six (6) screws.
-
Take care not to damage or nick the lead aperture.
Figure 5. Collimator Assembly
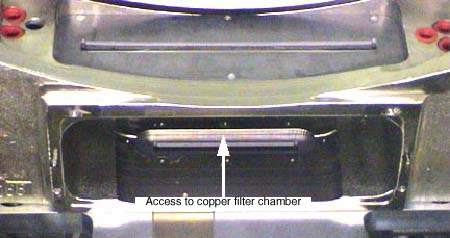
- Rotate gantry so collimator is at 6 o’clock. See Figure 6.
- Using the Aero Duster and nozzle, blow out debris from the Copper Filter chamber.
- Using the Aero Duster and nozzle, blow out debris from the Collimator Interior.
- notice
- Clean collimator interior with vacuum cleaner or tape to remove
any attached grease to metal particles.
Figure 6. Cleaning Collimator Interior

- Rotate gantry so collimator is at 12 o’clock and repeat step 8 cleaning.
- Rotate gantry so collimator is at 6 o’clock and repeat step 8 cleaning. This is to ensure all loose particles are removed from Copper Filter Chamber.
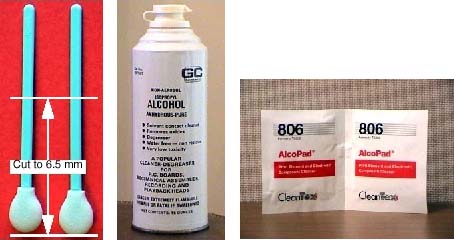
- Use clean swab, wet with alcohol, to clean the Copper Filter.
See Figure 7.
- Cut swab to 7.5 cm length (3 inches).
- notice
- Wet lint-free foam head with alcohol. Squeeze excess alcohol from head.
- notice
- Carefully insert swab into copper filter chamber, and wipe filter clean.
- Remove swab and inspect copper filter. Repeat with clean swabs
as necessary until clean.
Figure 7. Swabs, Pure Alcohol and Alcohol Pads

- notice
- Using fresh, wet alcohol pads, clean the Collimator Cams.
Rotate the Cams using the motor shaft on each side of the collimator.
Figure 8. Cleaning Collimator Cams
- notice
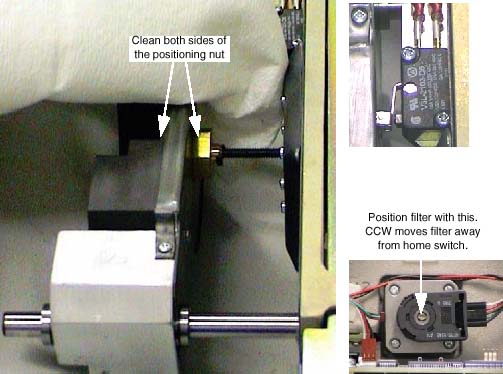
- Using the dry lint free alcohol pads from step 3, clean the
Bowtie Filter assembly positioning screw. See Figure 9.
- Remove only excess grease from the drive nut.
-
Remove only accumulated grease that may dislodge.
-
The grease should lightly coat the screw thread, not fill it.
-
- Position the filter using a flat blade screwdriver.
Figure 9. Filter Position Screw
- Remove only excess grease from the drive nut.
- Assemble collimator.
-
Four (4) Filter Assembly bolts. Torque to 3 ± 0.3 N-m (26.5 lbf-in).
-
Six (6) Secondary Aperture screws.
Use Loctite 242. Take care not to damage the lead window.
-
- Restore gantry power and perform a hardware reset.
|
Finalization
No finalization steps.