- Topic ID: id_15460213
- Version: 5.0
- Date: Jan 20, 2020 8:32:38 PM
Z820 / Z840 RAID Disk Clear Configuration Procedure
Prerequisites
Overview
When a hard disk drive, which was previously used in a RAID volume, is reused as system or image disk, clearing the configuration information in the hard disk drive is required.
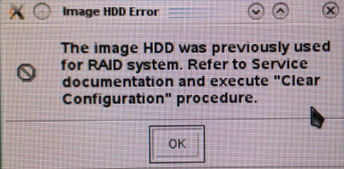
If an uncleared disk is used as system disk, OS load will be failed with the following error.
Figure 1. Error Message during OS Load
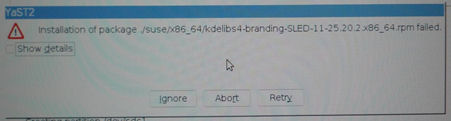
If an uncleared disk is used as image disk, Application load will be failed with the following error.
Figure 2. Error Message during Application Load
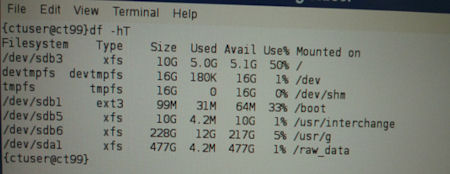
On VCT FREEdom (13HW31.8), error message during Application load will not appear. Thus check if /usr/g/sdc_image_pool/ directory exists by df command after OS loading. The Figure 3 shows failure case (missing /usr/g/sdc_image_pool/ directory).
Figure 3. df Command Output
1 Exchange the Hard Disk Drives
The disk configuration clearing needs to be performed by RAID control card WebBIOS utility.
Procedure
- Replace the System or Image Hard Disk Drive that you want to clear the configuration with one of the Scan Data Disk.
2 Clearing the Disk Configuration Information
Procedure
- Shut down the system and recycle the console power.
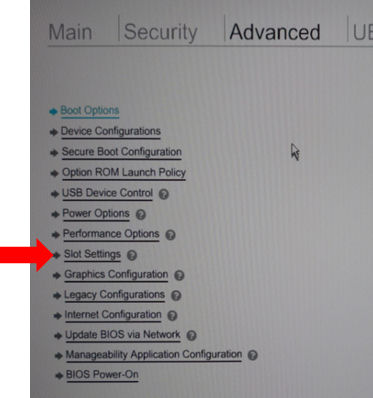
- Press F10 when HP logo is displayed.
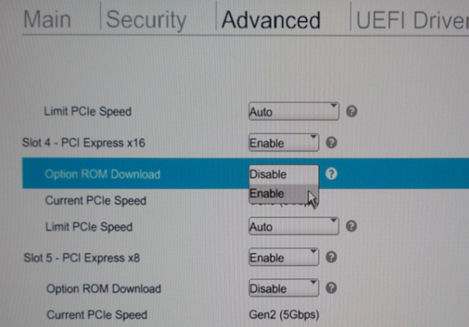
- In Hewlett-Packard Setup Utility, select Advanced → Slot Setting.
Figure 4. Hewlett-Packard Setup Utility (Z820)

Figure 5. Hewlett-Packard Setup Utility (Z840)
- In the Slot Settings menu, change the Slot 4 (RAID controller)
setting to Enabled. And hit F10 key to accept the change.note:
Do not change the slot 2 setting.
Figure 6. Slot Settings Menu (Z820)
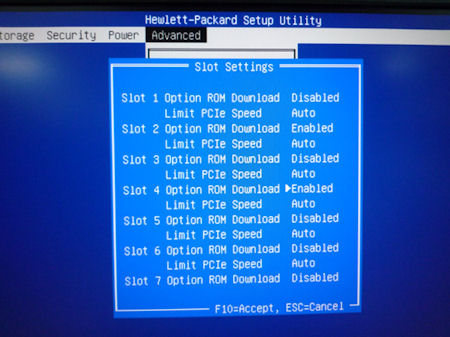
Figure 7. Slot Settings Menu (Z840)
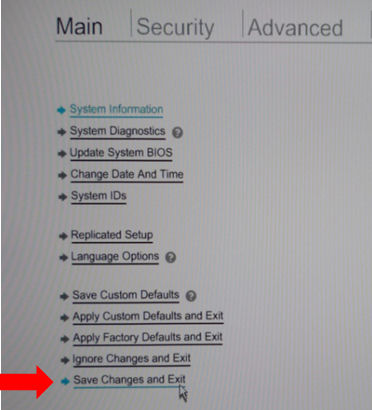
- Select File (or Main) → Save Changes
and Exit to exit Hewlett-Packard Setup Utility.
Figure 8. Menu of Hewlett-Packard Setup Utility (Z820)
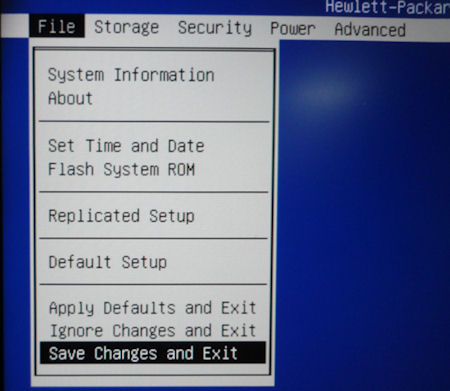
Figure 9. Menu of Hewlett-Packard Setup Utility (Z840)
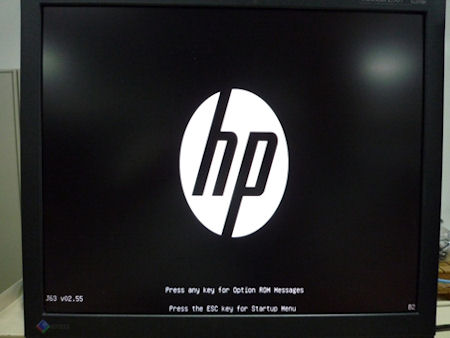
- When HP logo is displayed, hit Enter key.
Figure 10. HP Logo
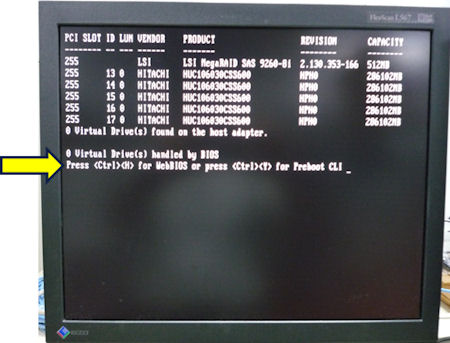
- When the following RAID information is displayed, press CTL+H.
Figure 11. RAID Information
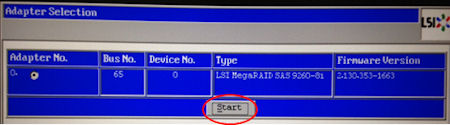
- Click “Start” in Adapter Selection screen.
Figure 12. Adapter Selection screen
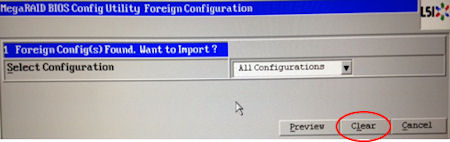
- Click “Clear” in the next screen.note:
This page may not appear.
Figure 13. Clear Foreign Config
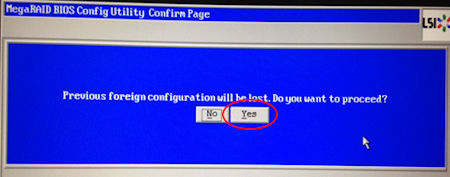
- Click “Yes” in the next screen.note:
This page may not appear.
Figure 14. Confirm Page
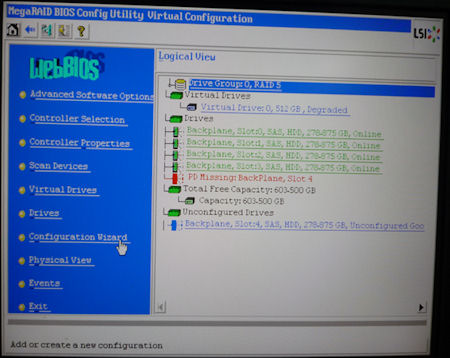
- The WebBIOS screen will be displayed as follows.
Figure 15. WebBIOS Screen
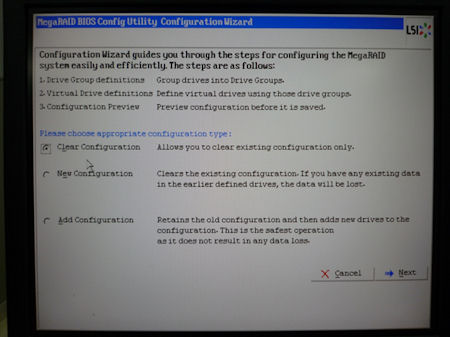
- Click Configuration Wizard from left side menu.
- In the Configuration Wizard menu, select Clear Configuration.
Figure 16. Configuration Wizard
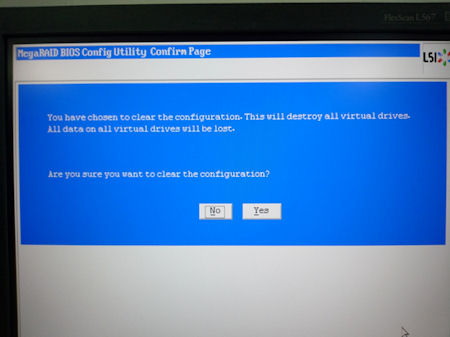
- In the next screen select Yes.
Figure 17. Configuration Wizard - Confirm Page
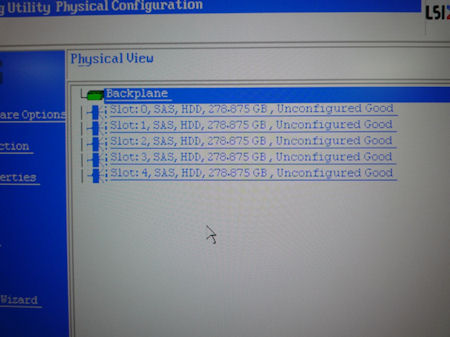
- Confirm all Scan Data disk shows Unconfigured
Good in Physical View screen.
Figure 18. Physical View
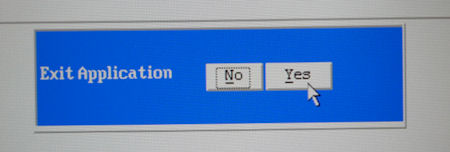
- Click “Exit” from the menu and select Yes in the next screen.
Figure 19. Exit Application
- Reboot the system by pressing CTL+ALT+DEL keys.
3 Finalization
Procedure
- Restore the Host BIOS setting to default. (Advanced → slot
settings → slot 4 option ROM Download : Disabled)note:
Do not change the slot 2 setting.
- Replace the hard disk drives to the original location.