- Topic ID: id_15460889
- Version: 5.0
- Date: Dec 22, 2021 11:15:59 PM
Peripheral Tower Functional Test
Prerequisites
Overview
This document describes the steps necessary to test the functionality of the Peripheral Tower Optical Drives for both the USB and MOD Peripheral Towers. The test method utilizes system functionality for accessing and writing data to the DVD-RAM, DVD-R/RW and MOD optical drives. Full details can be found in the Managing Images section of the LightSpeed Learning and Reference Guide
1 DVD-RAM Optical Drive
1.1 Save System State
 |
|
|
|
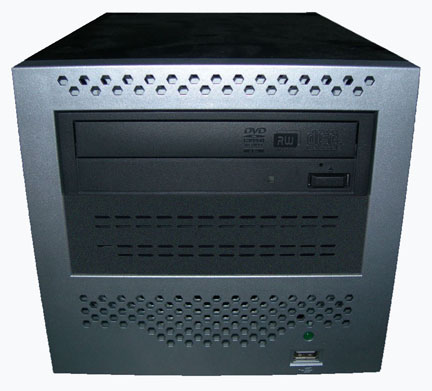
Figure 1. DVD-RW and DVD-RAM Front
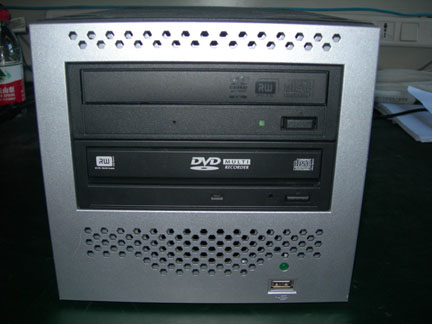
Figure 2. DVD-Multimedia Front
Procedure
- Perform a GOC6 Save System State per Software - Software Installation Procedures (LFC)- System State Save and Restore in the service manual.
- To test DVD-RAM writing capability, perform a Save System State using the Utilities under the CSD.
1.2 Verify Save System State
Procedure
- 1. Open up a Linux Terminal Window and type:
mountDVD ENTER
- To view the contents of the DVD-RAM, type:
ls –lR /DVD ENTER
- To remove the DVD-RAM disk from the drive, first un-mount it
by typing:
unmountDVD ENTER
2 DVD-R/RW Optical Drive
2.1 Save Exam/Series/Images using CD/DVD Interchange Option
Interchange Option is used to write or recall images from a CD-R or DVD-R in DICOM format. CD/DVD cannot be selected as the default archive device. Exam, series, or images will not be marked as archived. A DICOM viewer is stored on the media so the images can be viewed on a PC. The media is write-once and all selections must be queued at the same time. Approximately 7000 images can be stored to a 4.7 gb DVD-R. CD -R has a storage size of 700 mb.
Procedure
- notice
- With the desired CD/DVD in the DVD-R/RW drive, select the Image Works desktop. This is located in the upper left corner of the display monitor.
- Select the exam(s), series, or image(s) to be saved to the disk. To aid in this, The Sort and Selection menu on the browser can be used.
- Click CD/DVD. The CD/DVD composer window appears.
- Click Add Exams, Add Series, or Clear.note: Add Exams adds all of the exams that are selected. Add Series adds all of the series that are selected. Clear deletes all selections.
- Click Copy.note: Copy burns the images into the disk.
- Click Yes on the copy confirmation window.
The Interchange Media Browser appears, which shows the selections and progress of storage. A window appears stating “Restore or Copy completed successfully.”
- Click Ok.
- Click Eject, to eject the CD/DVD from the CD/DVD drive.
|
2.2 Verify that Exam/Series/Images On CD/DVD Storage Media
Procedure
- Insert the burned CD/DVD optical disk in laptop.
- Using File Explorer, navigate to the CD/DVD drive on laptop and select the DICOM Viewer program.
- Verify that the data saved to the CD/DVD optical disk is viewable using the DICOM Viewer program.
3 MOD Peripheral Tower
3.1 New (Uninitialized) MOD Storage Media
This procedure is used to:
-
Label new MOD disks. This must be done before disks are able to store image data.
-
Re-label MOD disks containing data that is no longer needed. When a disk is re-labeled, all existing data is permanently lost.
Procedure
- Insert the new MOD disk into the MOD drive.
- Select the Image Works desktop, located in the upper left corner of the display monitor.
- Click Archive.note: Archive can be accessed from the Image Works browser.
- From the Archive menu, click Label. A window titled "Format Window" pops up.note: The archive device name is shown in the upper left corner of the Format Window. The name reflects the MOD drive.
- Enter media ID number by clicking on the text field and entering a value. This value is the MOD label.
- Click on the Comment field and enter comments
from the keyboard. Typically, information about the type of images,
MOD side, or pertinent information is entered.note: The text in this field will appear at the bottom of the Archive Browser and the Image Works browser. The maximum number of characters allowed in this field is 160.
- Click Label. This begins the labeling
process."note: A confirmation window pops up and asks you to "Please refer to the Operator Manual for limitations regarding archive media exchange between GE Products.”
- Click OK. This will acknowledge the message.note: Selecting Cancel in the Format Window will abort the labeling process.
3.2 Save Exam/Series/Images to a MOD Storage Media
Procedure
- With the desired MOD in the drive, select the Image Works desktop, located in the upper left corner of the display monitor.
- Select the exam(s), series, or image(s) to be saved to the disk. To aid in this, the Sort and Selection menu on the browser can be used.
- Click Archive. Archive can be accessed from the Image Works browser.
- Click Save Examination, Save
Series, or Save Images. All items
selected on the browser for saving are written onto the MOD media.note: To eject the MOD disk from the MOD drive, it must first be "detached" via Detach in the Archive menu on the browser. If the MOD fails to detach and cannot be ejected, click Shutdown in the upper right corner of the right monitor. When you see the "OK to power off the system" message, press Eject on the MOD drive. The MOD will now eject.
3.3 Verify that Exam/Series/Images On MOD Storage Media
Procedure
- Click Archive and verify that the selected archive device is the device needed for restoring.
- Click Restore. An Archive browser appears and displays the exams, series, and images on the media of the selected device.
- Verify that the data archived to MOD is present on the MOD Disk.
- Click Application. This opens a pull down menu.
- Click Quit to leave the Archive browser window.
4 Finalization
No finalization steps.