- Topic ID: id_15460923
- Version: 5.0
- Date: Jan 20, 2020 8:35:32 PM
Mylar Window Removal
Prerequisites
Overview
Over time, the Lexan covering the collimator input windows can get brittle and break apart leading to image quality problems. When this occurs, it is recommended that the input window be replaced utilizing part number 2214248, HELIOS COLLIMATOR OUTPUT WINDOW. This new window is constructed of Mylar, not Lexan.
This procedure applies to HP-60, -80, and -100 systems, as well to RT and VCT systems.
This procedure is only to be performed in conjunction with a Tube change.
1 Mylar Input Window Removal
Procedure
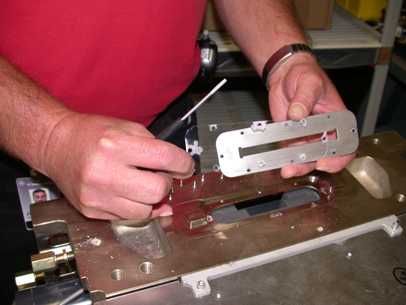
- Locate the interposer plate. See Figure 1.
Figure 1. Interposer Plate

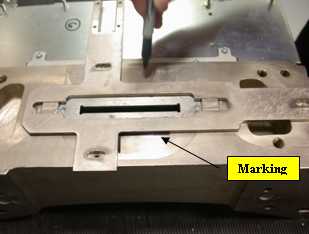
- Before removing the interposer plate, outline its position with
a marker as shown in Figure 2. This facilitates returning
the collimator to its original position later. Do Not use
pencil to make your mark as pencil lead is conductive.
Figure 2. Outlining the Interposer Plate
- On VCT systems, remove 3 screws from the interposer plate as
shown in Figure 3.
Figure 3. VCT Interposer Plate Alignment Screws
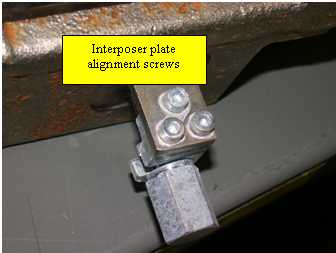
- After removing the interposer plate screws, unscrew the alignment adjuster until the plate can be removed.
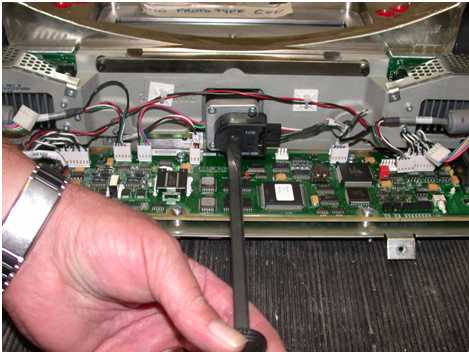
- Using a straight slot screwdriver, drive the collimator filters
to the home position. See Figure 4. This reduces the chance of
contamination and potential image quality problems.
Figure 4. Collimator Filter
- Remove the 8 screws from the lead aperture as shown in Figure 5.
Figure 5. Lead Aperture Screws
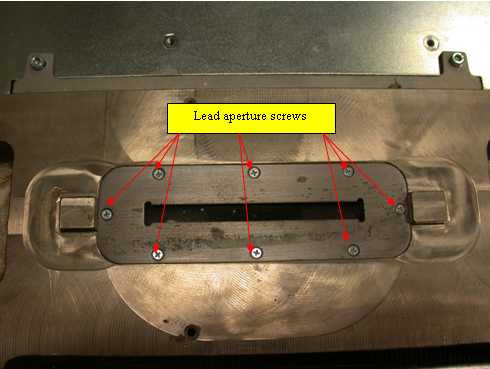 note:
note:VCT systems have 6 screws.
- With a flat blade screwdriver, carefully pry out the lead aperture.
- Clean any debris away from the filter and the lead aperture.
- Remove Lexan from the lead aperture and clean the underside
of any debris. See Figure 6.
Figure 6. Cleaning Underside of Aperture
2 Installing replacement Mylar window and replacing the Lead Aperture
Procedure
- Insure that the screw holes are properly aligned and insert Mylar window first and then the lead aperture. Using a dab of Loctite 242 on each aperture screw (end 2–3 threads), reattach the lead aperture. Torque screws as follows: 1 N-M, 8.9 LB-IN, 10.3 Kg-cm.
- Re-attach the Interposer plate, re-aligning it to the previously marked position. See Figure 2
3 Finalization
No finalization steps.