- Topic ID: id_15460640
- Version: 2.0
- Date: Nov 8, 2018 1:36:21 AM
Move Table into Position
Prerequisites
Overview
note:
Review the table installation and leveling video for this procedure.
1 Preparation
Procedure
 caution
- Remove all the transportation packaging and boxes from the table, except the dollies. Leave a layer of packing material on the cradle to protect the cradle from damage. (It can be removed during laser alignment of the table.)
- The GT table on dollies is approximately 2997 mm (118 in.) long and may require additional room to maneuver.
- Using the table centering and distance locator marks made earlier, wheel the table to its approximate position relative to the gantry.
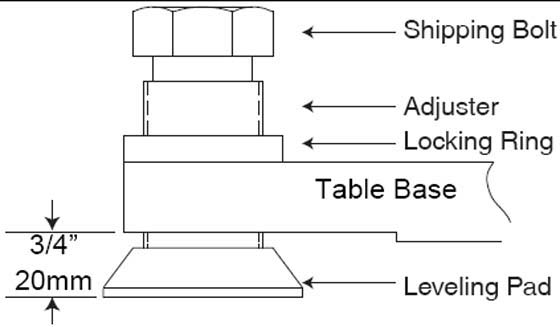
- Locate the table leveling pads inside the table in the back
and on the side in the front. Preset leveling pad heights to 20 mm
(3/4 in.) (see Figure 1).
Figure 1. Table Base Leveling Pads (Starting Positions)
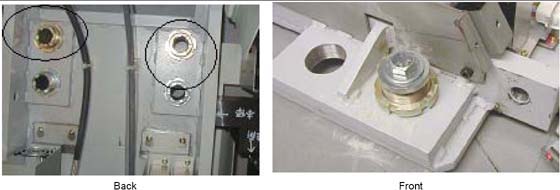
- Use a 1-5/8 in. socket and ½ in. ratchet to loosen the shipping bolt. Loosen the locking rings if present.
- Use a 1-1/8 in. socket with the adjuster tool, if needed to lower the adjuster.
- Use the dollies to evenly lower the table until it rests on
the leveling pads using a ½ in. ratchet on each end.
Figure 2. Adjusters and Lock Rings
2 Remove the Accessory Rail Strip
Procedure
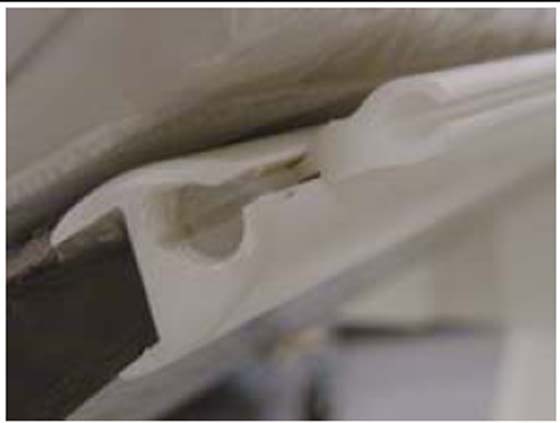
- Remove the accessory mounting strip attached on each side of the cradle using a small, flat blade screw driver. The nylon screws are inserted inside the accessory rail on the cradle.
- Place the accessory strips on the floor and reinstall the nylon
screws into the accessory rail for safe keeping.
Figure 3. Accessory Rail Screw
Finalization
No finalization steps.