- Topic ID: id_15460636
- Version: 2.0
- Date: Nov 8, 2018 1:36:20 AM
Install Operator Console, Peripherals, Hard Drives, etc
Prerequisites
1 Unpack the Console
If console is construction site packed, vacuum the dust and debris before removing packaging.
Procedure
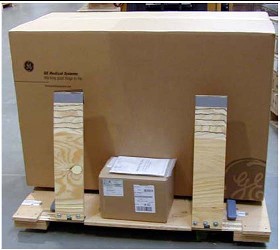
- Remove all items from the console.
Figure 1. Console Boxed on Skid
- Remove all packing materials and discard.
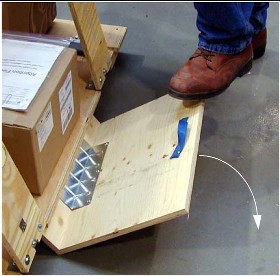
- Place the step-board under the front edge of the skid and step
on it to raise the front edge of the skid as shown in Figure 2.
Figure 2. Step-board used to raise front edge of skid
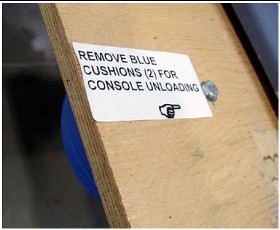
- Remove the two front cushions from the bottom of the skid (see Figure 3).
Figure 3. Cushion on Bottom of Skid
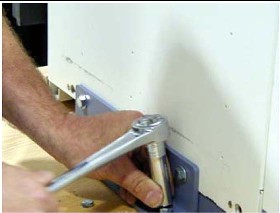
- Remove the Seismic Brackets from each side of the console (see Figure 4). Save the
brackets for use later if you need to mount the console to the floor.
Figure 4. Removing the Shipping/Seismic Brackets
- Lift up on the strap on the front of the step-board (Figure 2) to lower the skid. Remove the step-board.
- Ensure the console stabilizers are in line with the notched
portion at the front of the skid. This allows enough clearance to
smoothly roll the console down the ramps (see Figure 5).
Figure 5. Console Ready to be Unloaded
- Move the console to the installation location.
- Attach the two pads to the console stabilizers (see Figure 6). (If not already
attached)
Figure 6. Console Stabilizer Pads
- Screw the pads all the way into the legs
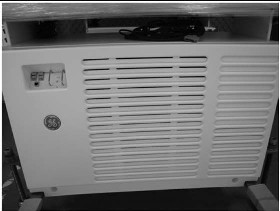
2 Remove Console Covers
Procedure
- Loosen the two captive screws at the bottom of console.
Figure 7. Front Cover Removal - Global Consoles
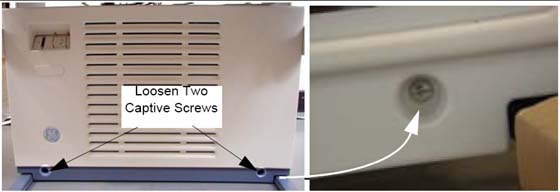
- Rotate the bottom of the cover outward and upward until you can lift it free of the console at the top.
3 Adjust Table Top Height and Position Console
Procedure
- The console normally arrives with the bottom hole on the monitor
top aligned with the fourth bolt from the bottom (see Figure 8).
Figure 8. Global Console Tabletop Adjustments
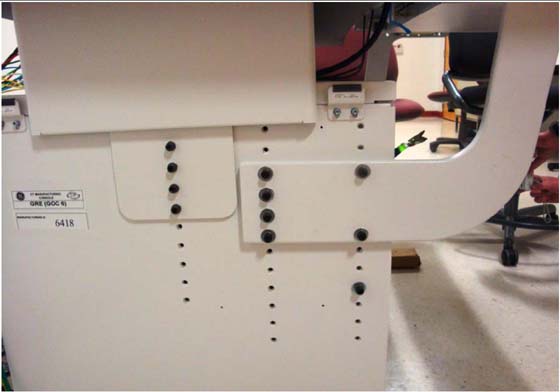
- For optimum operator comfort, align the top hole of the keyboard
table top with the third or fourth hole from top of cabinet.note:
Your site may have different requirements and you may have to adjust the monitor top and/or keyboard table top up or down from this position.
-
Always select a table top height that permits the operator to see the patient on the table.
-
Keep the one bolt-hole relationship between the monitor top and the keyboard table top.
-
Fasten the keyboard table top one (1) hole lower than the console table top (Figure 8).
-
- Insert washers on front bolts.
- Install the console side covers.
Side covers are left and right specific.
- After all necessary cables to the console have been run, move the console into its final position, maintaining a 15 cm (6 in.) minimum distance between the console and the wall.
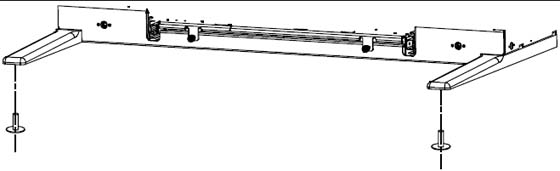
4 Attach Keyboard Table Top
Procedure
- Locate the spring-loaded latches at either end of the underside
of the keyboard table top.
Figure 9. Keyboard Table Top Placement
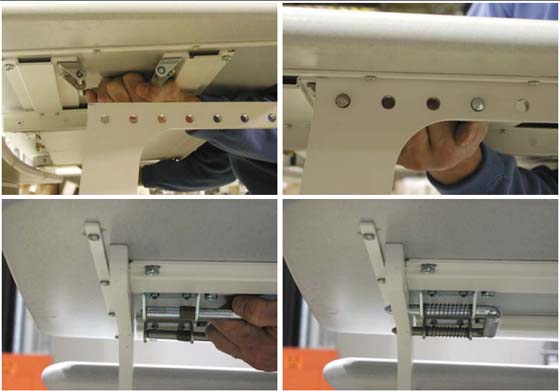
- Pull the latches inward (toward center of table top).
- Position table on the brackets so that the latches align with the holes.
- Release the latches, making certain that the pins fully engage the bracket holes (pins should protrude beyond outside edge of bracket).
Finalization
No finalization steps.