- Topic ID: id_15460912
- Version: 2.0
- Date: Nov 8, 2018 1:39:43 AM
HP xw8200 DVD Optical Drive Replacement
Prerequisites
Overview
This procedure describes the steps necessary to perform HP xw8200 DVD Optical Drive replacement. For preliminary requirements and finalization steps see HP xw8200 Lower Level FRU Replacement
1 Workstation Service Preparation
Perform the following steps before servicing the workstation.
Procedure
- Remove/disengage any security devices that prohibit opening the workstation.
- Disconnect all peripheral device cables from the workstation.
2 Optical Drive Removal
Procedure
- Remove access panel cover per HP xw8200 Lower Level FRU Replacement.
- Lift up on the three tabs located on the front bezel (Item 1 in Figure 1).
Figure 1. Front Bezel
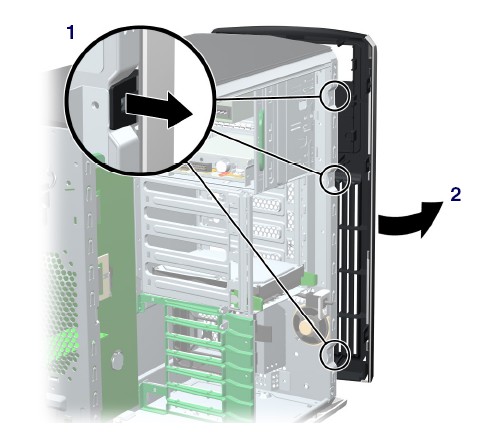
- Rotate the front bezel away from the chassis and remove the bezel (Item 2 in Figure 1).
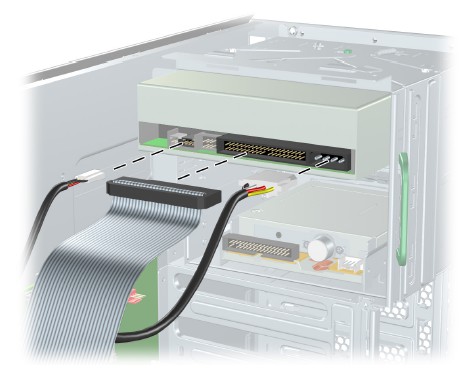
- Disconnect the power, drive, and audio cables from the drive.
Figure 2. Power, Drive, and Audio Cables
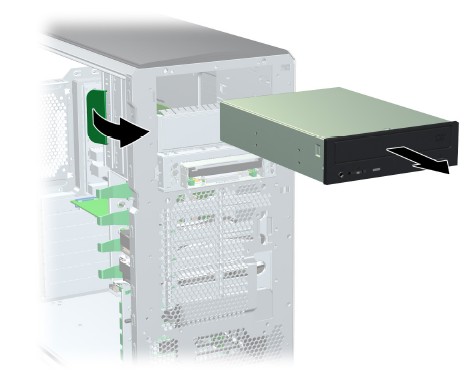
- Lift the green drive lock release lever and gently slide the
drive out of the chassis (Figure 3).
Figure 3. Removing Optical Drive from Chassis
3 Optical DVD Installation
Procedure
- Lift the green drive lock release lever while sliding the optical drive into the bay.
- When the optical drive is partially inserted, release the drivelock release lever and slide the drive completely into the bay until the drive is secured.
- Connect the power, drive, and audio (if required) cables to
the drive and workstation.note:
If running a Linux OS, you must connect an audio cable to the optical drive.
- Return to respective Lower Level FRU Replacement procedure.
4 Finalization
No finalization steps.