- Topic ID: id_15460860
- Version: 5.0
- Date: Mar 2, 2022 10:23:15 PM
Cradle Motor and Clutch Assy Replacement
Prerequisites
Overview
Procedure
- Raise the Table to maximum height.
- Move the IMS to OUT limit position.
- Remove power from Table by turning off 120VAC, Axial Drive and HVDC switches on Service Switch Panel.
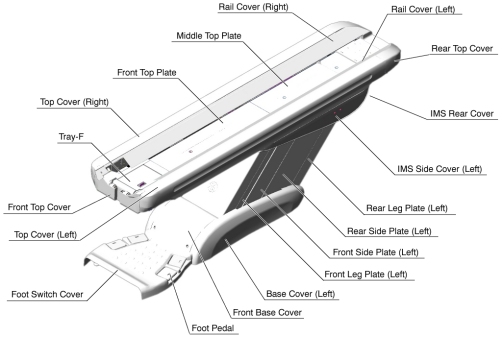
- Remove the following Table component and covers:
-
Cradle
-
Top Cover (Right/Left)
-
Tray-F
-
Front Top Cover
-
Front Left Rail Cover
Figure 1. Table Covers
-
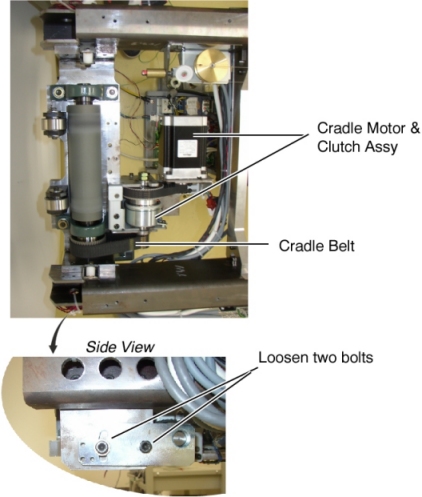
- Cut any tie-wraps holding the motor and the clutch cables to the Table frame.
- Disconnect a motor cable connector and a clutch cable connector.
- Loosen 2 bolts to remove tension from the cradle belt, and remove
the belt from the small pulley of the clutch.
Figure 2. Cradle Motor & Clutch Assembly
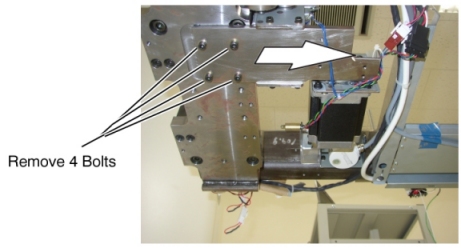
- Unscrew 4 bolts under the Cradle Motor & Clutch Assy.
- Slide the Cradle Motor & Clutch Assy away from the Gantry,
and remove it from the Table.
Figure 3. Cradle Motor & Clutch Assembly Removal
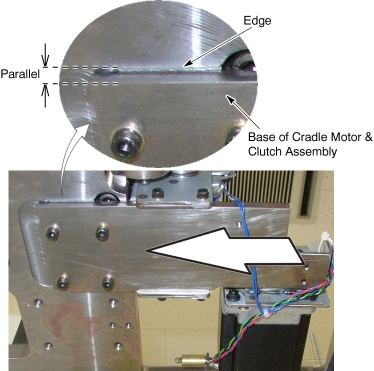
- Install the new Cradle Motor & Clutch Assy in place, and
tighten the 4 bolts.note:
Verify that the base of cradle motor & clutch assembly is parallel with edge.
Figure 4. Cradle Motor & Clutch Assembly Installation
- Check to make sure that the cables does not catch the cradle belt.
- Adjust the cradle belt tension according to Cradle Motor and Cradle Drive Belt Tension Adjustment.
- Connect the 2 cable connectors, and fasten the cables to the Table frame with tie-wraps.
Finalization
- Re-install the cradle and Table covers.
- Power up the Table from the Service Switch Panel.
- Move the cradle In/Out completely 10 cycles, and verify that the cradle movement is operating normally.