- Topic ID: id_15460434
- Version: 3.0
- Date: Jun 15, 2020 11:00:45 PM
Console Rear Cooling Fan Replacement
Prerequisites
Overview
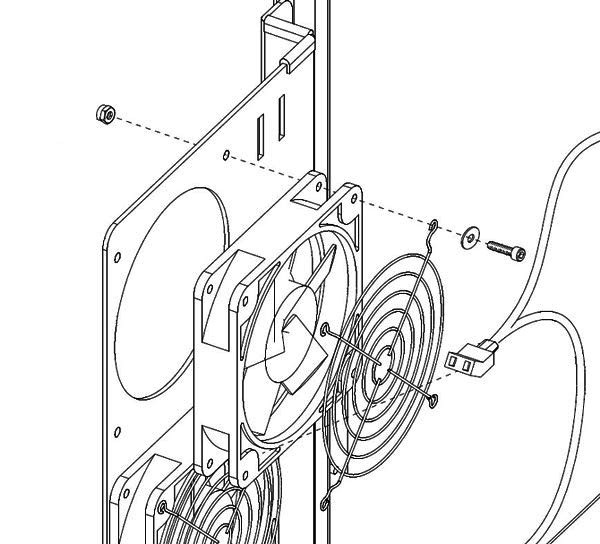
This procedure describes and illustrates the steps necessary to replace a Cooling Fan (Figure 1) in the rear of the Operator Console.
Figure 1. Rear Cooling Fan Mounting and Hardware
1 Power-Off (Shut Down) the Console
Procedure
- Select one of the following methods to power off the Operator
Console:
-
If applications are running, click the Shut Down icon and select Shut Down.
-
If applications are down, open a Unix Shell using the Toolchest. Type: {ctuser@hostname} halt. Press Enter.
The Operator Console monitor will display a ‘System Halted’ message when it is acceptable to power off the Operator Console.
-
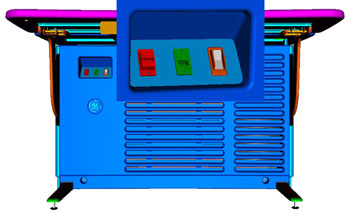
- Power OFF the Operator Console at the front panel switch. (See Figure 2.)
Figure 2. Console Power Switch
- Perform prescribed Lockout/Tagout procedure. For added protection, disconnect the Twist-N-Lock Main Power Cable from the rear of the console.
2 Remove Existing Fan
Procedure
- Remove the front and rear Operator Console Covers per prescribed cover removal procedure..
- Disconnect power to the failed Fan. Firmly grasp the power connector
with one hand and pull power connector from fan. (See illustration
below.)
- Remove the four (4) 4mm socket cap screws, nuts, and washers that hold the Fan to the mounting bracket. Save the screws and the fan guard.
- Remove Fan and set aside.
3 Install Replacement Fan
Procedure
- Install the replacement fan using the four (4) 4mm socket cap
screws, nuts, washers and fan guard removed from the previous steps.
Torque to 1.0 N-m.note:
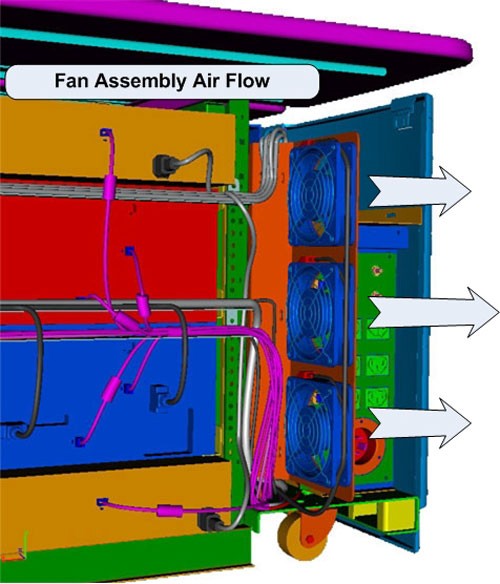
Ensure that the air will be flowing out of the console, Use the arrow indicators on the fan as a guide. The arrow should be pointing out of the console (Figure 3).
- Reattach the power connector on the replaced fan.
4 Power-On the Operator Console
DANGER: CRUSH HAZARD.With console rear cover removed and power applied to Operator Console, the outside of the cooling fan blades are exposed. KEEP FINGERS AND OTHER OBJECTS CLEAR OF SPINNING FANS.
Procedure
- Reconnect the Twist-N-Lock Main Power Cable from rear of console and remove Lockout Tagout protection applied earlier.
- Power ON the Operator Console at the console front panel switch.
5 Verify Replacement Fan Operation
Procedure
- Visually verify the Operator Console powers up and that all components (Computers, Monitors, Peripheral Towers, etc.) have power.
- Verify that the fan is blowing air in the proper direction.
- Air should be blowing OUT of the console cabinet.
- If the air is blowing IN (into console cabinet), you must physically
reverse the fan.
Figure 3. Fan Assembly Air Flow
6 Finalization
Procedure
- Remove console power.
- Install console Rear Cover and restore console power.