• Topic ID: id_15460108
  • Version: 2.0
  • Date: Nov 8, 2018 1:37:49 AM

Console Network Switch Replacement

Prerequisites

Overview

This procedure shall be followed when replacing the Console Network Switch in the GOC6.6 VCT console.

Figure 1. Console Network Switch – GOC6.6 VCT Console

1 8-Port Network Switch Removal

Procedure

  1. Select one of the following methods to Power OFF the Console:
    1. If Applications are up, click on the Shut Down button on desktop display and select Shutdown.
    2. If Applications are down, open a Terminal Window. Type: halt , then press Enter.

  2. When halt command has finished, power Off the console at the front panel switch.
  3. Apply LOTO for console. For procedures, see Equipment Service - Lockout-Tagout-PPE.
  4. Remove the console’s keyboard tabletop assembly and front console chassis cover.

    Refer to Replacement > Console (GOC6.6) > Console Cover Removal and Installation Procedure .

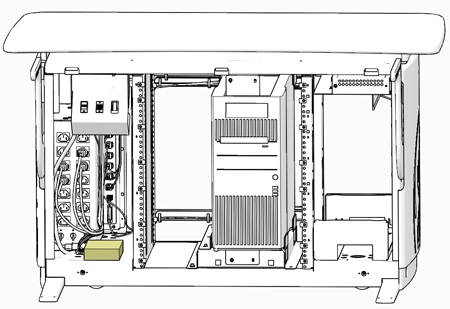
  5. Locate the network switch on the left side bottom of console chassis. The network switch is held in place with Velcro. Lift up on the network switch to detach it from the console base.

    Figure 2. Network Switch Removal

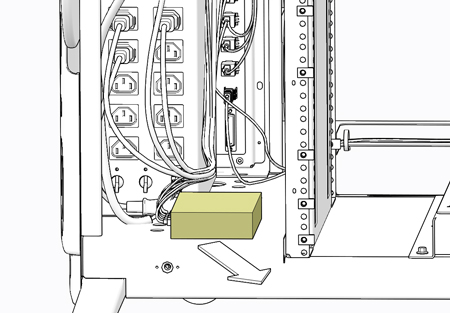
  6. Disconnect all cables attached to the network switch. Make certain that all cables are properly labeled.

    Figure 3. Network Switch Connections

2 8-Port Network Switch Install

Procedure

  1. Reconnect all cables removed earlier from network switch.
  2. Reattach the network switch to the base of the console.
  3. Remove LOTO on console. For procedures, see Equipment Service - Lockout-Tagout-PPE.

3 Functional Checks, Alignments and Setups

Procedure

  1. Power On console.
  2. Inspect network switch and confirm the Power and Port 1 LEDs are lit.
    note:

    Depending on hardware options (AW, EKG, and RPM), Ethernet Ports 2–5 may or may not show connection LED activity.

4 Finalization

Procedure

  1. Install console’s keyboard tabletop assembly and front console chassis cover. Refer to Replacement > Console (GOC6.6) > Console Cover Removal and Installation Procedure.
  2. Perform the Functional Checks > System Scanning Test instructions from the procedure list.