- Topic ID: id_15460371
- Version: 3.0
- Date: Jun 15, 2020 10:56:55 PM
Console Cover Removal and Installation
Prerequisites
Overview
Procedure Effectivity:
1 Front Cover
1.1 Removal Procedure
Procedure
- From the service desktop, shut down the system.
- Turn off console power.
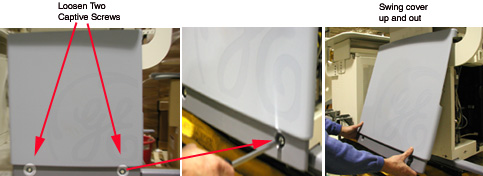
- Loosen two captive screws at bottom of console. See Figure 1.
Figure 1. Front Cover Removal - Global Consoles
- Rotate bottom of cover outward and upward until it may be lifted free of the console at the top.
1.2 Installation Procedure
Procedure
- Engage top of cover with top front of console.
- Swing cover down into place, position left or right as required to align mounting points.
- Tighten two captive screws at bottom of console.
2 Side Covers
2.1 Removal Procedure
2.2 Installation Procedure
Procedure
- Engage side cover on cover hangers.
- Swing cover into position.
- Tighten the two captive screws at the bottom of the side cover.
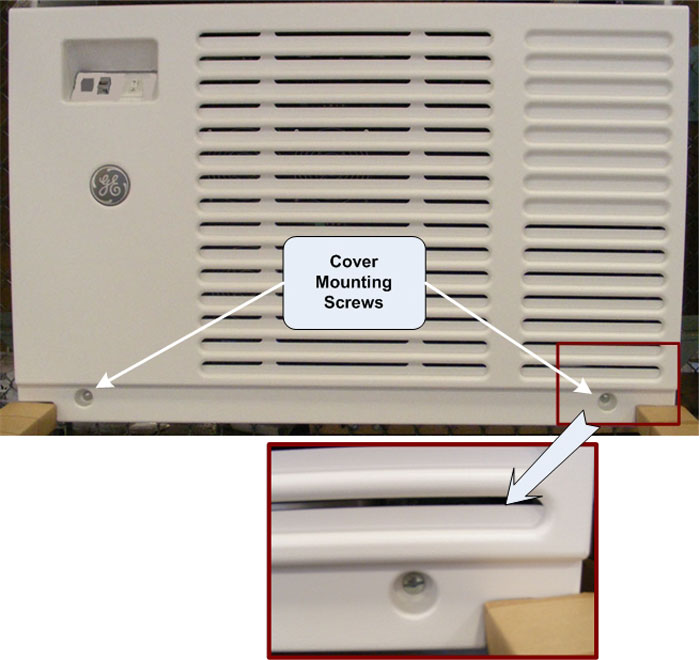
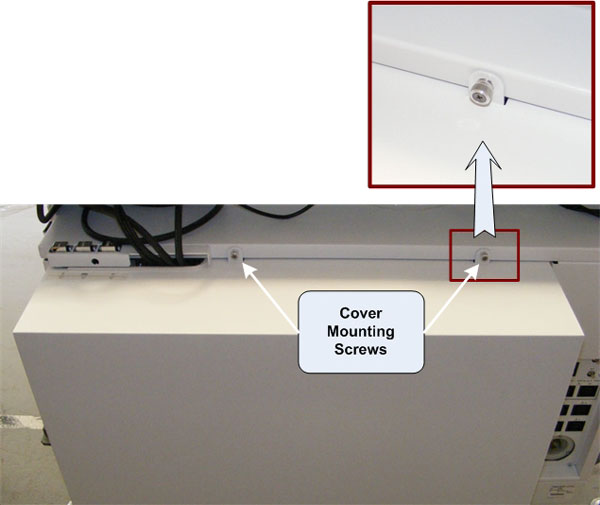
3 Rear Cover
Procedure
- Loosen two captive screws at top of rear cover.
See Figure 4.
Figure 4. Rear Cover - Global Console GOC6
- Tilt cover backward, so top moves away from console.
- Lift cover away, so that tabs disengage from bottom lip of opening.
- To reinstall, reverse the previous steps.
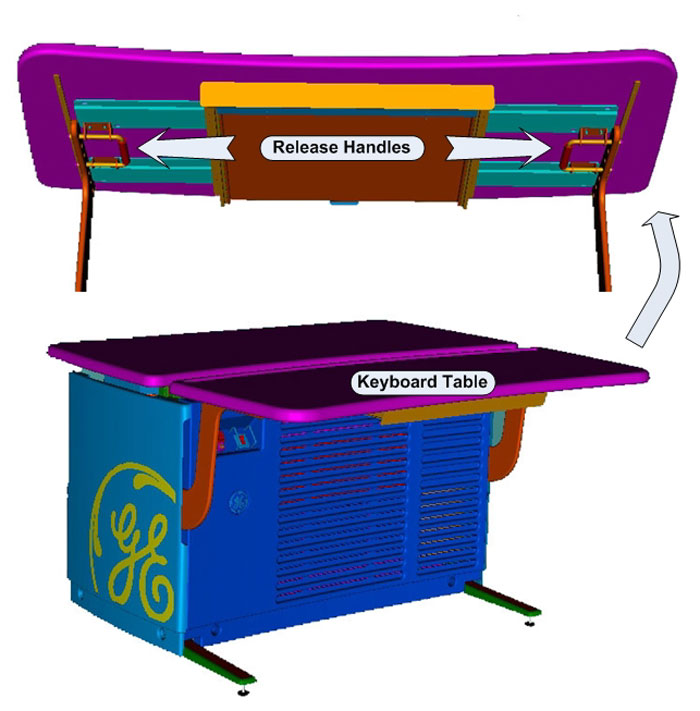
4 Keyboard Table Top Removal
Procedure
- Locate the spring-loaded latches at either end of the underside of the keyboard table top.
- Pull the latches inward (toward center of table top), then lift
Keyboard Table Top up and away from console.
Figure 5. Keyboard Table Top Release Handles
5 Keyboard Table Top Installation
Procedure
- Position table on the brackets so the latches align with the holes.
- Pull and release the latches, so the pins fully engage into the bracket holes (pins should protrude beyond outside edge of bracket).
6 Finalization
No finalization steps.