- Topic ID: id_11038920
- Version: 7.0
- Date: Dec 23, 2020 9:12:03 PM
Center Phantom
Prerequisites
Overview
This document provides the necessary steps to center the Quality Assurance Phantom in the scan plane.
Procedure
- Move table to longitudinal home position.
- Attach phantom holder to gantry end of cradle.
- Mount phantom to phantom holder.
- Place bubble level on top of phantom, positioned along Z-axis.
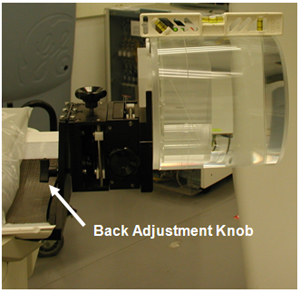
Adjust phantom holder back knob until phantom is level front to back.
Figure 1. Phantom Back Adjustment Knob
- Turn on laser alignment lights.
- Move table into gantry until axial internal alignment lights are aligned with phantom's axial reference mark.
- Adjust phantom holder side knob until sagittal internal alignment lights are aligned with phantom’s sagittal reference mark.
- Elevate table until coronal internal alignment lights are aligned with phantom’s coronal reference mark.
- Click SCANNER UTILITIES.
- Click CENTER PHANTOM.
- Click CONFIRM.
- Press START on SCIM/GSCB when it flashes.
- Adjust phantom position if results are out of specification
range.note: Phantom center specification is ± 0.5mm.
- Repeat steps 11 – 13 until the phantom is centered.
- Click DONE in Phantom Centering window.
- Click QUIT in Scanner Utilities window.
Finalization
No finalization steps.