- Topic ID: id_15460567
- Version: 2.0
- Date: Nov 8, 2018 1:37:35 AM
Assessment of Corrosive Atmospheric Conditions
Prerequisites
Overview
This procedure defines the method of attaching the “Environmental Coupon” to the Gantry. The procedure is only used when corrosive atmospheric environments are suspected.
1 Environmental Coupon Installation
1.1 Gantry Preparation
Procedure
- Remove gantry right side cover and disable Axial Drive and 120VAC from the Service Switch Panel.
- Lock gantry in position with Rotational Lock.
- Remove the gantry left side cover.
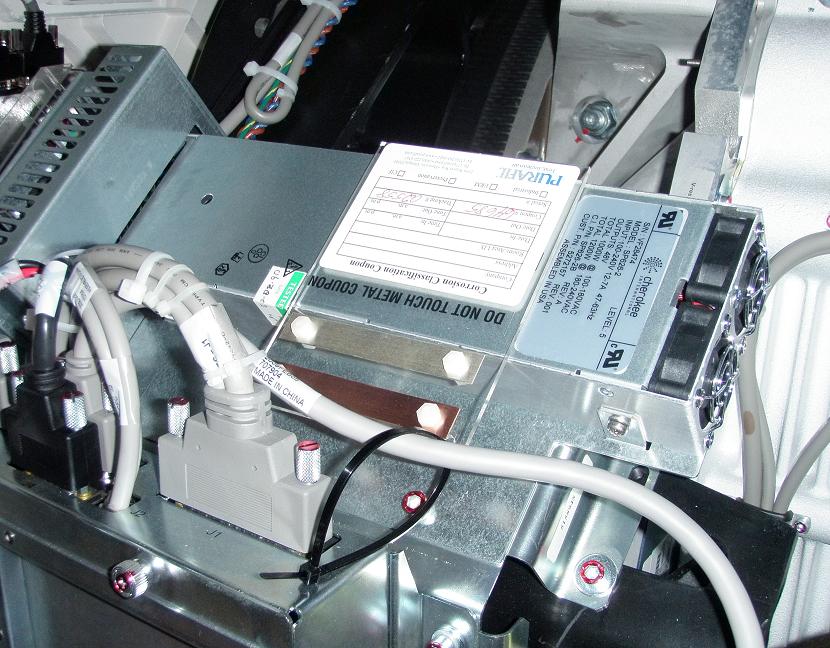
- Locate the “Stationary 48V Power Supply” on the
left side of the Gantry. See Figure 1.
Figure 1. Gantry Left Side - Power Supply Location
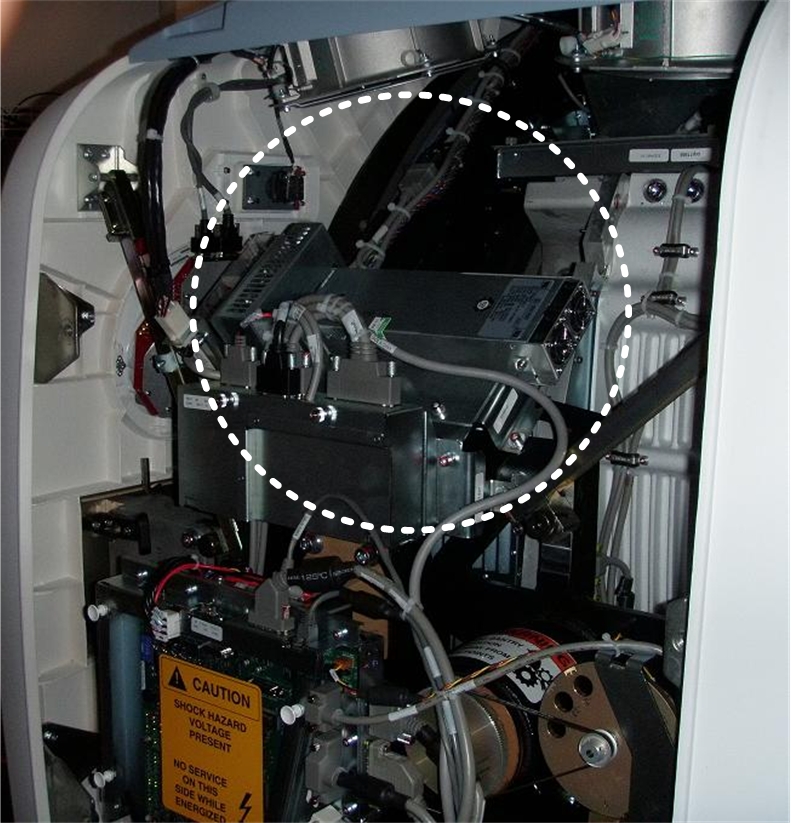 note:
note:Depending on age of gantry, the Stationary 48V PSU may be a different from the version shown above.
1.2 Unpacking the Coupon
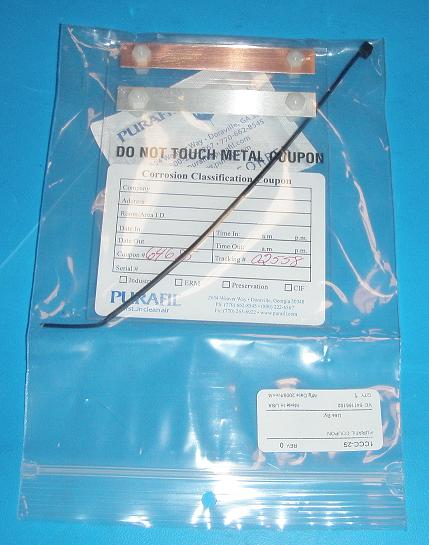
Figure 2. Coupon in Shipping Material

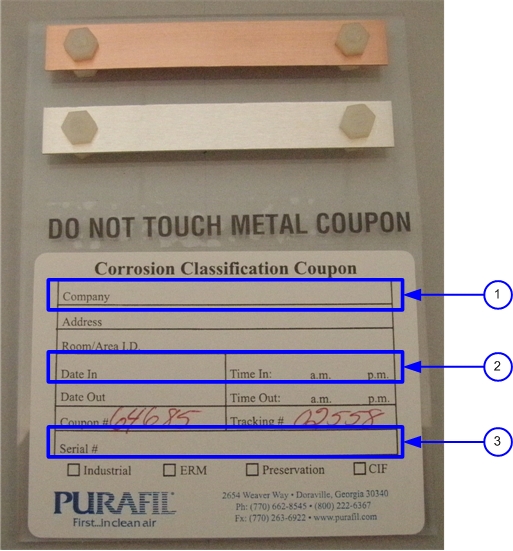
Figure 3. Shipping Material Removed
Procedure
- Without damaging the shipping material, remove the plastic bag
from the shipping container. Store this material in the Service cabinet,
as it will be used to return the Coupon upon its removal at a later
date.
 warning
- caution
- Remove the Coupon from the plastic bag.
- While still wearing gloves, record the requested data on the
Coupon.
-
Write GE Healthcare in the Company field (1)
-
Record the date the Coupon is installed on the Gantry (2)
-
Record the System ID of the scanner (3)
Figure 4. Requested Data on the Coupon Installation
-
 |
1.3 Coupon Installation
Procedure
- Attach the Velcro strip contained in this kit to the upper edge
of the power supply.
Figure 5. Velcro Location
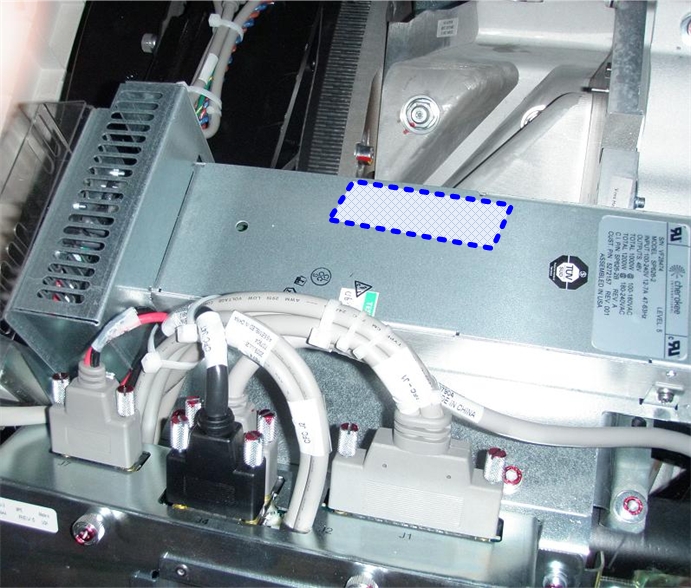 note:
note:If system contains older style of Stationary 48V PSU (not shown), apply Velcro in a similar location. The Coupon should be roughly centered on the PSU, close enough to allow tie wrap to reach a cable attachment point.
- Place the Coupon such that the metal strips are at the lower
edge of the power supply, then attach the Coupon to the Velcro strip.
Figure 6. Place Coupon On Power Supply
- Using the tie wrap contained in this kit, attach the lower right
corner of the “Coupon” to the power supply cable. See Figure 6.note:
This tie wrap is used as a backup to the Velcro attachment. Do not place strain on Coupon or Velcro with tie wrap.
- The installation is complete.note:
The Coupon will remain attached to the Gantry for a minimum of 90 days.
- Remove gloves and proceed to the Finalization section.
2 Environmental Coupon Removal
2.1 Gantry Preparation
Procedure
- Remove gantry right side cover and disable Axial Drive and 120VAC from the Service Switch Panel.
- Lock gantry in position with Rotational Lock.
- Remove the Gantry left side cover.
- Locate the Coupon attached to the power supply. See Figure 1.
- warning
- caution
- Cut the tie wrap securing the Coupon and remove the Coupon from the Velcro strip. The Velcro need not be removed from the power supply.
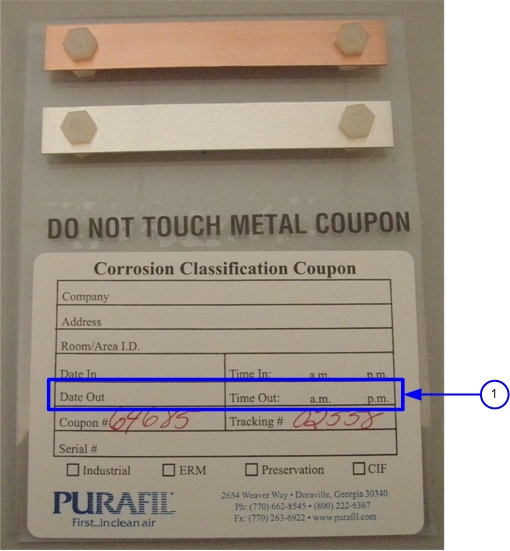
- While still wearing gloves, record the date the Coupon was removed
from the scanner in the “Date Out” field of coupon.
Figure 7. Requested Data on the Coupon Removal
|
2.2 Return of Coupon
Procedure
- While still wearing gloves, place the Coupon into the original plastic bag. Then place the plastic bag into the original shipping container.
- Remove gloves and address the package as indicated below and
send the package to the Vendor using the Postal services in your area.
Purafil
C/O Bill England
2654 Weaver Way
Doraville, Georgia 30340
United States of America
- Proceed to the Finalization section.
3 Finalization
Procedure
- Install the Gantry left side cover.
- Remove Rotational Lock from gantry.
- Restore power to the Gantry and Axial Drive by turning on the 120VAC and Axial Drive Service switches.
- Install the Gantry right side cover.
- Press Table Drive reset on the Gantry controls.
- Perform an axial scan and confirm the scan is successful.