- Topic ID: id_18718193
- Version: 1.0
- Date: Sep 20, 2018 2:04:35 PM
True-In-One Console Fan Replacement
Prerequisites
Overview
This module describes the procedures used to replace the Rear Fan in the True-In-One Console.
1 Power-Off (Shut Down) the Console
Procedure
- Select one of the following methods to Power OFF the Operator
Console:
- If Applications are UP, click on the Shut Down button and select Shutdown. The Operator Console monitor will display a 'Power Down' message when it is acceptable to power OFF the Operator Console.
- If Applications are DOWN, open a Unix Shell. Type: halt.
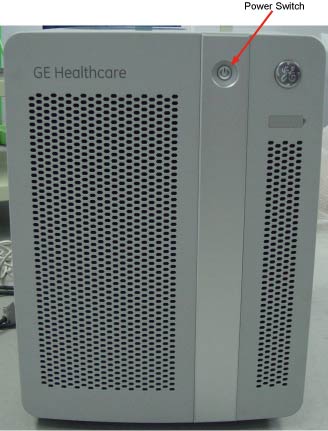
- Power OFF the console at the front panel switch. (See Figure 1.)
Figure 1. Console Power Switch
- Perform prescribed Lockout/Tagout procedure. For added protection, disconnect the Twist-N-Lock Main Power Cable from the rear of the console.
2 Remove the Existing Fan
Procedure
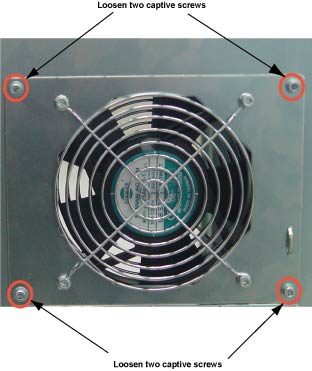
- Loosen four screws at rear of console. See Figure 2
Figure 2. Rear of Console
- Disconnect the Power to the Fan. Firmly grasp the power connector
with one hand and pull power connector from fan. (See illustration
below.)
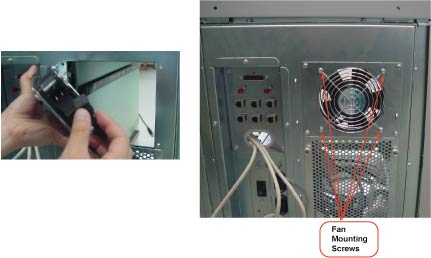
- Remove the four (4) 4mm socket cap screws, nuts, and washers that hold the Fan to the mounting bracket. Save the screws and the fan guard.
- Remove Fan and set aside.note:
Take Care to insure that the Air will be lowing out of the console, Use the arrow indicators on the Fan as a guide. The Arrow should be pointing out of the Console.
3 Install Replacement Fan
Procedure
- Install the replacement fan using the four (4) screws, nuts and fan guard from the previous step.
- Reattach the power to the fan.
4 Test the Replacement Fan
Procedure
- Apply power to the console.
- Verify that the fan is blowing air in the proper direction.
-
Air should be blowing OUT of the console.
-
If the air is blowing IN, you must reverse the fan. Refer to Remove the Existing Fan.
-
5 Finalization
Procedure
- Install the console Rear cover.
- Turn the system ON.