- Topic ID: id_18718288
- Version: 3.0
- Date: Nov 27, 2020 2:17:19 AM
Intercom Board Replacement
Prerequisites
Overview
Procedure
- Remove right side cover.
- notice
- Turn off the three (3) main power switches (Axial Drive, HVDC, 120VAC) on the Service Switch Panel.
- Use the quarter inch ratchet to loosen but not remove the 2 lower nuts
and washers.note:
Be careful not to lose the nuts and washers. Also notice that the flat washer is installed first, then the lock washer and then the nut.
- Remove 2 upper nuts and washers.
- Disconnect control cable.
- Remove 4 screws that secure intercom board.
- Reinstall intercom board in reverse order. Verify that J2 jumper is in auto position.
 |
Finalization
- Do the following:
Reference “Remote Intercom Board,” for test point and adjustments.
J2 AGC control Normal setting is Auto.
- Perform the Intercom board check and adjustment defined by Intercom Adjustment.
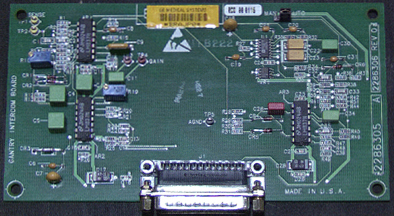
Figure 1. Remote Intercom X Board - Obsolete (no adjustments)