- Topic ID: id_15460464
- Version: 3.0
- Date: Apr 9, 2020 8:48:30 PM
HP Host Computer NIC Exchange
Prerequisites
Overview
1 Remove the Side Cover
With ALL cables removed from the old and new Host Computers, perform the following steps:
Procedure
- Unlock the cover on the side of the old Host Computer.
The cover keys are attached to the back panel of the system.
- Pull out on the side cover latch to release the side cover.
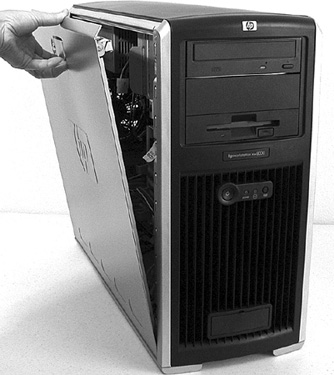
- Tilt the cover open, then lift it off. Refer to Figure 1.
Figure 1. Opening the Side Cover
- Repeat the above procedure, to open the new Host Computer.
2 Swapping Network Interface Cards
The Customer Options Keys are tied to the master Network Interface Card (NIC) unique MAC address (always eth0) and must be swapped into the new computer. Failure to do this will result in the need to regenerate the Customer keys to reactivate their specific options. The hostid command (as root on host) provides the hex equivalent of the eth0 HW Address (ifconfig eth0 command).
The NIC swap process must not be performed on systems experiencing communication issues associated with the master NIC (either port).
Procedure
- Determine the master NIC using Table 3. This must be determined for both the old computer and the new
computer.
- Remove the master Network Interface Card from the old computer
and install it in the appropriate slot position (A/B or C/D) in the
new Host Computer.
- For All-In-One console (Console without DARC), xw8400 is used.
Below is the NIC port description of xw8400:note:
xw8400 can’t be replaced by xw8000 or xw8200. In the meantime, we can’t replace xw8000/xw8200 with xw8400.
- Insert the unused Network Interface Card (from new computer) into the computer you are returning. The computer MUST be returned with both NICs installed.
3 Replace the Side Cover
Procedure
- Ensure that all internal cables are properly connected and safely routed in the new Host Computer.
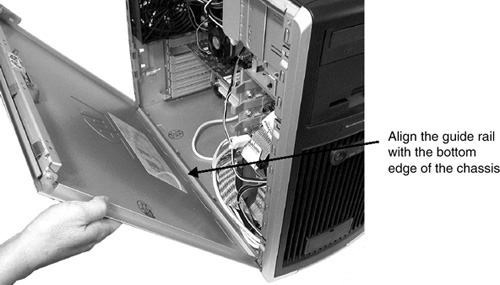
- Place the side cover onto the Host Computer chassis (aligning
the guide rail on the bottom inside edge of the cover with the bottom
edge of the Host Computer chassis). Refer to Figure 2.
Figure 2. Aligning and Closing the Cover
- Verify no cables are pinched, and gently close the cover.
- Lock the cover using the key provided.
- Repeat the above procedure, to close and lock the original Host Computer, with the new drives installed.
4 Finalization
A Reconfig is required when the console is powered on.
Procedure
- Continue with HP Host Computer Replacement (if applicable).