- Topic ID: id_16158040
- Version: 2.0
- Date: Nov 7, 2019 8:53:51 PM
Fuse Board Assembly Replacement
Prerequisites
Overview
1 Fuse Board Removal
Procedure
- notice
- Position the table to its lowest position.
- Remove the gantry right side cover.
- notice
- Turn OFF Axial Enable, HVDC, and 120VAC switches on the Service Switch panel.
- Remove the gantry top and front covers.
- Position the DAS at the 12 o'clock position.
- Lock the gantry in position using the rotational lock.
- Disconnect all cables connectors on the fuse board.
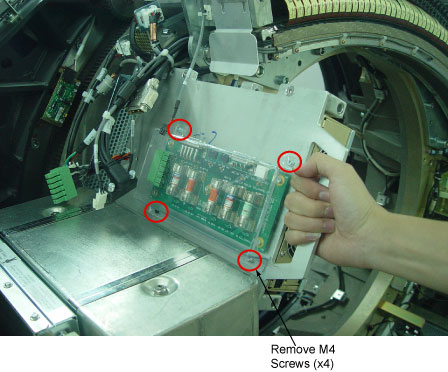
- Remove four (4) M4 screws on plastic cover and remove the cover.
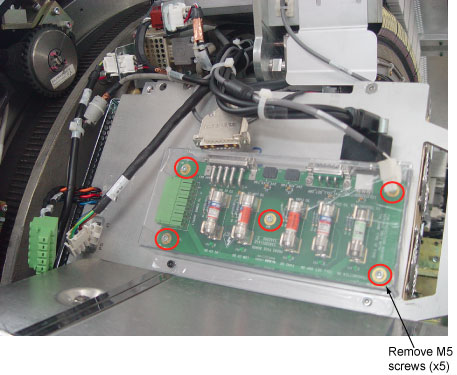
- Remove five (5) M5 screws on fuse board.
- Remove fuse board place into anti-static bag.
 |
|
2 Fuse Board Installation
Procedure
- Get new Fuse Board from anti-static bag.
- Secure fuse board by using four (4) M4 screws and torque to 2.3Nm.
- Secure plastic cover by using five (5) M5 screws and torque to 2.3Nm
- Reconnect all cables connectors on the fuse board.
- Disengage the rotational lock.
- Turn on Axial Enable, HVDC, and 120VAC switches.
3 Finalization
No finalization steps.