- Topic ID: id_16157963
- Version: 1.0
- Date: Jul 7, 2018 4:36:51 PM
Clean Pancake DAS Fan Filters
Prerequisites
Overview
Procedure Effectivity:
note:
This procedure is necessary to Maintain the cooling capacity of the PDAS.
Procedure
- Move the table to the lowest elevation.
 warning
- Turn off the facility power to PDU.
- Remove the Gantry side covers.
- Lift off the top cover.
- Remove the "scan" window.
- Remove the front cover.
- Clean or replace Pancake Das Fan Filter
- Rotate the Gantry until the DAS/DUCT Fan assembly is within serviceable reach.
- Engage the rotational lock. See Figure 1
Figure 1. Rotational Lock
- Disconnect the fan harness.
- notice
- Vacuum the dust from fans on the DAS fan cover
- Remove the fan cover from DAS chassis. See Figure 2
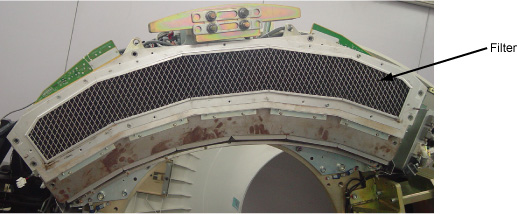
- Vacuum the dust from the filter, See Figure 3 or replace
the filter if necessary, replacement procedure refer to PDAS ADB Filter Replacement
Figure 2. DAS Fan Cover Removal
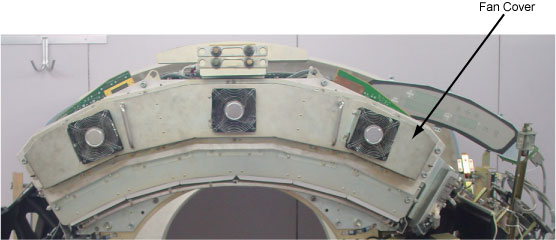
Figure 3. DAS Filter

- Clean or replace DIFB Fan Filter
- Two DIFB Fans located behind the Gantry DAS frame, remove the
DIFB fan filter by unscrewing its 4 screws on each fan. See Figure 4
Figure 4. DIFB Fan
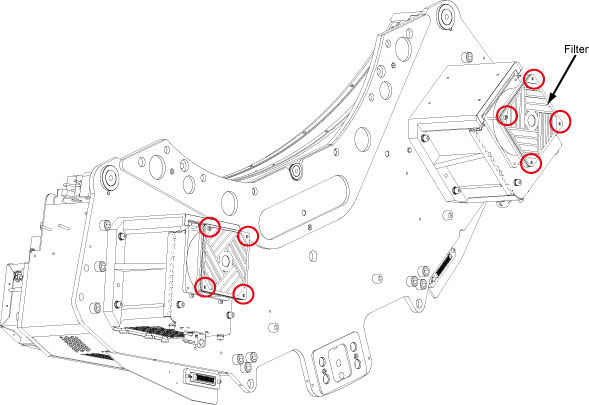
- Vacuum the dust filter on the DIFB Fan, or replace the filter if necessary
- Restore the DIFB Fan Filter by screwing its 4 screws on each Fan.
- Two DIFB Fans located behind the Gantry DAS frame, remove the
DIFB fan filter by unscrewing its 4 screws on each fan. See Figure 4
- Restore the fan harness connection.
- Reassemble the Gantry covers and the scan window.
- Restore the power.
Finalization
No finalization steps.