- Topic ID: task_tp4_3z1_t3b
- Version: 4.0
- Date: May 22, 2022 10:32:55 PM
Insite RSvP Configuration
Prerequisites
Overview
This procedure describes configuration of RSvP agent and scheduling prodiags tasks on a CT system.
1 Configuring RSvP with the UI
1.1 How to Configure Insite RSvP
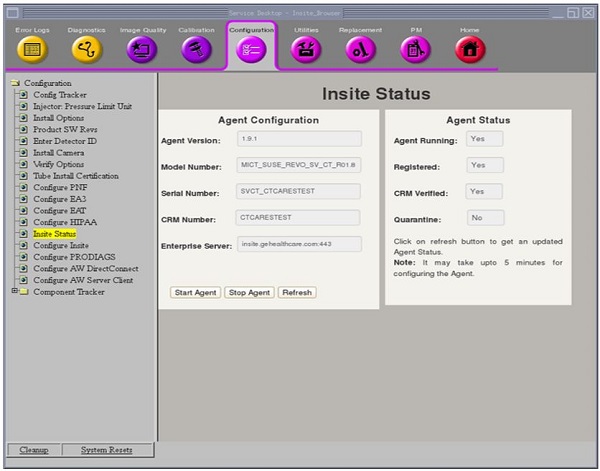
- Verify the status of the RSvP connection. Open the Common Service Desktop (CSD). Refer Figure 1
Figure 1. Insite Status not configured
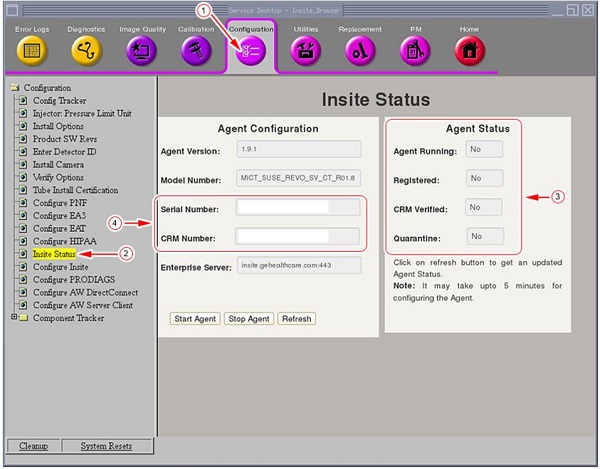
- Click Configuration tab [1].
- Select the Insite Status link[2]. If the link is not available, then the RSvP software has not been installed. Refer Preliminary Requirements section for software version.
- For first time RSvP connection, the Agent Status[3] fields are displayed as No. Proceed with 2
note:If RSvP agent was active earlier then the Serial Number and CRM numbers are visible [4]. In such cases, the agent needs to be restarted.
Click Start Agent button. Wait for 4 - 5 minutes and the Insite Status is displayed. Click Refresh button, if required.
Skip 2 and proceed with How to Update or Clear Local RSvP Agent Information.
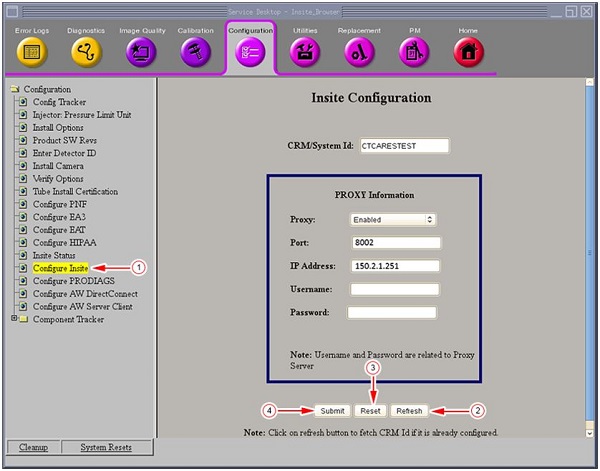
- To configure the RSvP connection, insert class M service key or import C2 license. Then click Configure Insite link [1]. The Configure Insite User Interface (UI) opens in the CSD. Refer Figure 2.
Figure 2. Insite Configuration input
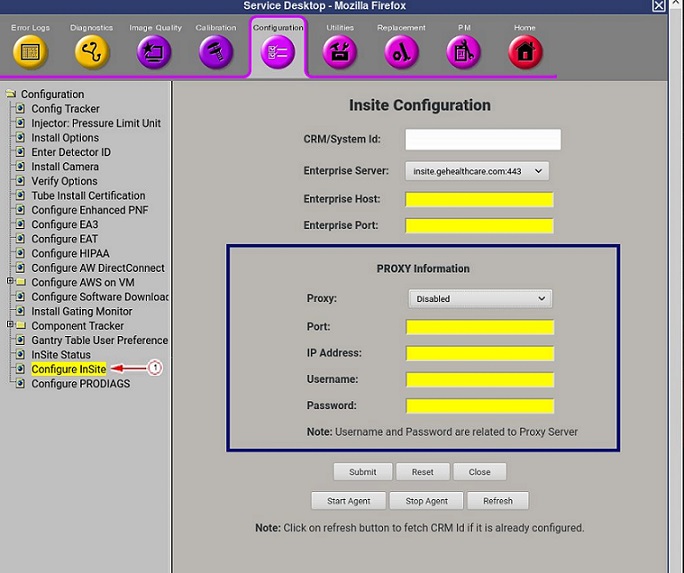 note: The Configure Insite page is used to submit an RSvP connection request. The required data entry depends on the customers network configuration with DNS and possible Proxy Server. Enter the customer network information into Insite Configuration input fields, that correspond to customer configuration.
 - Enter the CRM/System Id, [1]. This id must match the entitled system id. Refer Figure 3.
Figure 3. Insite Configuration input - Proxy Settings
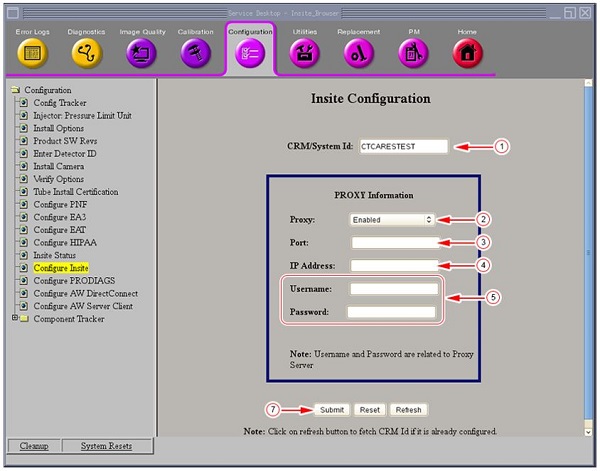
- If Proxy Server and Port are to be used, proceed with the following steps (refer Figure 3):
- Select Proxy and then select Enabled [2].
- Enter Port[3] details.
- Enter theIP Address[4].
- Enter the Username and Password[5], if applicable.
- If DNS server is to be used, Select Proxy and then select Disabled [6] (refer Figure 4).
Figure 4. Insite Configuration input - DNS Settings
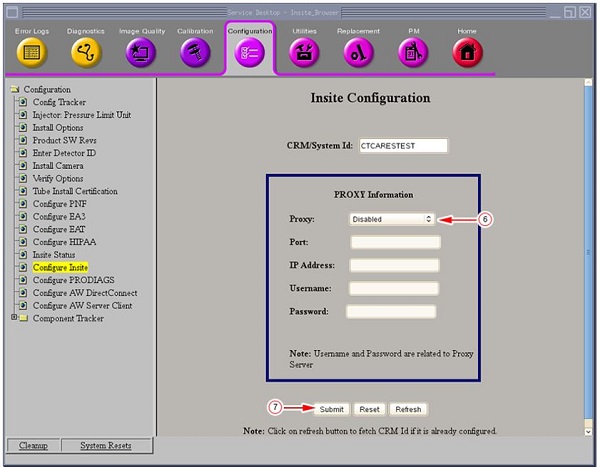
- The customer’s network information must be entered in the Network Configuration page, in the Reconfig menu, with default gateway IP Address and DNS IP Address information. See the System Configuration procedure for more information.
- Click Submit[7] and wait approximately 3 to 5 minutes for Insite Status to display.
Figure 5. Insite Status Updated
- If Proxy Server and Port are to be used, proceed with the following steps (refer Figure 3):
1.2 How to Update or Clear Local RSvP Agent Information
- To update the current Insite configuration details, do the following:
Figure 6. Insite Configuration
- Click Configure Insite link [1]. The Configure Insite User Interface (UI) opens in the CSD.
- Click Refresh button [2]. The CRM/System Id and Proxy details from the local Agent is displayed.
- Click the Submit[4] button to finish the updates.
- To clear the local connectivity details, do the following:
- Click Configure Insite to open page.
- Click Reset[3]. The Proxy/DNS details are cleared.
- Click the Submit[4] button to remove all information. To re-configure Insite, see How to Configure Insite RSvP for the procedure.
2 Configuring PRODIAGS Using UI
2.1 Add New Task
- Click Configure PRODIAGS
[1] link on the CSD, if no prodiag task is in the PRODIAG SCHEDULER, the UI displays like the screen shown below:
Figure 7. PRODIAG Scheduler
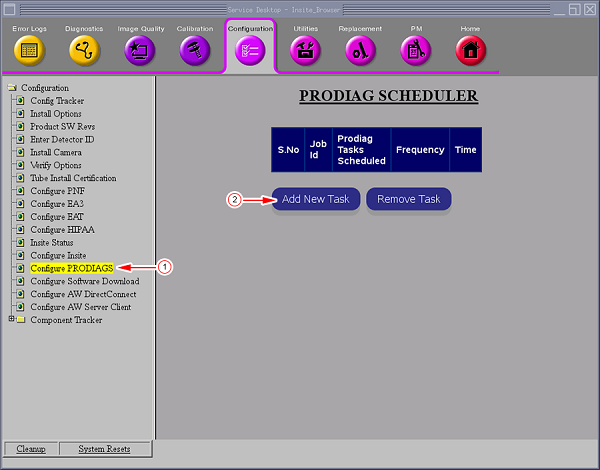
- Click Add New Task[2] button, and the Add Tasks UI opens.
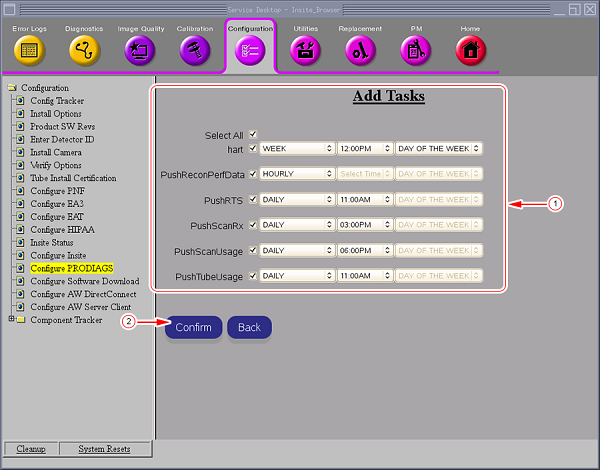
Figure 8. Add Task
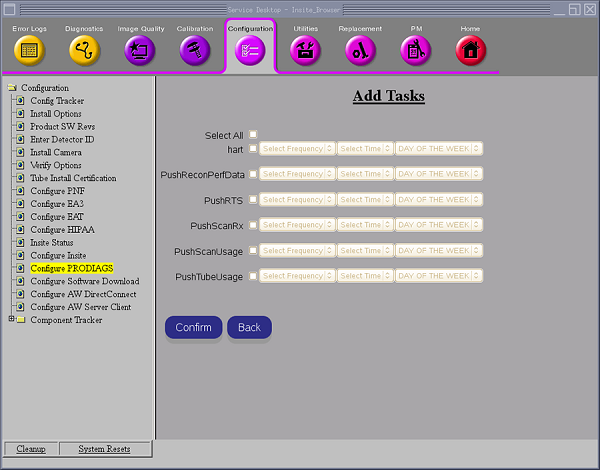
- Select the task, frequency, time and day of week (if needed) [1], and then click Confirm[2] button.
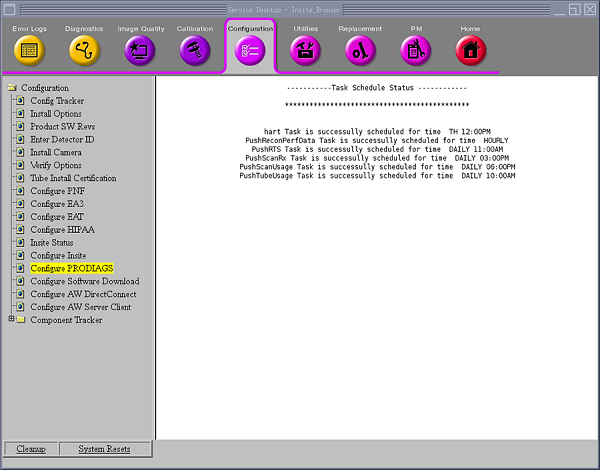
Figure 9. Confirm Tasks
- The adding Task Schedule Status window opens to show if the task is added successfully.
Figure 10. Task Status
- Click Configure PRODIAGS link, all the prodiags tasks display.
Figure 11. All tasks display

2.2 Remove PRODIAGS Task
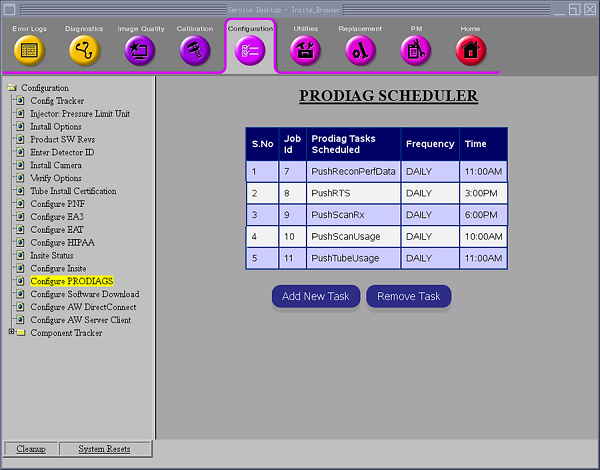
- Click Configure PRODIAGS[1] to open the configure prodiags UI.
Figure 12. PRODIAG Scheduler
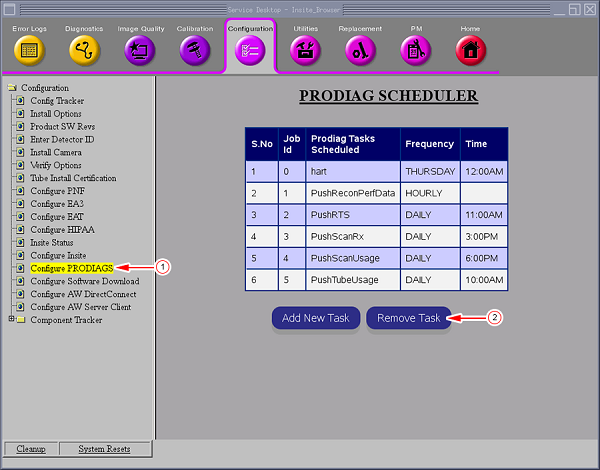
- Click Remove Task[2] button. The Remove Tasks UI opens.
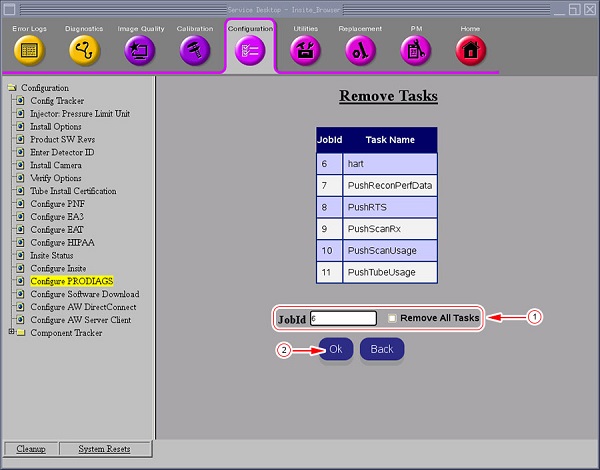
Figure 13. Remove Tasks
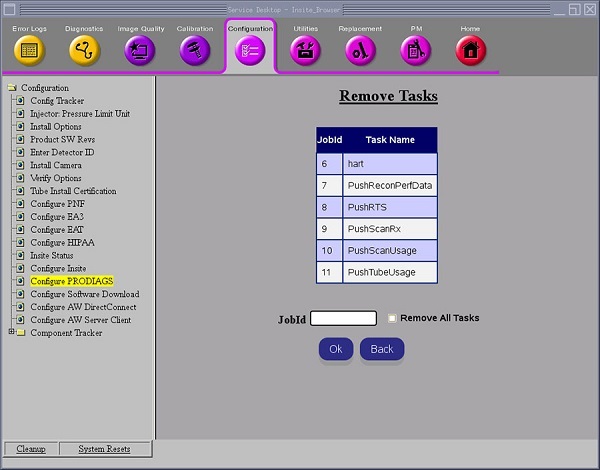
- Enter the job ID in the JobId[1] input field to remove individual task, or select the Remove All Tasks check box to remove all tasks.
Figure 14. Job Id input screen
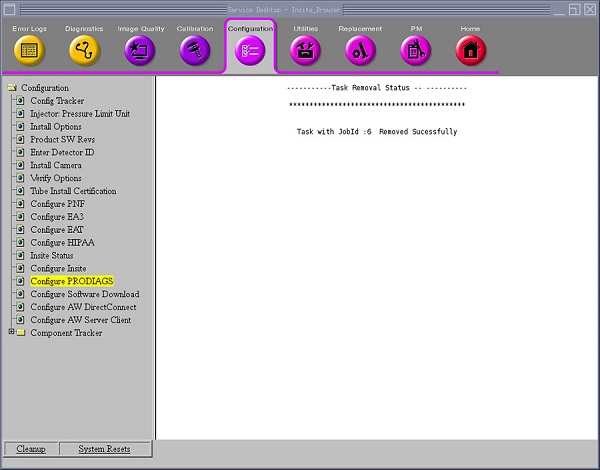
- Click Ok[2] button and the Task Removal Status window displays.
Figure 15. Task Status
- Click Configure PRODIAGS to verify removal of the task(s).
Figure 16. Verify removal of task(s) on PRODIAG Scheduler screen
3 Configure RSvP with Commands
Figure 17. Unix Shell - Root

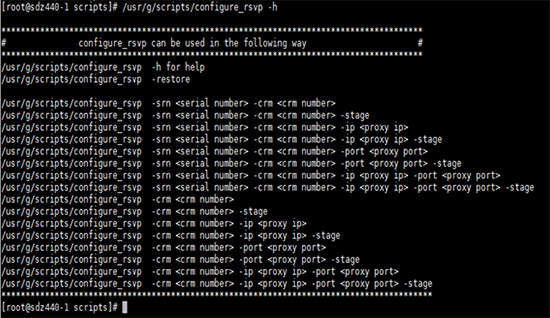
- Use CT script <configure_rsvp> to create a serial name to use with the system.
- To create the serial name yourself, run this command: </usr/g/scripts/configure_rsvp -srn your_serial_name -crm crm_name>
- To have the system automatically create a serial name, run this command: < /usr/g/scripts /configure_rsvp -crm crm_name>
Figure 18. Create Serial Name Usage Page
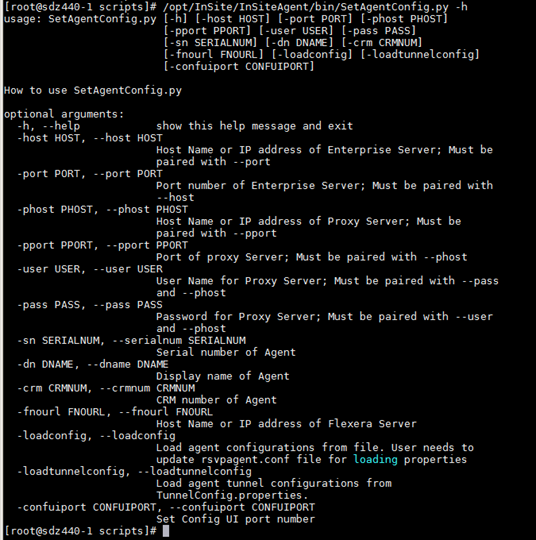
- Use RSVP script <SetAgentConfig.py> to further configure RSVP.
For example, you can add a proxy user name and password.
- SetAgentConfig.py -sn -crm -phost 12.34.56.78 -pport 9999 -user -pass
- SetAgentConfig.py -sn -crm -phost a.host.com -pport 9999 -user -pass
Figure 19. Set Agent Config Usage Page
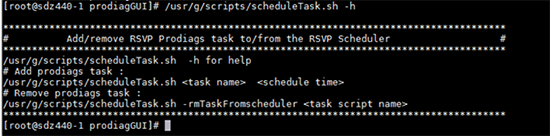
- Use CT script <scheduleTask.sh> to add or remove ProDiags task.
Figure 20. Schedule Task
- To add a task PushTubeUsage
Figure 21. Add PushTubeUsage

- To remove a task PushTubeUsage
Figure 22. Remove PushTubeUsage

- To add a task PushTubeUsage
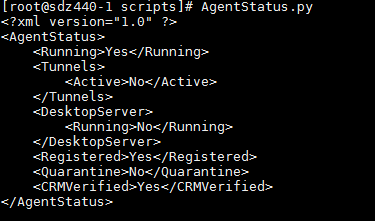
- Check status using <AgentStatus.py> or <iLinqStatus.py> .
- Check RSVP status command <AgentStatus.py>
Figure 23. AgentStatus Command
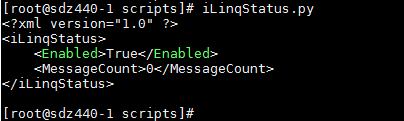
- Check iLinq status command <iLinqStatus.py>
Figure 24. iLinqStatus Command
- Check RSVP status command <AgentStatus.py>
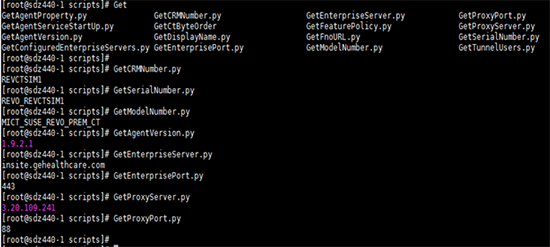
- Use <Get... > commands to obtain RSVP information.
Figure 25. Get... Commands
4 Finalization
No finalization steps.